Task 3.1 - Use Sub Flows and Arrays
Task Overview
In this tutorial task, you'll build a simple 3D model in which an operator transports multiple items at a time. When you're finished, your simulation model will operate similar to the following image:
In order to create this kind of logic, you'll need to learn about two important concepts: arrays and sub flows. The following sections will briefly introduce these concepts and link you to other relevant material for further information.
Using Arrays in Labels
In FlexSim, the term array refers to a data structure that can contain more than one value if needed. Each element in that array is usually identified by an index, which is a number that indicates the position of the value in the array.
In this 3D model, you'll use a label that contains an array of values. When an operator is ready to pick up items for transport, a Pull From List activity in the process flow will pull 2-5 flow items from a list (each representing an item that needs to be transported). The references to those flow items will be stored in a label called GroupOfItems that contains an array of values. The reference for each flow item will be assigned a unique index, starting with 1. Each index will be assigned based on the order in which the flow items were pulled from the list.
The following image shows an example of what the GroupOfItems array could possibly contain:
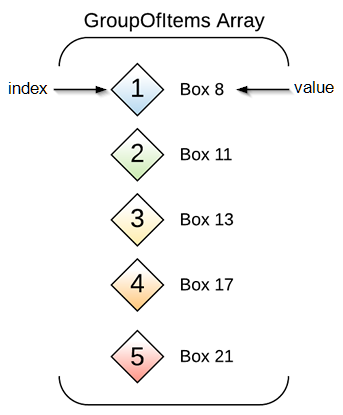
In this example, the GroupOfItems array contains references to five flow items. In this example, the array has 1-5 indexes since the Pull From List activity will pull up to 5 items from the list at a time. Each index has a specific value, which, in this case, is a reference to a unique flow item in the 3D model.
If you want to reference one of the flow items in the array, you will need to use its
specific index. When you call that index, it will return its current value. Using the
example in the preceding image, the FlexScript expression token.GroupOfItems[2]
would return a reference to the flow item named Box11 in the 3D model. The expression
token.GroupOfItems[4] would return a reference to the flow item named Box17 in
the 3D model.
Another FlexScript expression you'll find useful when working with arrays is
.length. This expression will return a value that indicates how many elements
are in a specific array. Continuing with the example in the preceding image, the FlexScript
expression token.GroupOfItems.length would return a value of 5 because there
are 5 elements in this array.
Using Sub Flows
A sub process flow (usually called a sub flow for short) is a separate process flow or set of activities that begin running when it is triggered by another activity or event in a process flow. Think of sub flows as chunks of self-contained logic that will get executed when they are triggered by certain events in the simulation model or general process flow.
Sub flows can cut down on the need to repeatedly create a certain block of process flow activities in multiple places throughout your process flows. In other words, it can help you cut down on redundancy in your process flow and make it more efficient and well-organized.
In this first tutorial task, you'll create a sub flow for loading and unloading flow items. Since the operator will load and unload multiple flow items at a time, you'll create sub flows to handle the loading and unloading logic. Rather than having to create a long string of activities to handle the loading and unloading of each flow item, each flow item will instead run through the sub flow on its own. You'll only need to create one simple block of activities for the loading process and one block for the unloading process. See Sub Process Flows for a deeper explanation of the key concepts related to sub flows.
Step 1 Build the 3D Model
In this step, you'll build a basic 3D model for this tutorial. You'll add two planes, one for loading and another for unloading. You'll add various 3D objects to these two planes and one operator to handle the transportation tasks. In the last few steps, you'll create some 3D object groups as well.
When you're finished, your model should look similar to the following image:

To build this model:
- Make sure your 3D model window is open and active. From the Library, drag two Planes (under Visual) into the model.
- Click the first Plane to select it. In Quick Properties, rename it as Loading.
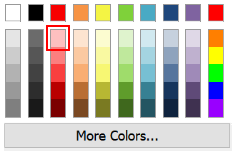
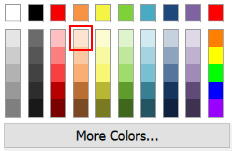
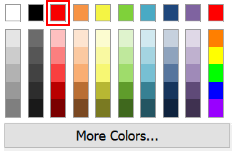
- Click the color selector to open it. Select the light red color.
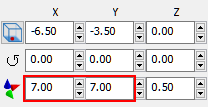
- Change the X-size
 to
to 7.00and the Y-size to7.00. - Click the second Plane to select it. In Quick Properties, rename it as Destination1.
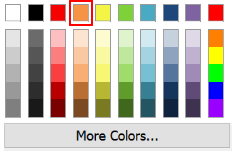
- Click the color selector to open it. Select the light orange color.
- Change the X-size
to
13.00and the Y-size to7.00. - From the Library, drag the following 3D objects into the model and place them on the
Loading plane:
- A Source
- A Queue
- Rename the objects as follows:
- From the Library, drag the following 3D objects into the model and place them on the
Destination1 plane:
- A Queue
- A Processor
- A Sink
- Create port-connections (A-connects) between the following objects:
- From MainSource to MainQueue
- From Queue1 to Processor1
- From Processor1 to Sink1
- From the Library, drag an Operator into the model, placing it between the two planes.
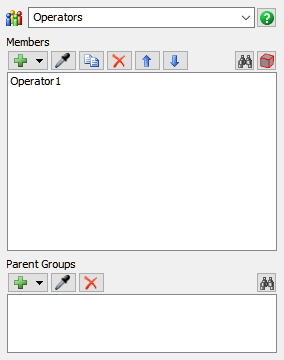
- Right-click Operator1 to open a menu. Point to Object Groups and select Add to New Group to open a new group properties window.
- In the name box at the top of the window, change the name of the group to Operators. Close the window.
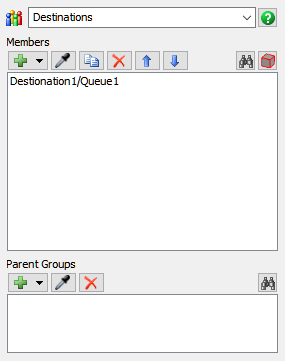
- Right-click Queue1 to open a menu. Point to Object Groups and select Add to New Group to open a new group properties window.
- In the name box at the top of the window, change the name of the group to Destinations. Close the window.
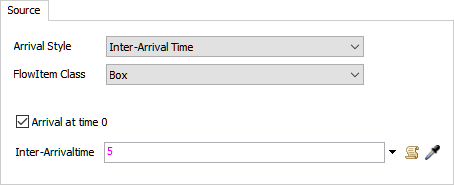
- Double-click the Source to open its properties window. In the Source tab, check the Arrival at time 0 box.
- In the Inter-Arrivaltime box, type
5. - Press the OK button to save the changes and close the window.
| Object | New Name |
|---|---|
| Source1 | MainSource |
| Queue1 | MainQueue |
Check to ensure your model looks similar to the image shown at the beginning of this step.
Step 2 Add Activities to a Process Flow
In this step, you'll add the activities and shared assets to a process flow. These activities will eventually control the 3D model's transportation logic. When you're finished, your process flow should look similar to the following image:
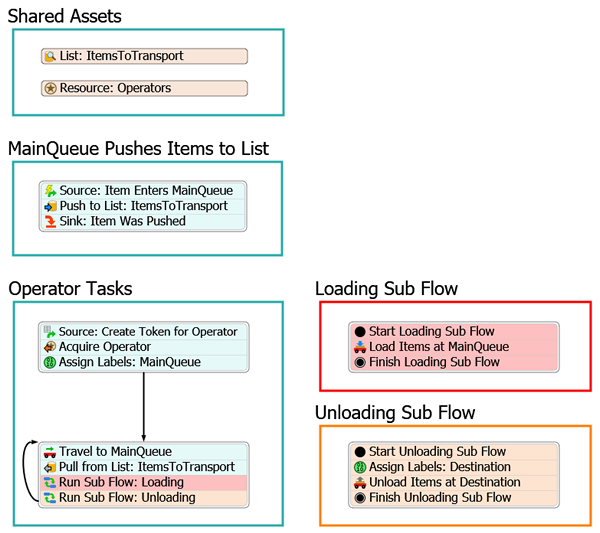
For now, you'll merely add and connect these activities to the process flow. You'll edit the properties to add the logic in a later step.
To add and connect these activities:
- On the main toolbar, click the Process Flow button to open a menu. Select Add a General Process Flow to create a new process flow.
- With the process flow active, in Quick Properties, change the name of the process flow to TransportTasks.
- Add 5 Process shapes (under Flowchart) to the process flow.
- Rename the shapes as follows:
- Shared Assets
- MainQueue Pushes Items to List
- Operator Tasks
- Loading Sub Flow
- Unloading Sub Flow
- In Quick Properties, use the color selector to change the color of the Loading Sub Flow shape to red.
- Repeat the previous step to change the color of the Unloading Sub Flow shape to orange.
- In the Shared Assets shape, add the following shared
assets:
- A List
- A Resource
- Rename the shared assets as follows:
- In the MainQueue Pushes Items to List shape, add the
following activities to create a stacked block:
- An Event-Triggered Source (under Token Creation)
- A Push to List (under Shared Assets)
- A Sink (under Basic)
- Rename the activities as follows:
- In the Operator Tasks shape, add the following
activities to create a stacked block:
- An Schedule Source (under Token Creation)
- An Acquire Resource (under Shared Assets)
- An Assign Labels (under Basic)
- In the Operator Tasks shape, add the following
activities to create another stacked block:
- A Travel (under Task Sequences)
- A Pull from List (under Shared Assets)
- 2 Run Sub Flow activities (under Sub Flow)
- Rename the activities as follows:
- In the Loading Sub Flow shape, add the following
activities to create another stacked block:
- A Start (under Sub Flow)
- A Load (under Task Sequences)
- A Finish (under Sub Flow)
- Rename the activities as follows:
- In the Unloading Sub Flow shape, add the following
activities to create another stacked block:
- A Start (under Sub Flow)
- An Assign Labels (under Basic)
- An Unload (under Task Sequences)
- A Finish (under Sub Flow)
- Rename the activities as follows:
- Create connectors between the following activities:
- Going from Assign Labels: MainQueue to Travel to MainQueue
- Going from Run Sub Flow: Unloading looping back to Travel to MainQueue
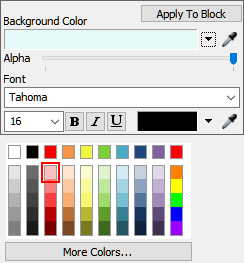
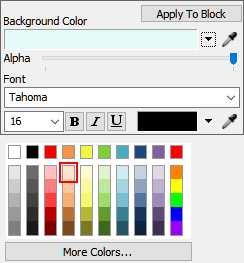
- Right-click the Run Sub Flow: Loading activity to open a menu. Select Edit Activity Visuals to open a properties window.
- Open the Background Color selector and choose the light red color.
- Repeat this process to change the color of all the activities in the Loading Sub Flow shape to light red.
- Right-click the Run Sub Flow: Unloading activity to open a menu. Select Edit Activity Visuals to open a properties window.
- Open the Background Color selector and choose the light orange color.
- Repeat this process to change the color of all the activities in the Unloading Sub Flow shape to light orange.
| Shared Asset | New Name |
|---|---|
| List | List: ItemsToTransport |
| Resource | Resource: Operators |
| Activity | New Name |
|---|---|
| Source | Source: Item Enters MainQueue |
| Push to List | Push to List: ItemsToTransport |
| Sink | Sink: Item Was Pushed |
| Activity | New Name |
|---|---|
| Source | Source: Create Token for Operator |
| Acquire | Acquire Operator |
| Assign Labels | Assign Labels: MainQueue |
| Travel | Travel to MainQueue |
| Pull from List | Pull from List: ItemsToTransport |
| Run Sub Flow (first one) | Run Sub Flow: Loading |
| Run Sub Flow (second one) | Run Sub Flow: Unloading |
| Activity | New Name |
|---|---|
| Start | Start Loading Sub Flow |
| Load | Load Items at MainQueue |
| Finish | Finish Loading Sub Flow |
| Activity | New Name |
|---|---|
| Start | Start Unloading Sub Flow |
| Assign Labels | Assign Labels: Destination |
| Unload | Unload Items at Destination |
| Finish | Finish Unloading Sub Flow |
Check to make sure your process flow looks similar to the image shown in the beginning of this step.
Step 3 Create the Push to List Logic
In this step, you'll edit the properties for the activities in the MainQueue Pushes Tasks to List shape. Simply put, when a flow item enters the queue, it will get pushed to a list where it will wait indefinitely until it can be transported.
The following is an overview of how each activity and shared asset will function:
| Activity | Explanation |
|---|---|
| List: Items to Transport | This list will store a reference to all the flow items in the MainQueue that are ready to be transported to a destination queue. You'll use the default settings for now. |
| Resource: Operators | You'll link this shared activity to the Operators group in the 3D model so that the operator in this group can be acquired for the transportation tasks. |
| Source: Item Enters MainQueue | The Event-Triggered Source is an event-listening activity that will listen to events in the 3D model. When a flow item enters Queue3, this activity will create a token and release it to the next downstream activity. You'll assign a label to this token named FlowItem that will contain a reference to the specific flow item that triggered the event. |
| Push to List: Items to Transport | This activity will push all flow items that are in the queue onto the Items to Transport list. When the items get pushed to the list, they will retain the reference to the specific flow item using the FlowItem label. |
| Sink: Item Was Pushed | This activity removes the token from the process flow. You'll use its default settings. |
To create this functionality:
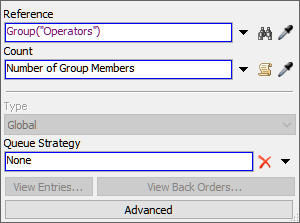
- Click the Resource: Operators shared asset to select it. In Quick Properties, click the arrow next to the Reference box to open a menu. Point to Group, then select Operators.
- Click the Source: Item Enters MainQueue activity to
select it. Click the Exclamation Point button
 to enter sampling mode.
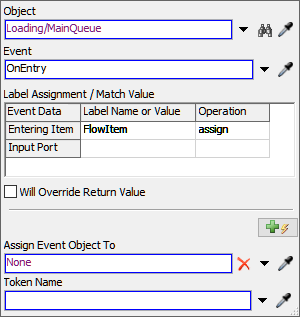
 - In the 3D model, click MainQueue to open a menu. Select MainQueue: On Entry.
- In Quick Properties, in the Label Assignment table, click the cell that is on the Entering Item row under the Label Name column. Type FlowItem.
- Click the cell that is on the Entering Item row under the Operation to open a menu. Select assign.
- Click the Push to List: Items to Transport activity to
select it. Click the Exclamation Point button
to enter sampling mode.
- Click the List: Items to Transport shared asset to select it. A blue line will now link this activity to the shared asset.
- In Quick Properties, click the arrow next to the Push Value box to open a menu. Point to Token Label, then select FlowItem.
Consider saving your simulation model.
Step 4 Add the Operator Task Logic
The following is an overview of how each activity and shared asset will function:
| Activity | Explanation |
|---|---|
| Source: Create Token for Operator | When the simulation starts, this activity will create a token for each operator in the Operators group. You'll set this activity to reference the NumberOfOperators process flow variable that you'll set up in this tutorial step. This activity will determine how many tokens to create by referencing how many operators are in the group at the time the simulation starts. |
| Acquire Operator | This activity will attempt to acquire a resource (one of the operators) to work on the transportation tasks. If an operator is not available to work on the task, the token will wait at this activity until the operator becomes available. If an operator is available to work on the task, the token will acquire that resource and release the token to the next downstream object. When the resource is acquired, you'll assign the token a label named Operator that will contain a reference to the specific operator that was acquired. |
| Assign Labels: MainQueue | This activity will create a label called MainQueue which will contain a reference to the MainQueue object in the 3D model. |
| Travel to MainQueue | This activity will tell the operator to travel to the MainQueue. You'll use the MainQueue label that you created in the Assign Labels activity. |
To create this functionality:
- Click a blank area in the process flow to ensure nothing is selected. In Quick Properties, click the More Properties button.
- On the Variables tab, click the
Add button
 to create a new variable.
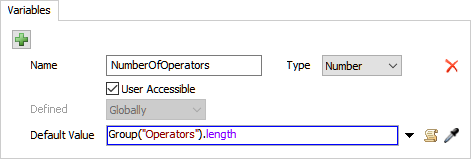
 - In the Name box, change the name of the variable to NumberOfOperators.
- Confirm that the Type menu is set to Number.
- In the Default Value box, delete the current value and
type
Group("Operators").length. - Click the OK button to close the window and save the changes.
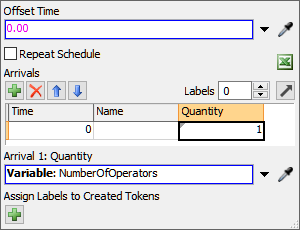
- Click the Source: Create Token for Operator activity to select it. In Quick Properties in the Arrivals table, click the cell under the Quantity column. With that cell selected, click the arrow next to the Arrival 1: Quantity box under the table to open a menu. Point to Process Flow Variable, then select NumberOfOperators.
- Click the Acquire Operator activity to select it. Click
the Exclamation Point button
next to the activity to enter
sampling mode.
- Click the Resource: Operators shared asset to select it. A blue line will now link this activity to the shared asset.
- In the Assign To Label box, delete the current text and
type
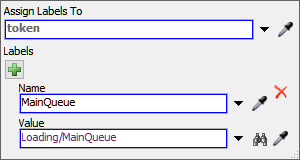
token.Operator. - Click the Assign Labels: MainQueue to select it. In
Quick Properties, click the Add button
to add a new label.
- In the Name box, type
MainQueue. - Next to the Value box, click the
Sampler button
 to enter sampling mode.
 - In the 3D model, click the MainQueue to open a menu. Select Loading/MainQueue.
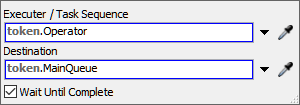
- Click the Travel to MainQueue activity to select it. In Quick Properties, click the arrow next to the Executer / Task Sequence box to open a menu. Point to Token Label, then select Operator.
- Click the arrow next to the Destination box to open a menu. Point to Token Label, then select MainQueue.

Consider saving your simulation model.
Step 5 Set Up the Loading Sub Flow
In this step, you'll set up the loading logic for the operator. You'll pull a certain number of items from the list, then tell the operator to load that number of items at the MainQueue. You'll do all of this using a label that contains an array and a sub flow that is dedicated to loading items.
The following is an overview of how each activity and shared asset will function:
| Activity | Explanation |
|---|---|
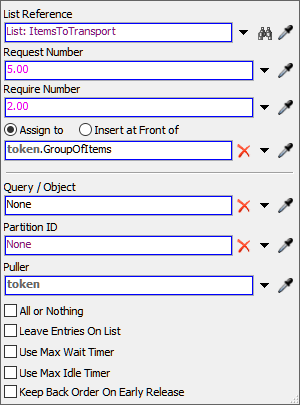
| Pull from List: ItemsToTransport | This activity will pull up to 5 flow items from the Items to Transport list. You'll assign the token a label called GroupofItems that will contain an array with references to each flow item that was pulled from the list. |
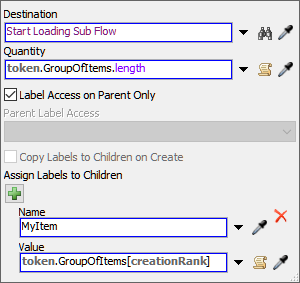
| Run Sub Flow: Loading | This activity will create child tokens and send them to the Loading Sub Flow. You'll set up the logic of this activity so that it will create a child token for each item that was pulled from the list in the previous activity. You'll also put a reference for each individual flow item in a label on the child tokens called MyItem. |
| Start Loading Sub Flow | Every sub flow needs to begin with a Start activity. When the Run Sub Flow activity sends child tokens to a sub flow, it will always send them to this activity. You'll use the default settings for this activity. |
| Load Items at MainQueue | When each child token reaches this activity, it will tell the operator which flow items to load and which location to load them from. You'll use the Operator label to indicate which operator should perform this task and you'll use the MyItem label on each child token to tell the operator which items it should load from the MainQueue. |
| Finish Loading Sub Flow | Every sub flow needs to end with a Finish activity. The parent token on the Run Sub Flow activity will wait at that activity until all of its child tokens have reached the Finish activity. You'll use the default settings for this activity. |
To create this functionality:
- Click the Pull from List: ItemsToTransport activity to
select it. Click the Exclamation Point button
next to the activity to enter
sampling mode.
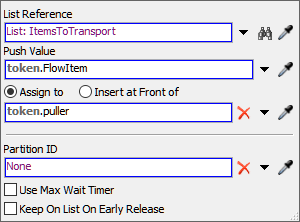
- Click the List: ItemsToTransport shared asset to select it. A blue line will now link this activity to the shared asset.
- In the Request Number box, type
5.00. - In the Require Number box, type
2.00. - Confirm that the Assign to option is selected. In the
box below this option, type
token.GroupOfItems. - Click the Run Sub Flow: Loading activity to select it.
Click the Exclamation Point button
next to the activity to enter
sampling mode.
- In the Loading Sub Flow shape, click the Start Loading Sub Flow activity to sample it.
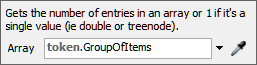
- In Quick Properties, click the arrow next to the Quantity box to open a menu. Select Array Size to open a picklist options window.
- In the picklist options window, click the arrow next to the Array box to open a menu. Point to Labels, then select token.GroupOfItems. When you click outside the picklist options, it will auto-generate the correct expression for you.
- Click the Add button
to add a label.
- In the Name box, type
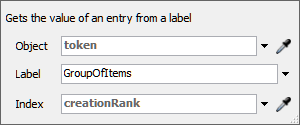
MyItem. - Click the arrow next to the Value box to open a menu. Point to Array, then select Value from Label Array to open a picklist options window.
- In the picklist options window, click the arrow next to the Label box to open a menu. Select GroupOfItems.
- Click the arrow next to the Index box to open a menu. Select creationRank. When you click outside the picklist options, it will auto-generate the correct expression for you.
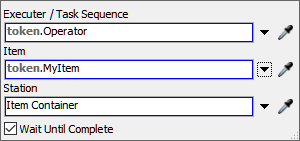
- In the Loading Sub Flow shape, click the Load Items at MainQueue activity to select it. In Quick Properties, click the arrow next to the Executer / Task Sequence box to open a menu. Point to Token Label, then select Operator.
- Click the arrow next to the Item box to open a menu. Point to Token Label, then select MyItem.
Consider saving your simulation model.
Step 6 Set Up the Unloading Sub Flow
In this step, you'll set up the unloading logic for the operator. The unloading sub flow will work similar to the loading sub flow, except that the operator will unload items at a specified destination.
The following is an overview of how each activity and shared asset will function:
| Activity | Explanation |
|---|---|
| Run Sub Flow: Unloading | This activity will create child tokens and send them to the Unloading Sub Flow. The settings for this activity will be identical to the Run Sub Flow: Loading activity. This activity will create a child token for each item that was pulled from the list in the previous activity. You'll also put a reference for each individual flow item in a label on the tokens called MyItem on the child tokens. |
| Start Unloading Sub Flow | Every sub flow needs to begin with a Start activity. When the Run Sub Flow activity sends child tokens to a sub flow, it will always send them to this activity. You'll use the default settings for this activity. |
| Assign Labels: Destination | This activity will create a label on the child token that sets its destination. For now, you'll sample Queue1 in the 3D model to set that as the destination for all tokens. |
| Unload Items at Destination | When each child token reaches this activity, it will tell the operator which flow items to unload and which location to load them from. You'll use the Operator label to indicate which operator should perform this task and you'll use the MyItem label on each child token to tell the operator which items it should load from the MainQueue. The Destination label that you set in the previous activity will tell the operator to unload the items at Queue1 in the 3D model. |
| Finish Unloading Sub Flow | Every sub flow needs to end with a Finish activity. The parent token on the Run Sub Flow activity will wait at that activity until all of its child tokens have reached the Finish activity. You'll use the default settings for this activity. |
To create this functionality:
- Click the Run Sub Flow: Unloading activity to select
it. Click the Exclamation Point button
next to the activity to enter
sampling mode.
- In the Unloading Sub Flow shape, click the Start Unloading Sub Flow activity to sample it.
- In Quick Properties, click the arrow next to the Quantity box to open a menu. Select Array Size to open a picklist options window.
- In the picklist options window, click the arrow next to the Array box to open a menu. Point to Labels, then select token.GroupOfItems. When you click outside the picklist options, it will auto-generate the correct expression for you.
- Click the Add button
to add a label.
- In the Name box, type
MyItem. - Click the arrow next to the Value box to open a menu. Point to Array, then select Value from Label Array to open a picklist options window.
- In the picklist options window, click the arrow next to the Label box to open a menu. Select GroupOfItems.
- Click the arrow next to the Index box to open a menu. Select creationRank. When you click outside the picklist options, it will auto-generate the correct expression for you.
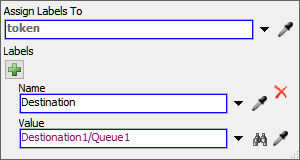
- Click the Assign Labels: Destination activity to
select it. In Quick Properties, click the Add button
to add a label.
- In the Name box, type
Destination. - Next to the Value box, click the
Sampler button
to enter sampling mode.
- In the 3D model, click Queue1 to open a menu. Select Destination1/Queue1 to sample it.
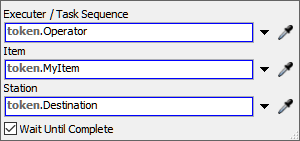
- In the Unloading Sub Flow shape, click the Unload Items at Destination activity to select it. In Quick Properties, click the arrow next to the Executer / Task Sequence box to open a menu. Point to Token Label, then select Operator.
- Click the arrow next to the Item box to open a menu. Point to Token Label, then select MyItem.
- Click the arrow next to the Station box to open a menu. Point to Token Label, then select Destination.

Consider saving your simulation model.
Step 7 Run the Model
Reset and run the model:
As you watch, the operator will load multiple items at the MainQueue and then unload them all at the Queue1. If you wanted, you could increase the distance between the two queues to see how that would affect the operator's efficiency.
Conclusion
In this tutorial task, you reviewed how to use lists to assign tasks to an operator and you got a simple introduction to how arrays and sub flows work. In the next tutorial, you'll learn how to add some complexity to the model when you add additional destinations. You'll build the logic that will change where the operator unloads flow items based on certain varying conditions and constraints in the model. Continue to Tutorial Task 3.2 - Add Conditional Tasks.