Task 2.1 - Create Standard Loading Tasks
Task Overview
Before learning how to create coordinated tasks, it helps to review the key concepts and processes that are involved in building basic tasks in a process flow. In many ways, this first tutorial task will be a review of the concepts taught in the Tutorial 1 - Task Logic Tools Tutorial.
Similar to the simulation model you built in that tutorial, you'll set up a simple series of transportation tasks in a process flow in this tutorial. The tasks in this process flow will direct two operators to load and unload boxes from one queue to two different processors. Building this simple transportation series of tasks first will help you to see how coordinated tasks are built a little differently from standard tasks.
When you're finished, your simulation model will work similar to the following image:
Step 1 Build the 3D Model
In this step, you'll build a basic 3D model for this tutorial. You'll add some queues that will store the boxes that need to be transported, the operators that will transport the boxes, and the processors that will process the boxes. When you're finished, your model should look similar to the following image:
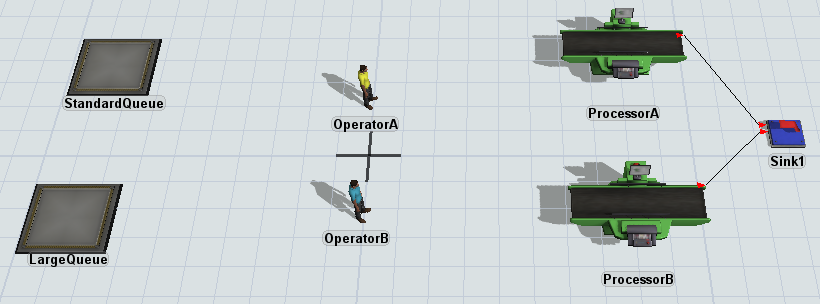
To build this model:
- Make sure your 3D model window is open and active. From the Library, drag the
following 3D objects into the model:
- 2 Queues
- 2 Operators
- 2 Processors
- A Sink
- Rename the objects as follows:
- Create port-connections (A-connects) between the following objects:
- From ProcessorA to Sink1
- From ProcessorB to Sink1
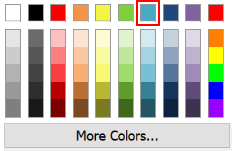
- Click OperatorB to select it. In Quick Properties, click the color selector to open it. Select the blue color.
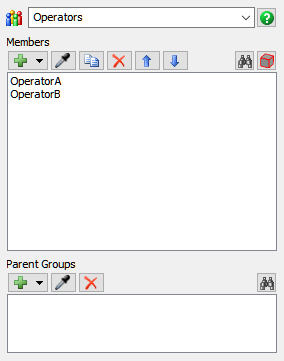
- Right-click OperatorA to open a menu. Point to Object Groups and select Add to New Group to open a new group properties window.
- In the name box at the top of the window, change the name of the group to Operators.
- In the Members group, click the
Sampler button
 to enter sampling mode.
 - Click OperatorB to sample it.
- Repeat the previous steps to create another group called Processors, adding ProcessorA and ProcessorB as members.
| Object | New Name |
|---|---|
| First Queue | StandardQueue |
| Second Queue | LargeQueue |
| First Operator | OperatorA |
| Second Operator | OperatorB |
| First Processor | ProcessorA |
| Second Processor | ProcessorB |

Check to ensure your model looks similar to the image shown at the beginning of this step.
Step 2 Add Activities to a Process Flow
In this step, you'll add the activities and shared assets to a process flow. These activities will eventually control the 3D model's transportation logic. When you're finished, your process flow should look similar to the following image:
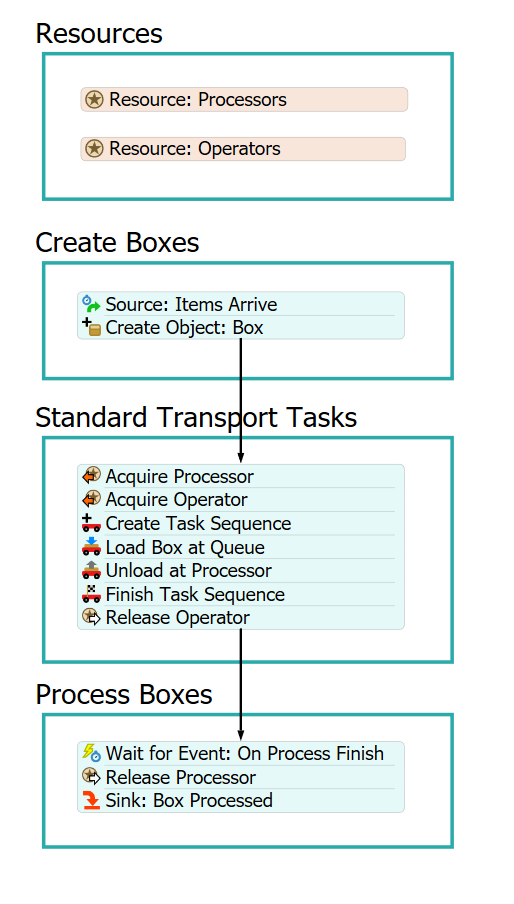
For now, you'll merely add and connect these activities to the process flow. You'll edit the properties to add the logic in a later step.
To add and connect these activities:
- On the main toolbar, click the Process Flow button to open a menu. Select Add a General Process Flow to create a new process flow.
- With the process flow active, in Quick Properties, change the name of the process flow to LoadingTasks.
- Add 4 Process shapes (under Flowchart) to the process flow.
- Rename the shapes as follows:
- Resources
- Create Boxes
- Standard Transport Tasks
- Process Boxes
- In the Resources shape, add two Resource shared assets (under Shared Assets).
- Rename the shared assets as follows:
- In the Create Boxes shape, create a stacked block with
the following activities:
- An Inter-Arrival Source (under Token Creation)
- A Create Object (under Objects)
- Rename the activities and shared assets as follows:
- In the Standard Transport Tasks shape, create a stacked
block with the following activities:
- 2 Acquire Resources (under Shared Assets)
- A Create Task Sequence
- A Load (under Task Sequences)
- An Unload (under Task Sequences)
- A Release Task Sequence
- A Release Resource (under Shared Assets)
- Rename the activities and shared assets as follows:
- In the Process Boxes shape, create a stacked block with
the following activities:
- A Wait for Event (under Basic)
- A Release Resource (under Shared Assets)
- A Sink (under Basic)
- Rename the activities and shared assets as follows:
- Create a connector going from the following activities:
- From the Create Object: Box activity to the Acquire: Processor activity
- From the Release Operator activity to the Wait for Event: On Process Finish activity
| Shared Asset | New Name |
|---|---|
| Resource (first one) | Resource: Processors |
| Resource (second one) | Resource: Operators |
| Activity | New Name |
|---|---|
| Source | Source: Items Arrive |
| Create Object | Create Object: Box |
| Activity | New Name |
|---|---|
| Acquire (first one) | Acquire Processor |
| Acquire (second one) | Acquire Operator |
| Create TS | Create Task Sequence |
| Load | Load Box at Queue |
| Unload | Unload at Processor |
| Finish TS | Finish Task Sequence |
| Release (first one) | Release Operator |
| Activity | New Name |
|---|---|
| Wait for Event | Wait for Event: On Process Finish |
| Release (second one) | Release Processor |
| Sink | Sink: Box Processed |
Consider saving your simulation model.
Step 3 Edit the Shared Assets and Initial Activities
In this step, you'll link the resource shared assets to the two different groups you set up in the first step of the tutorial. You'll also edit the logic that will create the boxes in the simulation model.
The following is an overview of how the shared assets and activities will function:
| Activity | Explanation |
|---|---|
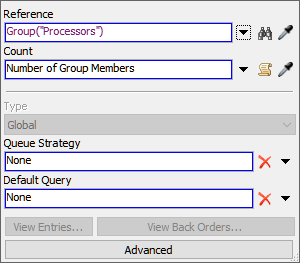
| Resource: Processors | You'll link this shared activity to the Processors group, which contains the processors in the 3D model. These processors can then be acquired as a destination for the boxes. |
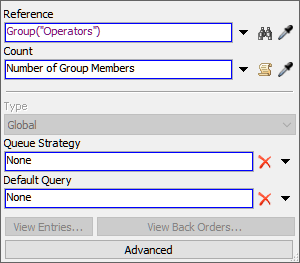
| Resource: Operators | You'll link this shared activity to Operators group, which contains the operators in the 3D model. These operators can then be acquired to work on the transportation tasks. |
| Source: Items Arrive | This Inter-Arrival Source will set the arrival rate at which boxes will enter the StandardQueue in the 3D model. You'll use the default statistical distribution for this activity for now. |
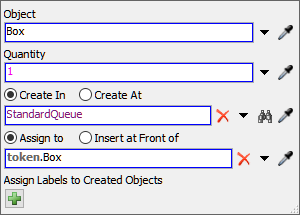
| Create Object: Box | Once the token is created, it will move to this activity which will create a box flow item and place it in the StandardQueue in the 3D model. You'll assign a label named Box that will contain a reference to the specific box that was created by this token. |
To create this logic:
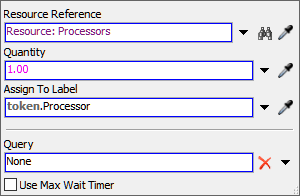
- Click the Resource: Processors shared asset to select it. In Quick Properties, click the arrow next to the Reference box to open a menu. Point to Group, then select Processors.
- Repeat the previous step to link the Resource: Operators shared asset to the Operators group.
- Click the Create Object: Box activity to select it. In
Quick Properties, confirm that the Create In option is
selected. In the box below this option, click the Sampler
button to enter sampling mode.
- In the 3D model, click the StandardQueue to open a menu. Select StandardQueue from the menu.
- In the box under the Assign to option, type
token.Box.
Consider saving your simulation model.
Step 4 Create the Standard Transport Task Logic
In this step, you'll edit the activities that will control the logic for the transportation tasks. The following is an overview of how the new activities will function:
| Activity | Explanation |
|---|---|
| Acquire Processor | This activity will attempt to acquire one of the processors for the box. If none of the processors are available to work on the task, the token will wait at this activity until a processor becomes available. If a processor is available to receive the box, the token will acquire that resource and release the token to the next downstream object. When the resource is acquired, you'll assign the token a label named Processor that will contain a reference to the specific processor that was acquired by the token. |
| Acquire Operator | This activity will attempt to acquire one of the operators to work on the transportation tasks. If an operator is not available to work on the task, the token will wait at this activity until an operator becomes available. If an operator is available to work on the task, the token will acquire that resource and release the token to the next downstream object. When the resource is acquired, you'll assign the token a label named Operator that will contain a reference to the specific operator that was acquired by the token. |
| Create Task Sequence | This activity sets up the series of the tasks (Load and Unload) as a sequence of tasks to be carried out by the assigned operator. |
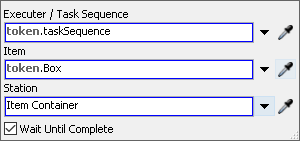
| Load Box at Queue | This activity tells the operator which flow item needs to be picked up and where it is located. It will use the Operator label to assign the task to the same operator that was acquired in the previous activity and it will use the Box label to tell the operator which item should be transported. |
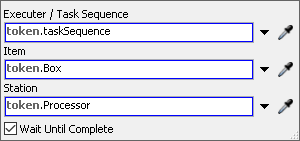
| Unload at Processor | This activity tells the operator where to unload the flow item. It will use the Operator label to assign the task to the same operator that was acquired in the previous activity and it will use the Box label to tell the operator which item should be transported. You'll use the Processor label to tell the operator which processor should receive the flow item. |
| Finish Task Sequence | This activity designates the sequence of tasks as finished. |
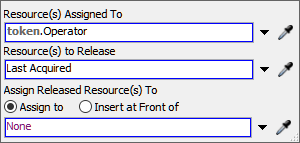
| Release Operator | When the transportation task is complete, this activity will release the operator. It will use the Operator label to release the operator. |
To create this logic:
- Click the Acquire Processor activity to select it.
Click the Exclamation Point button
 next to this activity to enter sampling mode.
 - Click the Resource: Processors shared asset to sample it.
- In Quick Properties in the Assign To Label box, type
token.Processor. - Click the Acquire Operator activity to select it. Click
the Exclamation Point button next
to this activity to enter sampling mode.
- Click the Resource: Operators shared asset to sample it.
- In Quick Properties in the Assign To Label box, type
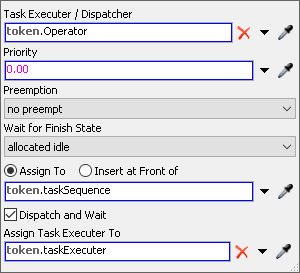
token.Operator. - Click the Create Task Sequence activity to select it. In Quick Properties, click the arrow next to the Executer / Task Sequence box to open a menu. Point to Token Label and select Operator. This will assign the task sequence we are creating to the operator previously acquired. Leave the other settings as their default values. You'll notice that this activity creates a new label on the token called taskSequence. All of the tasks in this sequence will be assigned to the sequence via this label.
- Click the Load Box at Queue activity to select it. In the Quick Properties make sure the default for Executer / Task Sequence reads token.taskSequence.
- Click the arrow next to the Item box to open a menu. Point to Token Label and select Box.
- Click the Unload at Processor activity to select it. In the Quick Properties make sure the default for Executer / Task Sequence reads token.taskSequence.
- Click the arrow next to the Item box to open a menu. Point to Token Label and select Box.
- Click the arrow next to the Station box to open a menu. Point to Token Label and select Processor.
- We can leave the Finish Task Sequence as its default settings. Make sure the Task Sequence box reads token.taskSequence. This designates the end of the sequence of tasks to be carried out.
- Click the Release Operator activity to select it. In Quick Properties, click the arrow next to the Resource(s) Assigned To box to open a menu. Point to Token Label and select Operator.

Consider saving your simulation model.
Step 5 Create the Process Boxes Logic
In this step, you'll edit the logic for the activities that will release the processor after it finishes processing the flow item. The following is an overview of how the new activities will function:
| Activity | Explanation |
|---|---|
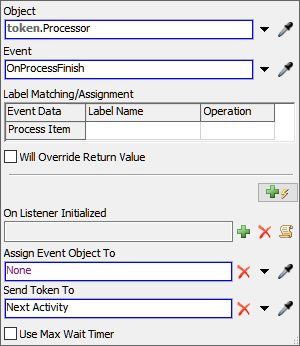
| Wait for Event: On Process Finish | This is an event-listening activity, which means it will listen to an object in the 3D model and release the token to the next downstream activity once the event occurs. This activity will wait for the processor to finish processing the item before releasing the token to the next activity. |
| Release Processor | When the flow item is finished being processed, this activity will release the processor. It will use the Processor label to release the processor. |
| Sink: Box Processed | This activity removes the token from the process flow. You'll use its default settings. |
To create this logic:
- Click the Wait for Event: On Process Finish activity to select it. In Quick Properties, click the arrow next to the Object box to open a menu. Point to Token Label and select Processor.
- Next to the Event box, click the
Sampler button
to enter sampling mode.
- In the 3D model, click ProcessorA to open a menu. Select On Process Finish.
- Click the Release Processor activity to select it. In Quick Properties, click the arrow next to the Resource(s) Assigned To box to open a menu. Point to Token Label and select Processor.

Consider saving your simulation model.
Step 6 Run and Test the Model
Reset and run the simulation model:
As you watch the model run, the operators will load boxes at the StandardQueue and unload them at one of the processors.
If your model isn't behaving as expected, go back and double-check that all your property settings are correct.
Conclusion
Now that you've reviewed the process for creating simple transportation tasks in FlexSim, you're ready to move on to creating a coordinated transportation task. Continue on to Tutorial Task 2.1 - Create Coordinated Loading Tasks.