Task 1.2 - Add Staff
Task Overview
In this tutorial task, you'll build more of the patient track for the health care clinic model to get some additional practice using the FlexSim Healthcare objects and activities.
In the first tutorial task, you learned how to use one of the activity sets to quickly set up the logic of your patient track. In this tutorial task, you'll use a few more activity sets that let the patient acquire staff and give them tasks.
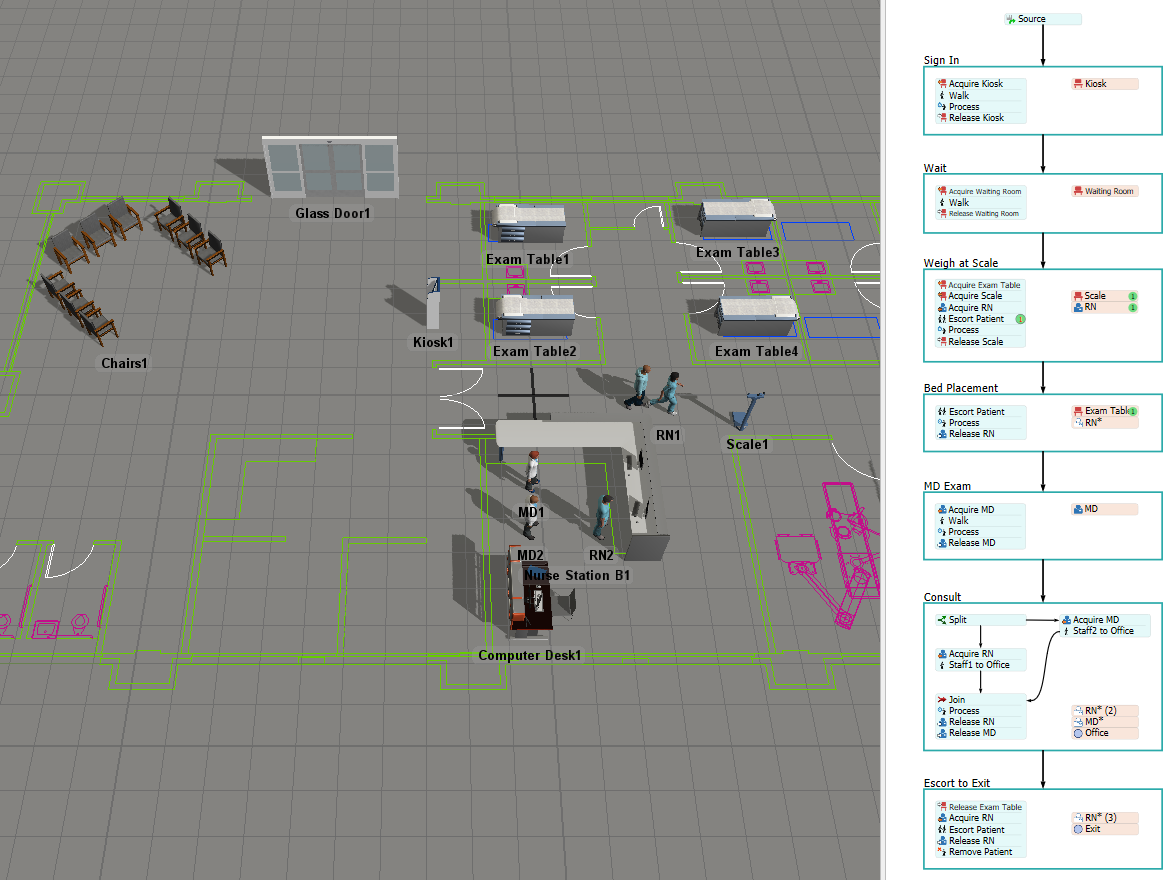
When you're finished, your simulation model should look similar to the following image:
Step 1 Add Staff and Additional Locations
In this step, you'll build out a little more of the 3D objects in the health care clinic by adding some more FlexSim Healthcare locations and staff objects to the model. In this step, you'll see what it's like to add several copies of the same object at the same time using the Create Objects mode.
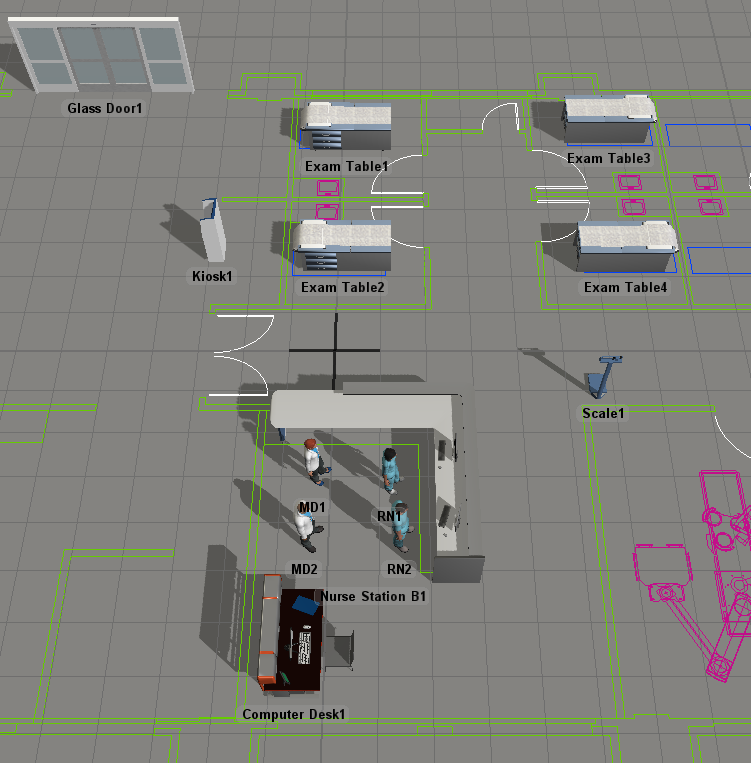
When you're finished, your model should look similar to the following image:
To add these additional 3D objects:
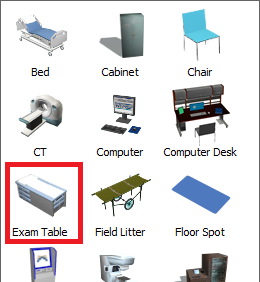
- In the Library under the Healthcare group, click the
Location object to open a menu. Click (don't drag) the
Exam Table to enter Create Objects mode. Your mouse pointer
will change to the Create Objects icon
 when you're in Create Objects mode. Click the area in the model where you want to add
the first exam table. (Use the image at the beginning of this step to guide you on the
placement of objects.)
when you're in Create Objects mode. Click the area in the model where you want to add
the first exam table. (Use the image at the beginning of this step to guide you on the
placement of objects.) - While still in Create Objects mode, click inside the model to add a second Exam Table.
- Repeat the previous step to add more Exam Tables until there are a total of 4 tables in the model. Press Esc or right click to exit Create Objects mode.
- Click Exam Table 3 to select it. In Quick Properties,
change the Z-rotation
 to
to
180.00. Repeat this step for Exam Table 4 as well. - From the Location menu, drag a Scale into the 3D model.
- Change the scale's Z-rotation to
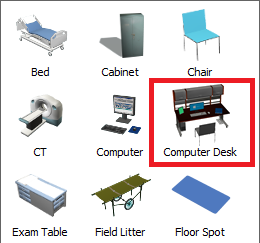
90.00. - From the Location menu, drag a Computer Desk into the 3D model.
- Change the desk's Z-rotation to
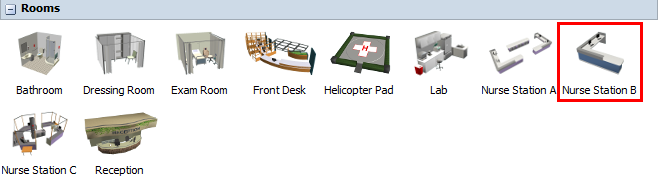
90.00. - In the Library under the Healthcare group, click the Prop object to open a menu of prop objects. Drag a Nurse Station B (under the Rooms group) into the 3D model.
- Click Nurse Station B1 to select it. In Quick
Properties, change the Z-rotation to
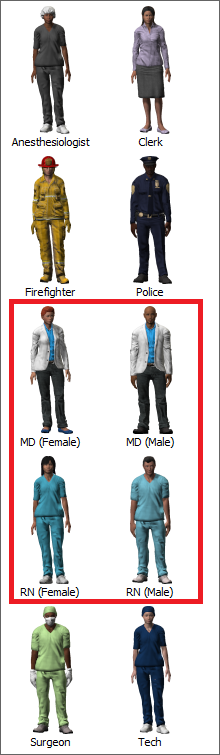
90.00. - In the Library under the Healthcare group, click the Staff object to open a menu. Drag an RN (Female) and an RN (Male) into the model.
- In the Library under the Healthcare group, click the Staff object to open a menu of staff objects. Drag an MD (Female) and an MD (Male) into the model.

Check to make sure your simulation model looks similar to the image at the beginning of this step.
Step 2 Create Object Groups
In this step, you'll learn how to add staff objects to your 3D model. You'll then learn how to create staff and location object groups. You'll also explore how groups work with FlexSim Healthcare 3D objects in general by exploring groups in the Toolbox. See Creating 3D Object Groups for more information about groups.
By default, all locations are automatically added to one of the main object groups: the Locations group. In a similar vein, all staff are added to the Staff group. However, you also have the ability to create additional groups or sub-groups to better organize your model. As you'll see in a later step, these groups are important to building the logic for FlexSim Healthcare objects.
Since you added several new 3D objects to your simulation model in the previous step, you need to create object groups for those new objects in order to make your model scale well. In this step, you'll create a location group named ExamRooms for the new exam tables and you'll create staff groups named MDs and RNs for the MD and RN staff members.
To create these object groups:
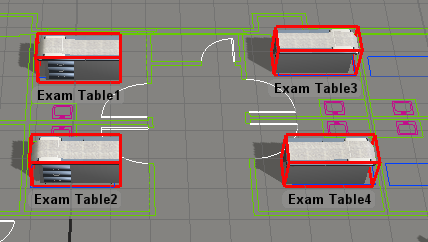
- Press and hold down the Shift key while using your mouse to draw a box around all four of the new ExamTable objects you added to your model in the previous step. A red box will appear around the ExamTables to show they are selected.
- Right-click ExamTable1 to open a menu. Point to Location Groups, then select Add to New Group to open a group properties window.
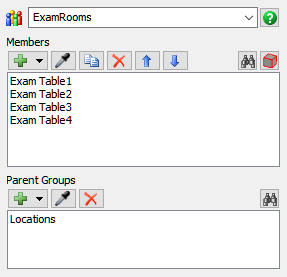
- In the name box, rename the group ExamRooms.
- Notice that all four of the ExamTables are members of the group. Close the group window.
- Press and hold down the Shift key while clicking a blank area in the 3D model with your mouse to de-select the ExamTables.
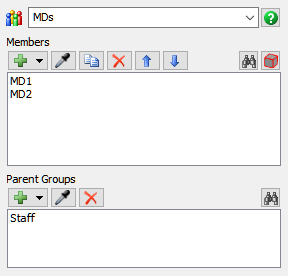
- In the 3D model, press the Ctrl button and click MD1 to select it. While still pressing the Ctrl key, click MD2 to select it as well. Right-click MD1 to open a menu. Point to Staff Groups, then select Add to New Group to open a group properties window.
- In the name box, delete the current text and rename the group MDs.
- Notice that MD1 and MD2 are both listed as a member and that Staff is listed as the parent group. Close the group window.
- Press and hold down the Shift key while clicking a blank area in the 3D model with your mouse to de-select the MDs.
- Add RN1 and RN2 to a new Staff Group named RNs the same way you added MD1 and MD2 to the MDs group.
- Remember to press and hold down the Shift key while clicking a blank area in the 3D model with your mouse to de-select the RNs.
Consider saving your simulation model at this point.
Step 3 Add Activity Sets for Bed Placement
In this step you'll use the Escort then Process activity set to model the patient being escorted to the scale and then to an exam table.
In this step, you'll also see how the staff groups you set up earlier in the tutorial will be used in this model's logic. When a staff member is required to help a patient, you can assign any member of the group to help the patient (as opposed to assigning a specific staff member). When needed, the process flow will select the first available member of this group to work on a task.
Using object groups will help your model scale well as it becomes more complex. It makes it so that you can add extra chairs, clerks, nurses, etc. as needed without having to change the model's logic. When you add new objects to the 3D model, all you will have to do is add the new members to the group and FlexSim Healthcare will take care of the rest of the logic. These object groups also make it possible to easily study the impact of adding additional staff or location resources to your model to find the most efficient use of resources.
When you're finished, your process flow should look similar to the following image:
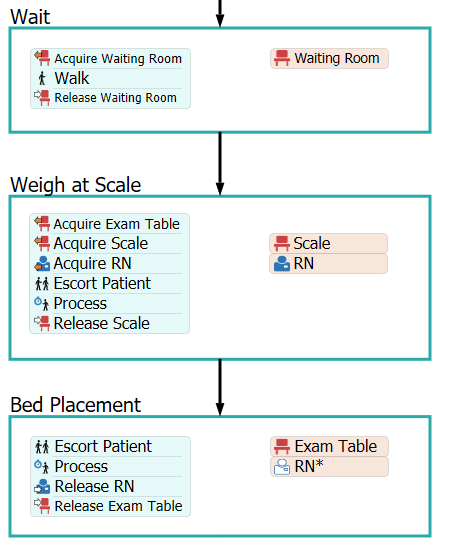
To add and connect these activities:
- In the Library under the HC Activity Sets group, drag an Escort then Process activity set into the Patient Flow process flow.
- Create a connector from the bottom edge of the Wait container to the top edge of the new container.
- Rename the container Weigh at Scale.
- Rename the Location resource Scale.
- Rename the Staff resource RN.
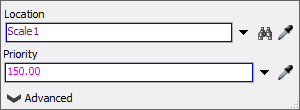
- Click the icon of the Scale activity to open its
properties. Next to the Location box, click the
Sampler button
 and sample the Scale1 object in the 3D view.
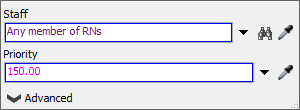
 - Click the icon of the RN activity to open its
properties. Next to the Staff box, click the
Sampler button
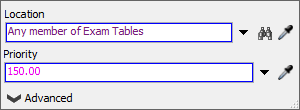
and sample any of the RN objects in the 3D view. Choose
the RNs group option from the menu so that the field now reads Any member of RNs.
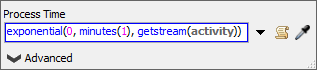
- Click the icon of the Process activity to open its properties. In the Process Time field change minutes(10) to minutes(1).
- Press and hold the Ctrl key. Click the Release RN activity, drag it out of the stacked block, and delete it.
- In the Library under the HC Activity Sets group, drag another Escort then Process activity set into the Patient Flow process flow.
- Create a connector from the bottom edge of the Weigh at Scale container to the top edge of the new container.
- Rename the container Bed Placement.
- Rename the Location resource Exam Table.
- Click the icon of the Exam Table activity to open its
properties. Next to the Location box, click the
Sampler button
and sample any of the Exam Table objects in the 3D view. Choose
the ExamRooms group option from the menu so that the field now reads Any member of ExamRooms.
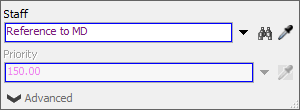
- Click the icon of the Staff resource to open its
properties. Next to the Staff box, click the
Sampler button
and sample the RN staff resource in the Weigh at Scale container
so that the field now reads Reference to RN. This means that the staff we want to use in the
Bed Placement activity set is the same RN we used in the Weigh at Scale activity set.
- Press and hold the Ctrl key. Click the Acquire RN activity, drag it out of the stacked block, and delete it.
- Press and hold the Ctrl key. Click the Acquire Exam Table activity, drag it out of the stacked block, and drag it into the stacked block inside the Weigh at Scale container such that it is now the first activity in the block.
See Escort then Process for more information about how the activities in this activity set work together.
We are doing this because we will continue to use the RN we acquire in this activity set in the following activity set.

We are doing this because the RN we're using was already acquired in the previous container and has not been released yet.
We are doing this because we don't want the patient to be escorted to the scale until there is an open exam room to go to.
Check to ensure that your patient flow looks similar to the image at the beginning of this step.
Step 4 Add Activity Sets for Exam and Departure
In this step you'll use the Process with Staff, the Two Staff Meet, and the Escort to Exit activity sets to model the patient being seen by an MD, the RN and MD discussing the patient, and then the patient being escorted to the exit. We will also see how to refer to resources acquired in an earlier activity set.
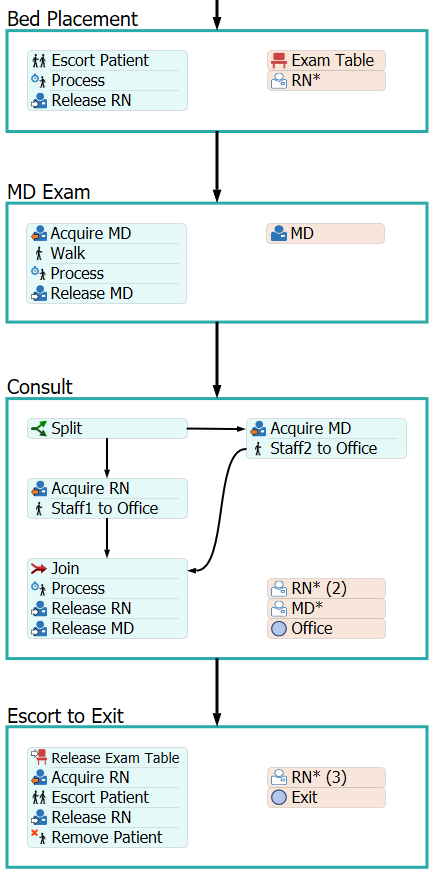
When you're finished, your process flow should look similar to the following image:
To add and connect these activities:
- In the Library under the HC Activity Sets group, drag a Process with Staff activity set into the Patient Flow process flow.
- Create a connector from the bottom edge of the Bed Placement container to the top edge of the new container.
- Rename the container MD Exam.
- Rename the Staff resource MD.
- Click the icon of the MD activity to open its
properties. Next to the Staff box, click the
Sampler button
and sample any of the MD objects in the 3D view. Choose
the MDs group option from the menu so that the field now reads Any member of MDs.
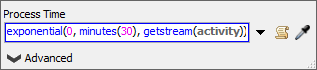
- Click the icon of the Process activity to open its properties. In the Process Time field change minutes(10) to minutes(30).
- In the Library under the HC Activity Sets group, drag a Two Staff Meet activity set into the Patient Flow process flow.
- Create a connector from the bottom edge of the MD Exam container to the top edge of the new container.
- Rename the container Consult.
- Click the icon of the Staff1 resource to open its
properties. Next to the Staff box, click the
Sampler button
and sample the RN* staff resource in the Bed Placement container
so that the field now reads Reference to RN.
- Click the icon of the Staff2 resource to open its
properties. Next to the Staff box, click the
Sampler button
and sample the MD staff resource in the MD Exam container
so that the field now reads Reference to MD.
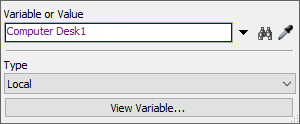
- Click the icon of the Office variable to open its
properties. Next to the Variable or Value box, click the
Sampler button
and sample the Computer Desk1 object in the 3D view.
- In the Library under the HC Activity Sets group, drag an Escort to Exit activity set into the Patient Flow process flow.
- Create a connector from the bottom edge of the Consult container to the top edge of the new container.
- Click the icon of the Staff resource to open its properties. Click the arrow next to the Staff box to open a menu. Point to Previous Staff Resource, then select RN so that the field now reads Reference to RN.
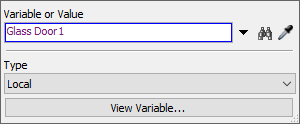
- Click the icon of the Exit variable to open its
properties. Next to the Variable or Value box, click the
Sampler button
and sample the Glass Door1 object in the 3D view.
- Press and hold the Ctrl key. Click the Release Exam Table activity in the Bed Placement container, drag it out of the stacked block and into the Escort to Exit container so that it's the first activity in the stacked block.
See Process with Staff for more information about how the activities in this activity set work together.

See Two Staff Meet for more information about how the activities in this activity set work together.
See Escort to Exit for more information about how the activities in this activity set work together.
We are doing this because we don't want to release the exam table until the patient is ready to leave.
Check to ensure that your patient flow looks similar to the image at the beginning of this step.
Consider saving your simulation model at this point.
Step 5 Test Your Model
As you watch the 3D model, the patient is escorted from the waiting room to the scale and then to to an exam table. A doctor then examines the patient and consults with the nurse. The patient is then escorted to the exit:
Notice also that the nurse and patients walk through the floor plan walls, taking the shortest distance between two points. You'll learn how to fix this problem in a future tutorial.
Conclusion
Up to this point, you've created a simulation model of a health care clinic in which a patient is seen by a doctor and then leaves. In the next tutorial we'll add a branching path to the flow so that the patient recieves one of two possible tests. Continue on to Tutorial Task 1.3 - Add Transports and Equipment.