Using Lists for Task Logic
Overview
As was discussed in the topic Key Concepts About Task Sequence Logic, using lists is one of the most powerful mechanisms for implementing job dispatching. This topic teaches you how to implement one specific example of dispatching using lists, namely using a task sequence list.
This topic presents an example to solve the job dispatching problem. While this example uses process flow for the task sequence generation mechanism, it will also work with other task generation strategies.
| Job Dispatching | Who or what will perform what jobs? |
|---|
In this scenario, the core dispatching decisions are solved by orienting a list as a list of jobs. In this case, a job is represented by a task sequence, as follows:
| Dispatching Using a List of Task Sequences | |
|---|---|
| Resource Selection | Resource selection is performed when a task sequence is created and pushed onto the list. If there are resources waiting on the list's back orders, those back orders will be fulfilled based on the Back Order Queue Strategy. |
| Job Selection | The set of active jobs is managed by pushing task sequences onto the list. Job selection is done when a resource pulls from the list, wherein the pull query defines selection requirements and prioritization. Since the List is the gatekeeper to acquiring resources, an individual task executer's task sequence queueing logic is not a factor. |
The following is a high-level overview of how you would set up this kind of system:
- Create a global task sequence list - In the Toolbox, you'll create a task list that will store task sequences created by the process flow.
- Add triggers to task executers in the 3D model - You'll add the On Resource Available trigger to all the task executers. This trigger will fire whenever the task executer is free to work on a new task sequence. You'll add instructions that will tell the task executer to pull tasks from the global list when that trigger fires.
- Create task sequences in the process flow - You'll create a complete set of tasks and put them inside a task sequence. Then you'll dispatch the task sequence to the global list you created.
- Set up standard 3D task logic - You won't need to make any changes to how you assign standard 3D tasks to task executers. You can use the normal procedures for creating these types of tasks.
See How Task Executers Handle Tasks for more information about task sequences and how task executers handle them.
Creating a Global Task Sequence List
The global task sequence list will act as the job board from which the task executers will pull the list of tasks they need to do.
To set up a global task sequence list:
- In the left pane, click the Toolbox tab to switch to the Toolbox.
- Click the Add button
 to open a menu. Point to
Global List, then select Task Sequence
List.
to open a menu. Point to
Global List, then select Task Sequence
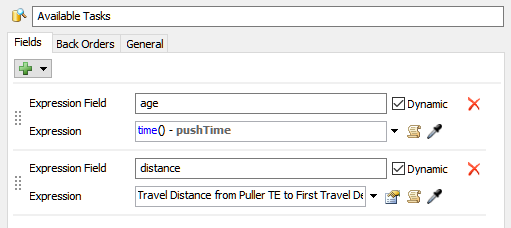
List. - In the list properties, change the name of the list to something distinct that you'll remember, such as Available Tasks.
- If needed, add or remove any custom fields to help track your list entries.
- Press the OK button to save the changes and close the window.
- Confirm that the list you just created now appears in the Toolbox.
See Key Concepts About Lists for more information about lists in general.
Adding On Resource Available Triggers
After creating the global task sequence list, you'll need to add an On Resource Available trigger on all of the task executers in the 3D model. Then you'll set the trigger to pull from this list whenever they're available to work on tasks. To add this trigger:
- In the 3D model, click the task executer to open its properties on the right.
- Under the Triggers section, click the
Add button to open
a menu. Select On Resource Available.
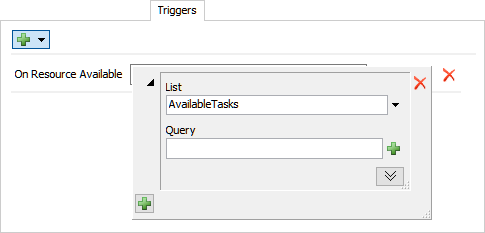
- Next to the On Resource Available box, click the
Add button
to open a menu. Point to Use List, and then select
Pull from Task Sequence List.
- In the picklist properties window, click the List menu and select the name of the global list the task executer should use.
- If needed, add a query to the Query box to instruct the task executer which task sequences should be pulled before others.
- Repeat the previous steps for all of the task executers in the 3D model.
See Key Concepts About Events for more information about triggers in general.
Creating a Task Sequence in Process Flow
The Process Flow library includes the Create Task Sequence activity.

You can use this activity to create task sequences. You'll use the Create Task Sequence activity at the beginning of a set of process flow tasks to create a task sequence and assign the task sequence a name. Next, you'll add the task activities in the order they should be completed.
To create a task sequence in process flow and push it to a global task sequence list:
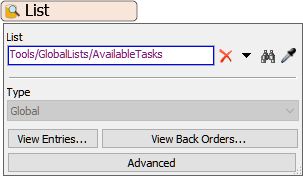
- Add a List shared asset to the process flow. In the List box, use the menu to link it to the global task sequence list you created earlier.
- Think through which event(s) in the simulation model will trigger the creation of token that will then create the task sequence. Perhaps you could use an Event-Triggered Source that listens for a specific event to occur, such as an item entering a queue that needs to be transported.
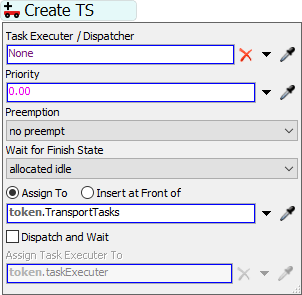
- Add a Create Task Sequence activity to the process
flow. In the activity's properties, next to the Task Executer /
Dispatcher box, click the Delete button
 to ensure there is no currently selected
task executer.
to ensure there is no currently selected
task executer. - If needed, you can assign values for the Priority and Preemption properties for the entire task sequence.
- In the box under the Assign to option, delete the part
of the code that says
taskSequenceand replace that with the custom name you want to give your task sequence. For example, the final code could read something such astoken.MyTaskSequenceortoken.TransportTasks. - Clear the Dispatch and Wait checkbox. This will make the token immediately continue to the next Push to List activity.
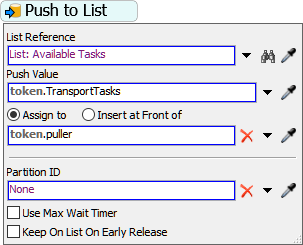
- After the create task sequence activity, add a Push to List activity that will push the task sequence to the global task sequence list. Link the activity to the list in the process flow (which should be tied to the global task sequence list).
- In the Push Value box, make sure that you assign the value to the name of the custom task sequence you created earlier.
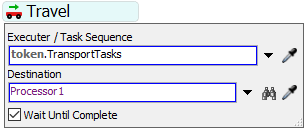
- Add the rest of the task activities that will comprise the task
sequence. In each task activity's properties, make sure that you change the
Executer / Task Sequence box to add the task to
the custom task sequence you created earlier, e.g.
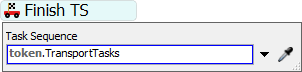
token.TransportTasks. - Finally, add a Finish Task Sequence activity.
In the activity's properties, make sure that you change the
Task Sequence box to reference
the custom task sequence you created earlier, e.g.
token.TransportTasks.
Try completing Task Logic Tutorial 1.4 for a hands-on example of this system.