Task 1.3 - Add Transport and Equipment Objects
Task Overview
In this task, you'll build out two different possible treatment tracks for the patient. These different treatment tracks will teach you how to use transports and equipment, which are a special class of objects in FlexSim Healthcare models.
In the first track, a tech will get an EKG machine from a storage area to monitor the patient. In the second track, the patient will be transported to the x-ray room for radiology and then transported back to the exam room using a wheelchair. You'll build and test each track in this tutorial.
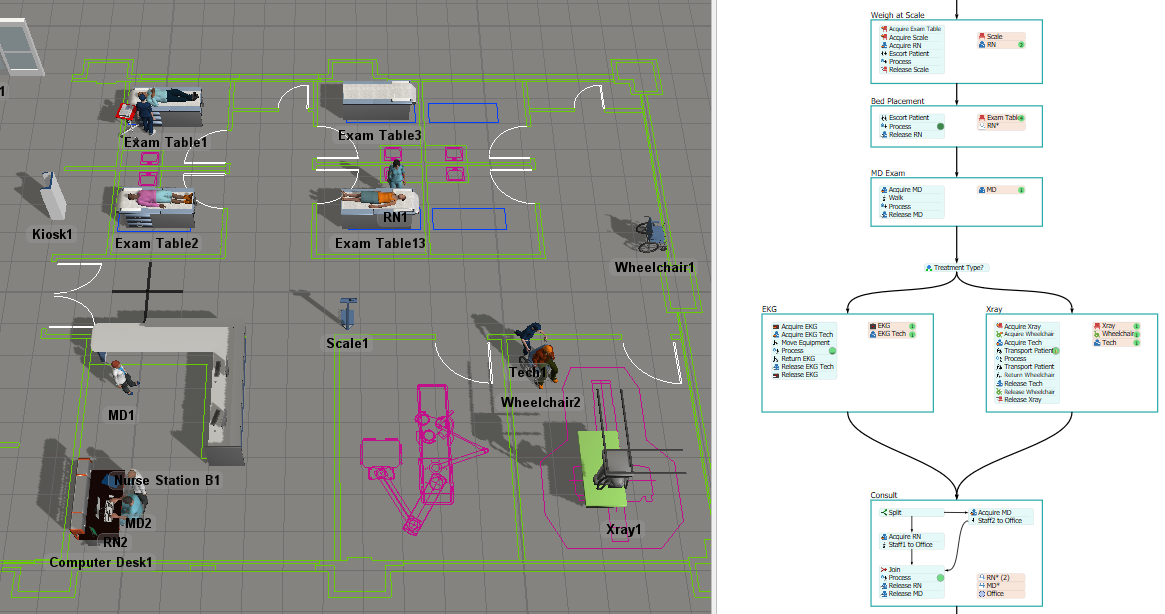
When you're finished, your simulation model should look similar to the following image:
Step 1 Add Additional Locations, Equipment, and Staff
In this step, you'll add additional location objects and staff objects to the 3D model. You'll also add some transport objects to the model (wheelchairs) and an equipment object (an EKG machine).
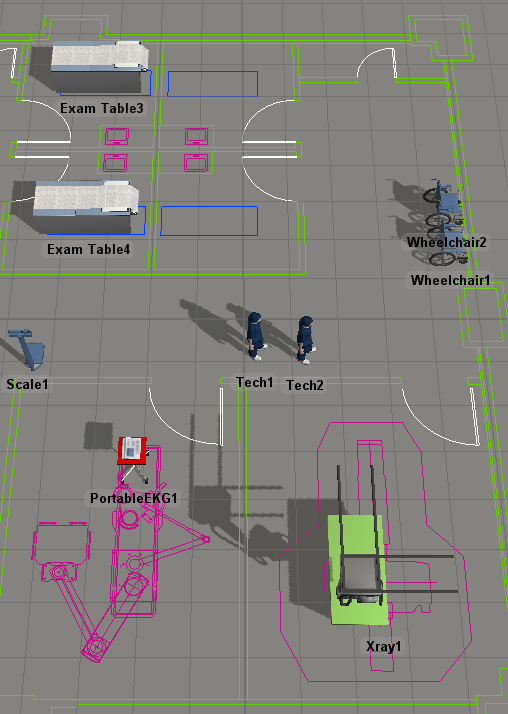
Lastly, you'll also add some additional staff members to this model and create a group for the new staff members. When you're finished, your simulation model should look similar to the following image:
To make these changes:
- Make sure the 3D model is open and active and that you are in the FlexSim Healthcare environment.
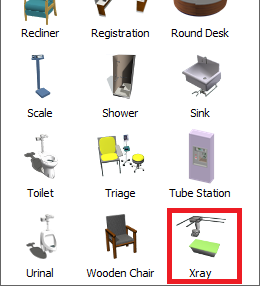
- In the Library under the Healthcare group, click the Location object to open a menu of location objects. Drag an Xray object into the model. (Use the image at the beginning of this step as a guide on the placement of objects.)
- Click Xray1 to select it. In Properties, change the
Z-rotation
 to
to 90.00. - In the Library under the Healthcare group, click the
Transport object to open a menu. Click (don't drag) the
Wheelchair to enter Create Objects mode. Your mouse pointer
will change to the Create Objects icon
 when you're in Create Objects mode. Click the area in the model where you want to add
the first wheelchair.
when you're in Create Objects mode. Click the area in the model where you want to add
the first wheelchair. - While still in Create Objects mode, click in the model to add a second Wheelchair.
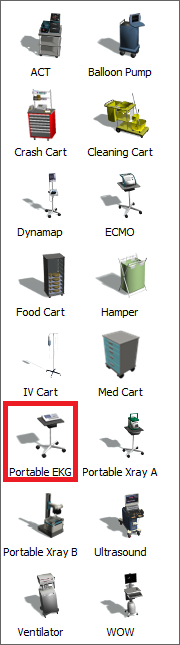
- In the Library under the Healthcare group, click the Equipment object to open a menu of location objects. Drag a PortableEKG object into the model.
- In the Library under the Healthcare group, click the Staff object to open a menu. Click (don't drag) the Tech to enter Create Objects mode. Click in the model to create the first Tech.
- While still in Create Objects mode, click in the model to add a second Tech.
![]()
Check that your simulation model looks similar to the image at the beginning of this step.
Step 2 Create Additional Object Groups
Since you added several new 3D objects to your simulation model in the previous step, you need to create object groups for those new objects in order to make your model scale well. In this step, you'll create an equipment group named EKGs for EKG machine, a transport group named Wheelchairs, and a staff group named Techs.
To create additional object groups:
- Press and hold down the Shift key while using your mouse to draw a box around all of the Wheelchair objects. A red box will appear around the Wheelchairs to show they are selected.
- Right-click Wheelchair1 to open a menu. Point to Transport Groups, then select Add to New Group to open a group properties window.
- In the Group Name box, rename this group Wheelchairs. Close the group window.
- Press and hold down the Shift key while clicking a blank area in the 3D model with your mouse to de-select everything.
- In the 3D model, press the Ctrl button and click Tech1 to select it. While still pressing the Ctrl key, click Tech2 to select it as well. Right-click Tech1 to open a menu. Point to Staff Groups, then select Add to New Group to open a group properties window.
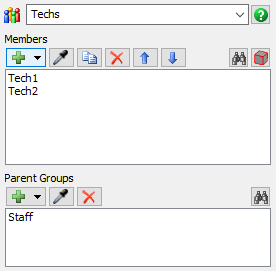
- In the Group Name box, rename this group Techs. Close the group window.
- Press and hold down the Shift key while clicking a blank area in the 3D model with your mouse to de-select everything.
- In the 3D model, right-click PortableEKG1 to open a menu. Point to Equipment Groups, then select Add to New Group to open a group properties window.
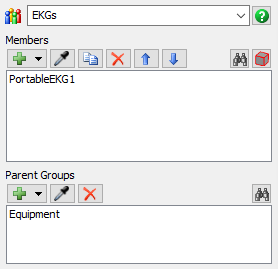
- In the Group Name box, rename this group EKGs. Close the group window.

Consider saving your model at this point.
Step 3 Use Equipment in a Treatment Phase
In this step, you'll learn how to work with equipment in FlexSim Healthcare models. You'll add a treatment option in which a Tech will get an EKG machine from its storage area and use it to test the patient. When the patient is done being tested, the Tech will return the EKG machine to its storage closet.
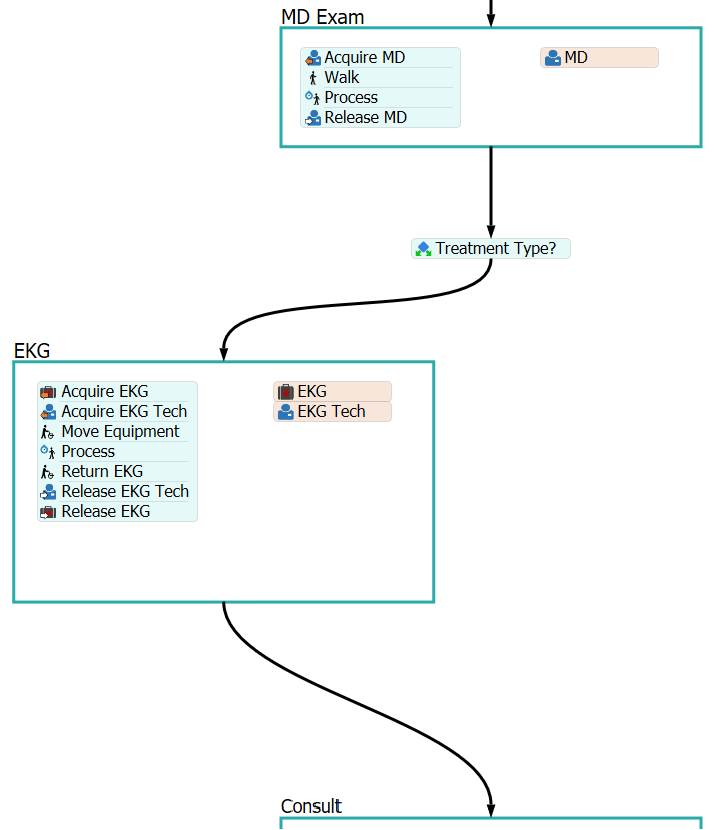
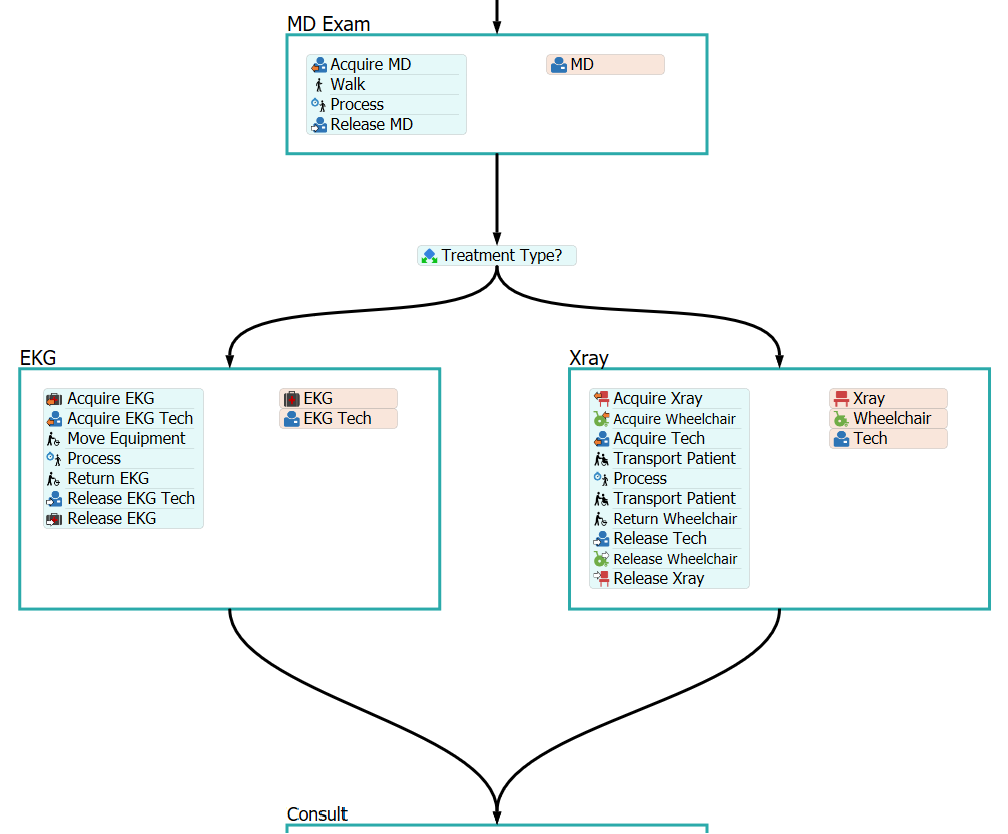
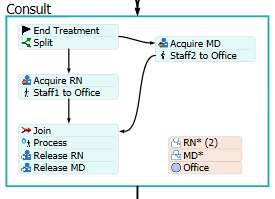
When you're finished, the process flow will look similar to the following image:
To build this logic:
- In the PatientFlow process flow, press and hold down the Shift key while using your mouse to draw a box around the Consult and Escort to Exit containers. The containers will highlight yellow to show they are selected.
- Click on one of the highlighted containers and then drag downwards to move the containers down so we'll have some room to insert some more activities.
- From the Library under the Basic group, drag a Decide activity into the space we just made.
- Rename this activity Treatment Type?.
- Find the connector between the MD Exam and Consult containers. Click on the arrow end of the connector and drag it to the top edge of the Treatment Type? activity.
- Add a Move Equipment then Process activity set (under HC Activity Sets).
- Create a connector from the bottom edge of the Treatment Type? activity to the top edge of the new container.
- Rename this container EKG.
- Rename the Equipment resource EKG.
- Rename the Staff resource EKG Tech.
- Create a connector from the bottom edge of the EKG container to the top edge of the Consult container.
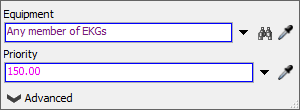
- Click the icon of the EKG activity to open its
properties. Next to the Equipment box, click the
Sampler button
 and sample the EKG1 object in the 3D view. Choose
the EKGs group option from the menu so that the field now reads Any member of EKGs.
and sample the EKG1 object in the 3D view. Choose
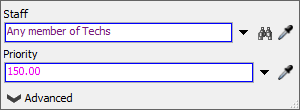
the EKGs group option from the menu so that the field now reads Any member of EKGs. - Click the icon of the EKG Tech activity to open its
properties. Next to the Staff box, click the
Sampler button
and sample one of the Tech objects in the 3D view. Choose
the Techs group option from the menu so that the field now reads Any member of Techs.
- From the Library under the HC Sub Flows group, drag a Move Equipment activity into the process flow and insert it after the Process activity.
- Rename the new Move Equipment activity Return EKG.
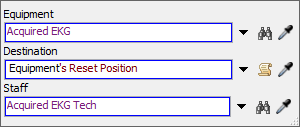
- Click the icon of the Return EKG activity to open its
properties. Next to the Equipment box, click the
Sampler button
and sample the EKG resource so that the field now reads
Acquired EKG.
- Click the arrow next to the Destination box to open a menu. Select Equipment's Reset Position.
- Next to the Staff box, click the
Sampler button
and sample the EKG Tech resource so that the field now reads
Acquired EKG Tech.
See Move Equipment then Process for more information about how the activities in this activity set work together.
Save, then reset and run the simulation model.
After the MD Exam phase, a Tech brings the EKG machine to the patient. After a brief delay, the Tech then returns the EKG to its storage room.
Step 4 Use a Transport in a Treatment Phase
In this step, you'll add the second treatment track to the PatientFlow process flow. You'll add a treatment track in which the patient is taken to get an x-ray. This treatment track will show you how to work with transport objects because the patient will need to be transported to and from the x-ray on a wheelchair.
When you're finished, the process flow will look similar to the following image:
To build this logic:
- Add a Transport Patient then Process activity set (under HC Activity Sets).
- Create a connector from the bottom edge of the Treatment Type? activity to the top edge of the new container.
- Rename this container Xray.
- Rename the Location resource Xray.
- Rename the Transport resource Wheelchair.
- Rename the Staff resource Tech.
- Create a connector from the bottom edge of the Xray container to the top edge of the Consult container.
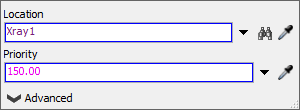
- Click the icon of the Xray activity to open its
properties. Next to the Location box, click the
Sampler button
and sample the Xray1 object in the 3D view.
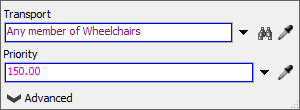
- Click the icon of the Wheelchair activity to open its
properties. Next to the Transport box, click the
Sampler button
and sample one of the Wheelchair objects in the 3D view. Choose
the Wheelchairs group option from the menu so that the field now reads Any member of Wheelchairs.
- Click the icon of the Tech activity to open its
properties. Next to the Staff box, click the
Sampler button
and sample one of the Tech objects in the 3D view. Choose
the Techs group option from the menu so that the field now reads Any member of Techs.
- From the Library under the HC Sub Flows group, drag a Move Equipment activity into the process flow and insert it after the Process activity.
- Rename the Move Equipment activity Return Wheelchair.
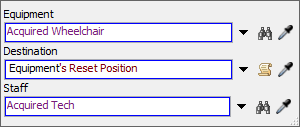
- Click the icon of the Return Wheelchair activity to open its
properties. Next to the Equipment box, click the
Sampler button
and sample the Wheelchair resource so that the field now reads
Acquired Wheelchair.
- Click the arrow next to the Destination box to open a menu. Select Equipment's Reset Position.
- Next to the Staff box, click the
Sampler button
and sample the Tech resource so that the field now reads
Acquired Tech.
- From the Library under the HC Sub Flows group, drag a Transport Patient activity into the process flow and insert it after the Process activity.
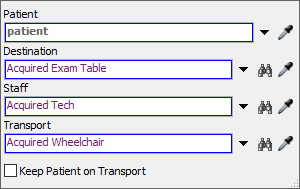
- Click the icon of the new Transport Patient activity to open its
properties. Next to the Destination box, click the
Sampler button
and sample the Exam Table resource in the
Bed Placement container so that the field now reads
Acquired Exam Table.
- Next to the Staff box, click the
Sampler button
and sample the Tech resource so that the field now reads
Acquired Tech.
- Next to the Transport box, click the
Sampler button
and sample the Wheelchair resource so that the field now reads
Acquired Wheelchair.
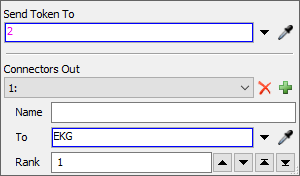
- Since you only want to test this new track right now, click the icon of the
Treatment Type? activity to open its properties. In the
Send Token To box, delete the current number and type
2.
See Transport Patient then Process for more information about how the activities in this activity set work together.
Save, then reset and run the simulation model.
After the MD Exam phase, a tech grabs a wheelchair then comes and transports the patient to the x-ray machine and takes an x-ray of the patient. The tech then returns the patient to their exam room.
Step 5 Change the Patient Arrival Schedule
Now that you've built out a fairly complex simulation model and tested it, it's time to increase the number of patients that move through the health care clinic model. In this step, you'll change the patient arrival schedule on the Date Time Source activity in the Arrivals process flow. Patients in a walk-in clinic often arrive at varying rates depending on the time of day. The Date Time Source activity will allow you to define the number of patients arriving within different time periods of the day.
To change the patient arrival pattern:
- Open the Arrivals process flow.
- Click the icon of the Source activity to open its properties. Click the Edit Arrivals button to open this activity's expanded properties window.
- In the Rows box change the number of rows from 1 to 18.
- Close the properties window.
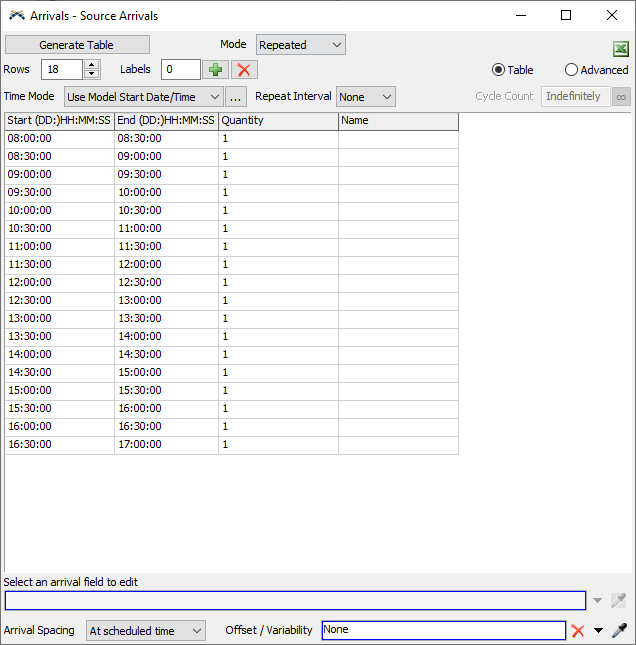
Save your model. Reset and run the simulation model. A new patient should now arrive every 30 minutes.
Step 6 Assign Patients to Different Treatments
Now that you've built and tested each of the different treatment tracks, we'll randomly distribute patients between the two treatment tracks. We could do this directly in the Treatment Type? decide activity, but we're going to create two different labels sets and have the decide activity read the value of the Treatment label off the patient.
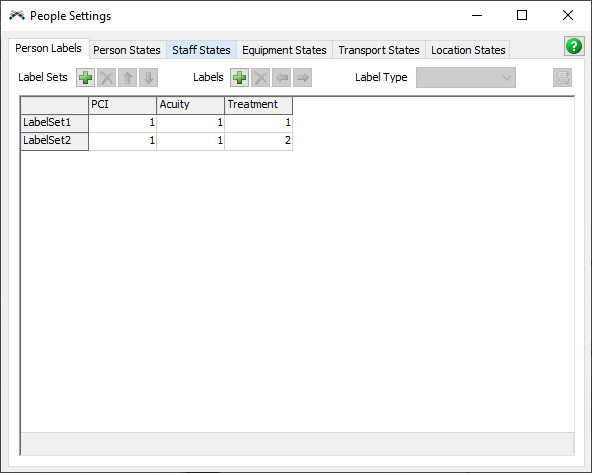
- Open the Toolbox in the left pane. Find the People Settings object and double click on it to open its properties.
- Add a label set.
- Add a number label and rename it Treatment.
- Set the value of Treatment to be 1 for LabelSet1 and 2 for LabelSet2.
- Close the window.
- Open the Arrivals process flow.
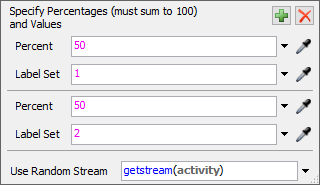
- Click the icon of the Create Patient activity to open its properties. Click the arrow next to the Label Set box to open a menu. Select Label Set by Percentage.
- Fill out the popup so that 50% of patients are assigned the first label set and the other 50% are assigned the second label set.
- Open the Patient Flow process flow.
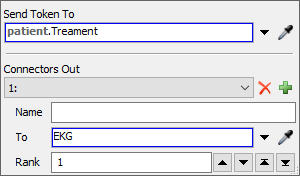
- Click the icon of the Treatment Type? activity to
open its properties. In the Send Token To box type
patient.Treatment.
Save, then reset and run the simulation model:
As you watch, notice that the patients will randomly be assigned to one of the two different treatment tracks.
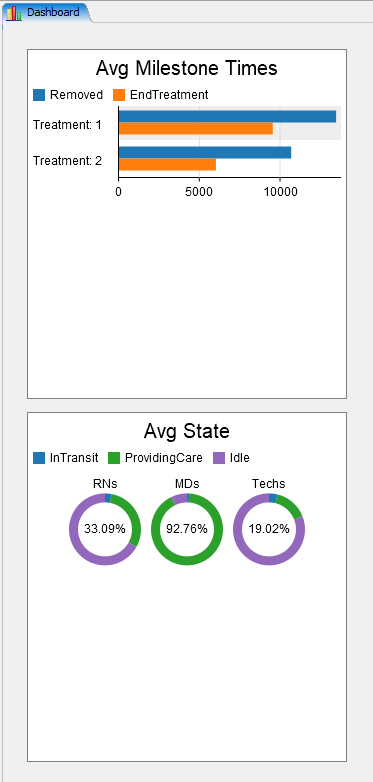
Step 7 Add Charts
Now that we have the patient flow working the way we want, take a look at displaying data collected by this model:
- Open the Patient Flow process flow.
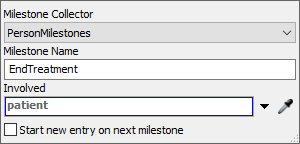
- From the Library under the Basic group, drag a Milestone activity into the process flow and insert it before the Split activity in the Consult container.
- Rename this activity End Treatment.
- Open its properties and in the Milestone Name box enter EndTreatment.
- On the main toolbar, click the Dashboards button to open a menu. Select Add a Dashboard to create a new dashboard.
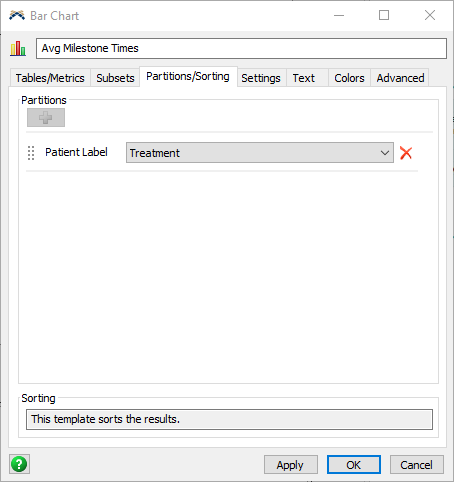
- From the Library under the People Templates group, drag a Avg Milestone Times chart into the dashboard.
- In its properties window move to the Partitions/Sorting tab.
- Add a Patient Label partition by clicking the plus button.
- Choose Treatment in the dropdown that was added.
- Click the OK button to apply the settings.
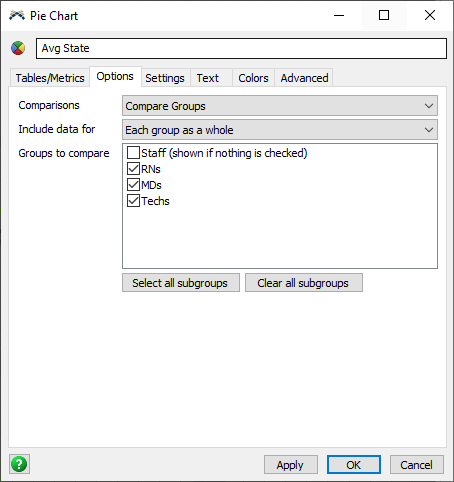
- From the Library under the Staff State Templates group, drag a (pie chart) Avg State chart into the dashboard.
- In its properties window move to the Options tab.
- In the Groups to compare list box check the RNs, MDs, and Techs boxes.
- Click the OK button to apply the settings.
Save your model. Reset and run the simulation model. The charts should display data similar to this:
Conclusion
Up to this point, the patients and staff members sometimes walk through walls and objects. In the next tutorial task, you'll learn how to fix this problem using A* navigation. Continue on to Tutorial Task 1.4 - Add A* Navigation.