Using the Toolbox
Introduction to the Toolbox
The Toolbox is the place you can go to access nearly every tool in FlexSim. (See Overview of Tools for a brief description of all the tools that are available in the Toolbox.)
The Toolbox provides a single place where you can see all of the tools and tool components you are using in your simulation model. You can also use the toolbox to manage tool components. (See What Are Tool Components? for more information.)
You'll want to get comfortable with how the Toolbox works because you'll use it to work on many different tasks as you're building your simulation model.
Overview of Tools
The following table describes the some of the major tools that are available in the Toolbox, listed in the order they appear in the Tool menu:
| Tool | Description |
|---|---|
| Global Table | Internal spreadsheets where you can import and store information that can be dynamically referenced by other tools in FlexSim. See Global Tables for more information. |
| Time Table | Schedules state changes (such as scheduled down times) for specific 3D objects in the model. See Time Tables for more information. |
| MTBF MTTR | Sets random breakdown and recovery times for groups of 3D objects in the model. See MTBF MTTR for more information. |
| Dashboard | Displays data from a simulation run in real time. See Key Concepts About Dashboards and Charts for more information. |
| Process Flow | Builds the overall logic of your model. See Overview of the Process Flow Interface for more information. |
| Global List | Used when you need to create more complex flows between 3D objects. Lists can also be used for connectionless routing, filtering flow items, task management, and prioritizing fixed resources. See Key Concepts About Lists for more information. |
| Statistics Collector | Used to get standard or custom statistics from a simulation model. See Using the Statistics Collector for more information. |
| Flow Item Bin | Customizes the visual appearance of flow items in your simulation model. See Using the Flow Item Bin for more information. |
What Are Tool Components?
This User Manual will use the term tool components in a general sense to describe a basic entity used by a specific tool.
For example, you could use the Process Flow tool to create your model's logic. Using the Process Flow tool, you can make many different process flows that each contain their own pieces of model logic. Each individual process flow would be a tool component of the Process Flow tool.
The Dashboard tool is another example. You can use the Dashboard tool to display charts and statistics while your simulation model is running. You can create more than one dashboard to display these statistics. Each individual dashboard would be a tool component of the Dashboard tool.
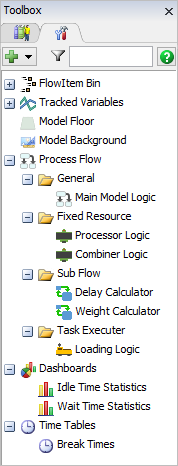
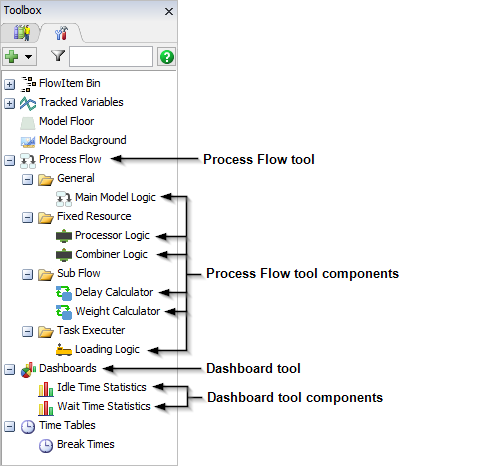
The following image shows an example of both the Process Flow tool and Dashboard tool with many different tool components in the Toolbox:
The other sections in this topic will discuss how to manage tool components in the Toolbox.
Adding a New Tool Component
You will use a slightly different method to add a new tool component depending on whether you have added that particular kind of tool component to your simulation model before now.
To add the first new tool component:
- With the Toolbox open, click the Add button
 at the top of the Toolbox. This will open a
menu of available tools.
at the top of the Toolbox. This will open a
menu of available tools. - Select the name of the tool for which you want to add a new tool component. For example, if you want to add a new process flow, you would select Process Flow from the menu. If you wanted to add a new dashboard, you would select Dashboard from the menu, and so forth.
This will create a new component. The newly created component will automatically open up in the applicable tool. See Arranging Windows and Tabs for an explanation of how you can change the display options for this tool window.
To add additional tool components in the Toolbox:
- If needed, click the Plus sign
 next to the applicable tool name to
expand and display the list of tool components that have been created so far.
next to the applicable tool name to
expand and display the list of tool components that have been created so far. - Right-click the tool name. Select Add [Tool Component] from the menu. For example, if you want to add a new patient track, you would right-click Dashboard and select Add Dashboard from the menu. The newly created component will immediately open up in the applicable tool.
Opening and Closing a Tool Component
If the tool component you want to open is not already open, you can open it using the Toolbox. (See What Are Tool Components? for a deeper explanation of what a tool component is.)
To open a tool component:
- If needed, click the Plus sign
next to the applicable tool name to
expand and display the list of tool components that have been created so far.
- Double-click the tool component you want to open from the list. The applicable tool will open with the specific tool component you just selected.
To close a tool component, click the X on the top right corner of the tool.
Renaming a Tool Component
To rename a tool component:
- If needed, click the Plus sign
next to the applicable tool name to
expand and display the list of tool components that have been created so far.
- Right-click the tool component you want to rename. Select Rename from the menu.
- Type the new name of the tool component and press Enter. The tool component should now have a different name.
Copying a Tool Component
It might be useful to copy a tool component if you want to create two very similar components with subtle differences. For example, if you want two process flows to start with the same five activities, you could create a copy of the first process flow and use the copy to create the second process flow to save time.
To create a copy of a tool component:
- If needed, click the Plus sign
next to the applicable tool name to
expand and display the list of tool components that have been created so far.
- Right-click the tool component you want to copy. Select Duplicate from the menu.
By default, the new component will use the name of the component you originally copied, but it will have a _2 at the end of its name, such as ProcessFlow_2. See Renaming a Tool Component for information on how to change the component's name.
Reorganizing Tool Components
If you want to change the order that components are displayed in the Toolbox:
- If needed, click the Plus sign
next to the applicable tool name to
expand and display the list of tool components that have been created so far.
- Right-click on the component you want to re-organize and, select one of the
options depending on how you want to move the selected component:
- Move Up - Moves the selected component up one position in the list.
- Move Down - Moves the selected component down one position in the list.
- Move to Top - Moves the selected component to the first position in the list.
- Move to Bottom - Moves the selected component to the last position in the list.
Deleting a Tool Component
If you want to delete a tool component:
- If needed, click the Plus sign
next to the applicable tool name to
expand and display the list of tool components that have been created so far.
- Right-click on the tool component you want to delete and select Delete from the menu.