Task 4.3 - Create Clones Using Process Flow Instances
Task Overview
In the previous tutorial task, you used the copy and paste method to create one clone of your sticker system. While the copy and paste method is intuitive, it doesn't scale well for large models. Not only is it tedious to update all the properties of every clone, it also greatly increases the chance that you might forget to update a specific property. Failing to update one or more properties could cause your model to break and increase the amount of time needed to troubleshoot the model.
In this task, you'll learn a more efficient method for creating clones using process flow instances. The following subsections will explain some of the key concepts related to these two tools.
Key Concepts About Process Flow Instances
As you know, process flows control the logic of your simulation system. In the first tutorial task, you created a general process flow. General process flows are useful for creating the global logic that will affect multiple objects in your 3D model.
However, if you may have noticed, the process flow logic you created in the previous tutorial tasks primarily controls the sticker machine, which is a fixed resource object. For that reason, it might be better to use an object process flow. Fixed resource process flows allow you to attach a fixed resource object to a specific process flow and run its own instance of that process flow. In other words, you could attach each sticker machine to an object process flow and each individual machine will run its own copy of the process flow logic. Think of the object process flow as the template for all the different copies of the logic that will be running on each processor. See Types of Process Flows and Process Flow Instances for more information.
In this tutorial task, you'll copy the logic from your general process flow into a fixed resource process flow and then attach a clone of your sticker machines to it. After you test the new process flow to ensure it's working, you'll then create additional clones (instances) of this process flow by attaching additional sticker machine clones to it. By the time you're finished with the next two tutorial tasks, you should have a fairly good understanding of the practical applications for process flow instances.
Step 1 Create Another Clone of the 3D Objects
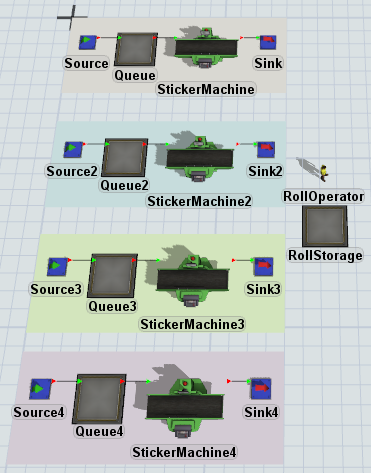
In this task, you'll create an additional clone of the sticker system. When you're finished, your new sticker system should look like the following image:
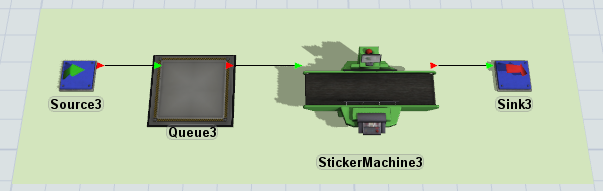
To create this copy:
- In the 3D model, hold the Shift key and draw a box around Plane2 and all the objects inside it. A red box will appear around the selected objects.
- Press Ctrl+C to copy it to the clipboard.
- Position your mouse in the approximate area of the model where you want to place the copied objects. Press Ctrl+V to paste the plane.
- Hold the Shift key and click in a blank area of the model to deselect the objects.
- Make sure the third Plane is selected. In Properties, change its name to Plane3.
- Then, click the arrow next to the color box to open the color selector. Select the lightest green color.
- Rename all of the objects inside Plane3 so that there is a 3 after the object name. For example, Source should become Source3, Queue should become Queue3, etc.
Check to make sure your 3D model looks similar to the image at the beginning of this step.
Step 2 Create an Object Process Flow
In this step, you'll create the new object process flow. Then, you'll copy all the activities from the general process flow over to the new process flow. Lastly, you'll attach Sticker Machine 3 to this process flow:
- On the toolbar, click the Process Flow button to open a menu. Point to Add an Object Process Flow, then select Blank.
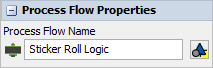
- In Properties, double-click the text in the Process Flow Name box. Type Sticker Roll Logic and press Enter to change the name of the process flow.
- Click the ProcessFlow tab to return to your original process flow.
- Click the Sticker Roll Refill shape to select it.
- Press Ctrl+C to copy it to the clipboard.
- Click the newly created Sticker Roll Refill tab. Position your mouse in the approximate area of the process flow where you want to place the copied shape. Press Ctrl+V to paste the shape.
- Repeat steps 2-5 for the List: Sticker Rolls in Use asset and the Sticker Roll Usage shape.
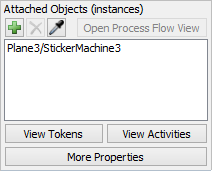
- Click inside a blank space on the Object Process Flow to ensure nothing is selected and this process flow is active.
- In Properties:
- Under Attached Objects (instances) click the
Sampler button
 to enter sampling mode.
 - In the 3D model, click StickerMachine3 to attach it to this process flow.
- Under Attached Objects (instances) click the
Sampler button
Consider saving your simulation model.
Step 3 Edit the Process Flow Activities
In this step, you'll update the properties in your process flow so that it can easily be applied to multiple process flow instances at one time. You'll update the List: Sticker Rolls in Use so that it is a local list rather than a global list.
In this step, you'll use the current keyword for the first time. The current keyword references a token's instance object. In this case, you'll use the keyword current to set the Roll Operator's destination when it is ready to load a new sticker roll onto the sticker machine. Using current will tell the Roll Operator to travel to the object that is attached to this specific instance of the process flow. Using this keyword will ensure that the destination changes based on which sticker machine is attached to a specific instance.
To create this functionality:
- In the Sticker Roll Logic object process flow,
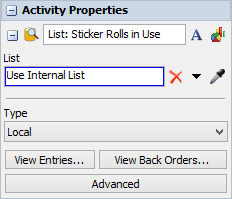
click the List: Sticker Rolls in Use asset to select it. In
Properties:
- Click the Type menu and select Local.
- In the Sticker Roll Refill shape, click the
Push to List: Sticker Rolls to select it. (Notice that this
activity is still linked to the list in the original process flow.) In
Properties:
- Next to the List Reference box, click the
Sampler button
to enter sampling mode.
- Click List: Sticker Rolls in Use to link it to the Push to List activity.
- Next to the List Reference box, click the
Sampler button
- Repeat the previous steps for the two Pull from List activities in the Sticker Roll Usage process flow.
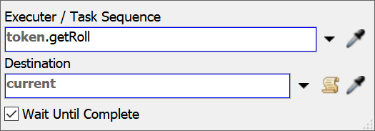
- Click the stacked block of Task Sequence activities in the Sticker Roll Refill process flow to select them.
- In Properties under Travel: Install New Roll, click the arrow next to the Destination box to open a menu. Select current (instance object) from the menu.
- Click the first stacked block in the Sticker Roll Usage process flow to select it.
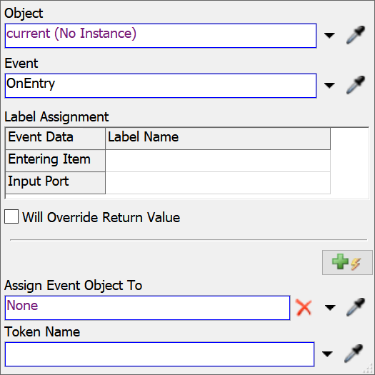
- In Properties under Source:
Flow Item Enters:
- Click the arrow next to the Object button to open a menu.
- Select current (instance object) from the menu.
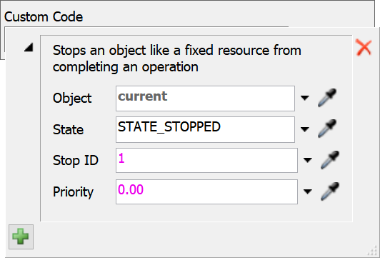
- Click the second stacked block in the Sticker Roll Usage
process flow to select it. In Properties under
Custom: Stop Machine:
- Click the Edit Properties button
 next to the
Custom Code box.
next to the
Custom Code box. - Click in the Object box, delete the current
text and type
current.
- Click the Edit Properties button
- Repeat the previous step for the Custom Code: Resume Machine activity.
Consider saving your simulation model.
Step 4 Run and Test the Simulation Model
Now it's time to test the model again to make sure that it's running correctly. Before you run the model, open the list entries for the first and third sticker systems.
Now reset and run your model and watch it in action.
The sticker machine systems should operate nearly identically.
Step 5 Create Five More Clones
In this step, you'll create five more clones of the sticker system (for a total of 8). Since you won't need to update very many properties, you'll hopefully see how much easier it is to create these clones using process flow instances compared to the copy and paste method. You'll also move the RollStorage queue and RollOperator so that they are centered in between the eight sticker systems. When you are finished, your model should look similar to the following image:
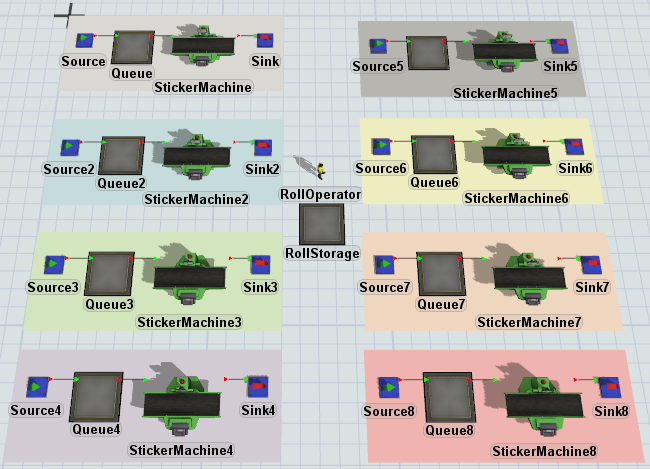
To create these clones:
- In the 3D model, move the RollStorage queue and the RollOperator so that they are to the right of the sticker systems and centered in between Plane2 and Plane3.
- Hold the Shift key and draw a box around Plane3 and all the objects around it. A red box will appear around the selected objects.
- Press Ctrl+C to copy it to the clipboard.
- Position your mouse in the approximate area of the model where you want to place the copied objects. Press Ctrl+V to paste the plane.
- Hold the Shift key and click in a blank area of the model to deselect the objects.
- Make sure the fourth Plane is selected. In Properties, change its name to Plane4.
- Then, click the arrow next to the color box to open the color selector. Select the lightest purple color.
- Rename all of the objects inside Plane4 so that there is a 4 after the object name. For example, Source3 should become Source4, Queue3 should become Queue4, etc.
- Click a blank area inside of the Sticker Roll Logic process flow to make sure the process flow is active and nothing is selected.
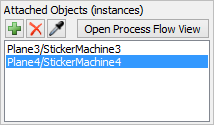
- In Properties under Attached Objects, verify that Plane4/StickerMachine4 is listed.
- Repeat the previous steps until you have 8 sticker machine systems in total.
Consider saving your simulation model.
Step 6 Run and Test the Model One Additional Time
Now it's time to test the model one more time to make sure that it's running correctly. Again, you'll likely want to open the list entries to view them. However, now that you're using process flow instances, the process for opening the list entries for sticker systems 3-8 is slightly different, as described in the following tip box:
Now reset and run your model to watch it in action.
The eight sticker machine systems should operate nearly identically.
How Process Flow Instances Work During a Simulation Run
By default, you'll only see the main object process flow during a simulation run. To view individual instances of the process flow (such as for Sticker Machine 4 or 5, etc.):
- Click a blank space inside the Sticker Roll Refill Logic process flow to make sure it is active and nothing is selected.
- In Properties, under Attached Objects, click the specific process flow you'd like to view to select it.
- Press the Open Process Flow View button to open the process flow as an additional tab in the process flow view.
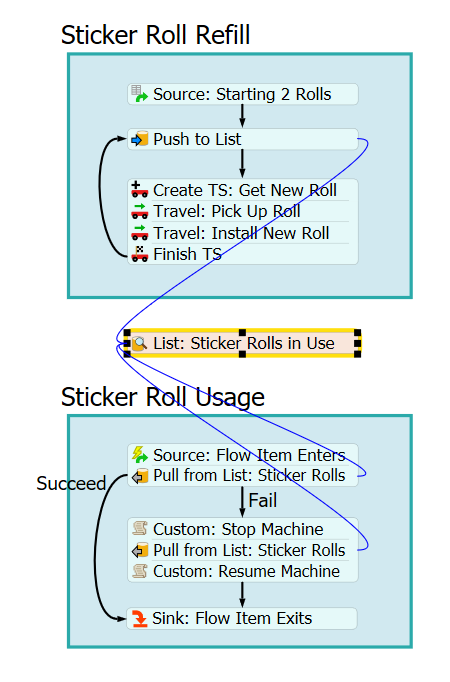
The following image shows a few different process flows while this simulation runs. In the top left corner, you can see the Sticker Roll Logic process flow, which is the main process flow that controls all other instances of the process flow. You can also see the specific instances of the process flows for Sticker Machines 5, 6, and 7.
Notice that the main process flow shows the tokens for all the instances at one time. Sticker Machine 6 runs out of stickers first and initiates the task sequence. Then Sticker Machine 7 is next, then some other sticker machines go until finally Sticker Machine 5 goes. Notice they correlate with tokens in the main process flow:
Conclusion
Hopefully you can already see why it's easier to clone models using process flow instances as opposed to the cut and paste method. When you use the cut and paste method, you have to update several different settings at a time, which increases the possibility that you could make a mistake. It could also possibly slow down your model unnecessarily.
But when you use process flow instances and process flow variables, everything is much easier. After you've set up the initial model and process flow, all you have to do is create clones and update a few of the minor settings. The chances of making an error are much smaller.
In the next tutorial task, you'll also see how much easier it is to modify the original process flow and update all instances at the same time. Continue on to Tutorial Task 4.4 - Change Instances Simultaneously.