Task 1.1 - Use an Activity Set
Task Overview
FlexSim Healthcare's 3D objects and process flow activities make it easy to build a variety of health care simulation models, such as hospitals, emergency rooms, clinics, etc. In this tutorial task, you'll learn about the basics of building a FlexSim Healthcare (HC) model. You'll learn how to:
- Switch to the FlexSim Healthcare environment
- Add a floor plan to a 3D model
- Add locations to your 3D model
- Build a process flow that will create people inside the 3D model
- Use an activity set in a process flow for faster logic building
To teach you how to use the FlexSim Healthcare 3D objects and process flows, you'll build a portion of a walk-in health care clinic. In this tutorial task, you'll only build the section of the system that handles new patient arrivals. You'll add the necessary objects and create the basic behavior of a patient that arrives at the clinic and registers at a kiosk.
When you're finished with this task, your model will look similar to the following image:
Step 1 Add a Floor Plan
In this step, you'll create a new model and switch to the FlexSim Healthcare environment. Technically, this step is unnecessary because you can access all the same 3D objects and process flow activities without being in this environment. For example, you can access the FlexSim Healthcare 3D objects in the Library under the People group and you can access the FlexSim HC process flow activities in the Library in various People groups near the bottom of the process flow library.
However, when you switch to the FlexSim Healthcare environment, those specific 3D objects and process flow activities will move to the top of their respective libraries, making them easier to access. The overall interface, the main toolbar, and organization of objects in the library also becomes simpler and more streamlined for building health care models.
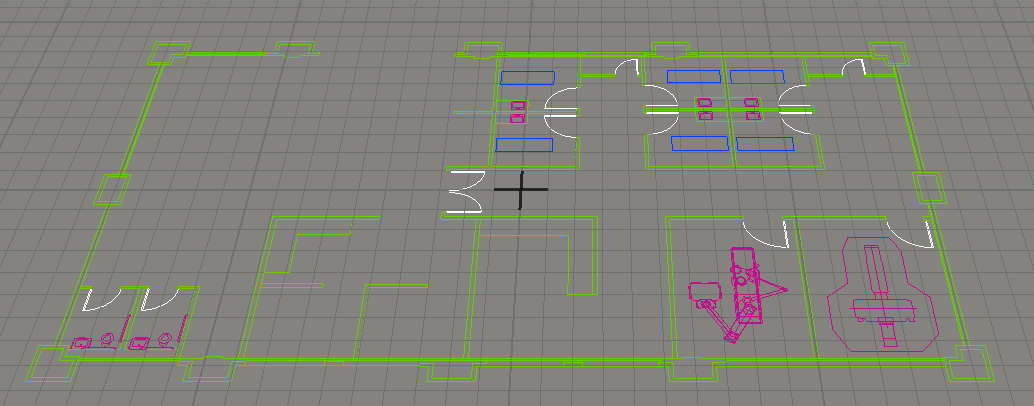
After switching to the Healthcare environment, you will add a floor plan of the clinic that you will simulate in this tutorial. This floor plan was included with FlexSim when you installed the software. When you're finished adding the floor plan, your model should look similar to the following image:
To switch to the FlexSim Healthcare environment and add a floor plan:
- Create a new model using the default settings.
- In the top right corner of the main window (above Properties), click the
Change Environment button
 to open a menu. Select
Healthcare to switch to the FlexSim Healthcare
environment.
to open a menu. Select
Healthcare to switch to the FlexSim Healthcare
environment. - On the main toolbar, click the Floor Plans button to open a menu. Select Add a Floor Plan to add a new floor plan and open its Model Background Properties window.
- In the Background tab, next to the File name box click the Browse... button to open your computer's file directory.
- Navigate to your computer's Documents folder, then to the FlexSim 2020 Projects folder. Double-click the ER_small.dwg file to select it.
- You'll use the default settings for the drawing's spatials.
- In the Layers tab, you can click the colored box next to any of the layers to change the color of that layer.
Check to ensure your 3D model looks similar to the image in the beginning of this step.
Step 2 Add Locations to Your 3D Model
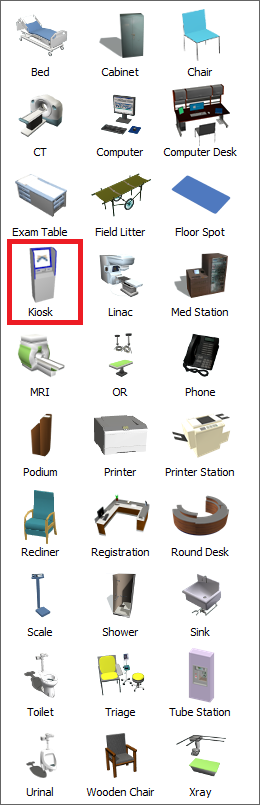
The FlexSim Healthcare 3D Library has a set of objects that are specifically designed for building health care models. In this step, you'll learn how to add FlexSim Healthcare locations and multi-locations to a 3D model.
If you're familiar with FlexSim in general, locations are similar to fixed resources for flow items in the standard FlexSim environment. Patients will move to these locations and interact with them based on the type of object they are. Usually the interaction will involve changing something about the patient's visuals or animations while they arrive at, use, or exit the location. For example, when patients interact with a chair, it will animate them sitting in a chair.
You'll also add a multi-location to your 3D model in this step. A multi-location is a location that contains a group of related locations. When a patient attempts to acquire the multi-location, any of the individual locations in this group could be acquired. In this model, you'll add a chairs multi-location to represent chairs in a waiting room area. Each individual chair can potentially be acquired by the patients, but you don't need to add each chair to the model; you can simply add the group of chairs.
At this point, you'll just build the registration area of the model, which will include an entrance and exit for patients, a registration kiosk where they will sign in when they arrive, and a waiting area. When you're finished, your 3D model will look similar to the following image:
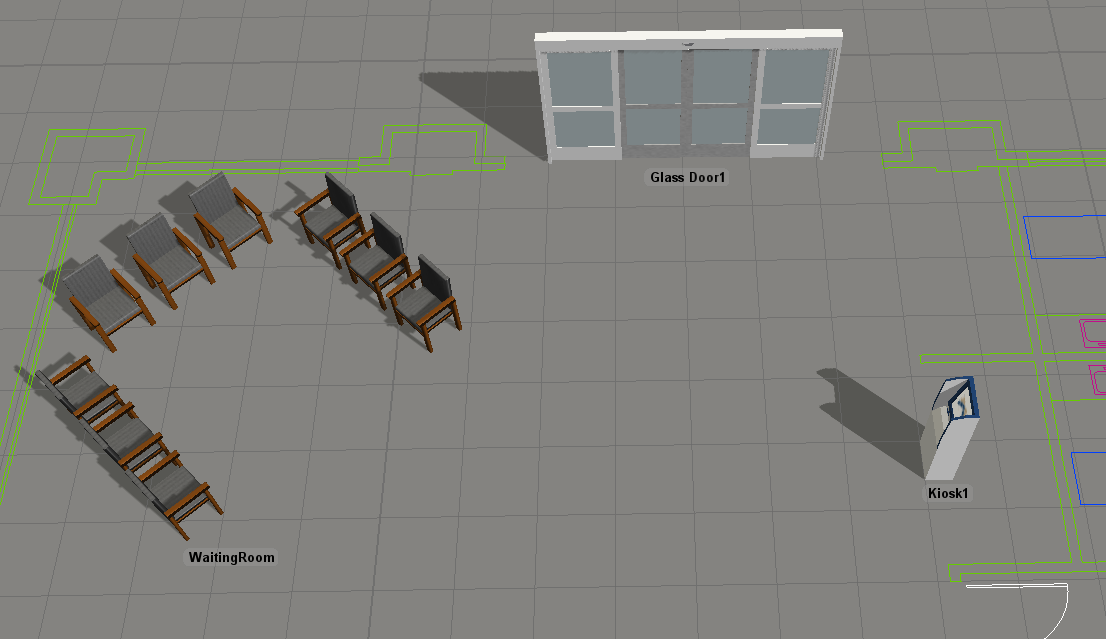
To add these locations to your model:
- In the left pane, click the Library tab to open the Library.
- Under the Healthcare group of objects, click the Location object to open a menu of location objects. Drag a Kiosk object into the 3D model. (Use the image at the beginning of this section as a guide for the placement of objects.)
- Rotate the kiosk 180 degrees. (Right-click and then drag the blue sizer arrow to
rotate the object or use Properties to change the Z-rotation
 to
to 180) - In the Library under the Healthcare group, click the Prop object to open a menu of prop objects. Drag a Glass door (under the Doors group) into the 3D model.
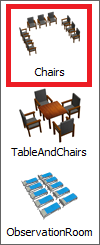
- In the Library under the Healthcare group, click the MultiLocation object to open a menu of multi-location objects. Drag the Chairs object into the model.
- In the 3D model, click the Chairs1 multi-location to select it. In Properties, rename the object WaitingRoom.
- Rotate the waiting room 45 degrees.

Check to make sure your 3D model looks similar to the image shown at the beginning of this step.
Step 3 Add a Patient Flow
In this step, you'll learn how to set up process flows. The Process Flow tool allows you to build a flowchart of your model's logic. Inside that flowchart, you'll add activities that contain small chunks of pre-programmed logic or instructions. When a simulation model runs, small green circles called tokens move through the process flow activities, performing each activity's instructions.
In this step, you'll create two process flows. One will be a patient process flow that you'll use to control how the patient interacts with the 3D model after it has been created. The second will be a general process flow named Arrivals that will control how frequently patients will be created inside the 3D model.
Inside the Patient Flow process flow, you'll add activity sets that direct the patient's flow through the model. FlexSim Healthcare models have several activity sets you can use to build your simulation model's logic. Activity sets are groups of process flow activities that have been pre-programmed to accomplish some of the most common logical tasks in FlexSim Healthcare models. See Activity Sets for more information.
To add and set up a patient flow:
- On the main toolbar, click the Patient Flows button to open a menu. Select Add a Patient Process Flow to create a new process flow. You'll notice two process flows will open in a separate window.
- Click the Arrivals tab to open it. Notice that there is a stacked block of four activities in this process flow. The first creates tokens according to a specified schedule. The second creates a patient in the 3D model and attaches them to the Patient Flow. The third randomizes their appearance and the fourth removes the token.
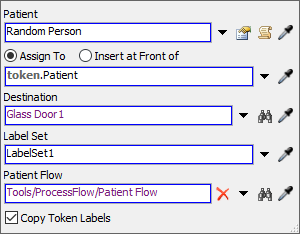
- Click the icon of the Create Patient activity to open its properties.
Next to the Destination box, click the Sampler
button
 to enter sampling mode.
 - In the 3D model, click Glass Door1 to sample it.
- Notice that the Patient Flow box indicates that it is
linked to the
Patient Flowprocess flow. - Click the Patient Flow tab to open it. Notice that this process flow already has a Schedule Source activity. A token will be created in this activity whenever a patient is created by the Create Patient activity in the Arrivals flow.
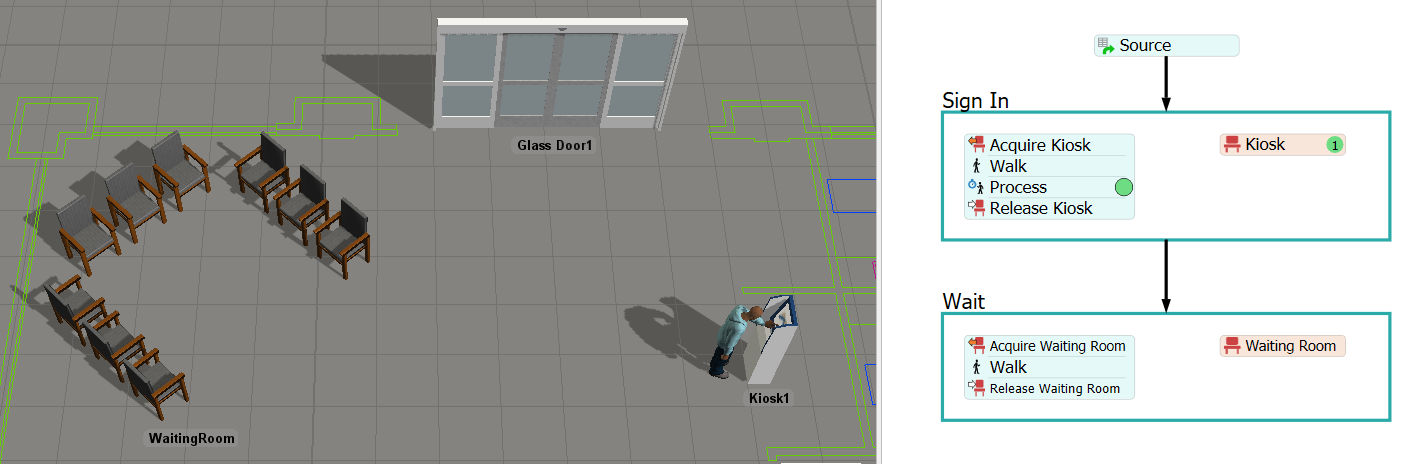
Step 4 Add Activity Sets in Process Flow
The activity sets you'll add in this step contains activities that will instruct a patient to acquire a location, walk to it, and spend some time there.
When you're finished, your process flow should look similar to the following image:

For now, you'll merely add and connect these activities. You'll edit the properties to add logic in a later step.
To add and connect these activities:
- In the Library under the HC Activity Sets group, drag a Walk then Process activity set into the Patient Flow process flow.
- Double click on the text above the container and rename the container Sign In.
- Double click the Location resource and rename it Kiosk.
- Create a connector from the Source activity to the edge of the Sign In container.
- Double click in blank space to open the Quick Library. Under the HC Activity Sets group, click Walk then Process to add another activity set into the Patient Flow process flow.
- Rename the container Wait.
- Rename the Location resource Waiting Room.
- Create a connector from the bottom edge of the Sign In container to the top edge of the Wait container.
- Press and hold the Ctrl key. Click the Process activity in the Wait container and drag it out of the stacked block. Delete the Process activity.
See Walk then Process for more information about how the activities in this activity set work together.
Check to ensure that your patient flow looks similar to the image at the beginning of this step.
Step 5 Edit the Activity Properties
In this step, you'll edit the properties for the activities in the process flow. One important concept to keep in mind is that in this tutorial you'll use a process flow instance for each patient that is created by the Arrivals process flow. That means that each patient will run its own individual copy of the PatientFlow process flow based on the template you'll build for the patient in this step. See Process Flow Instances for more information about how process flow instances work.
In practical terms, this means that any time you see the keyword patient in
the properties for an activity, it will refer to the current patient that is running
this instance of this process flow. The token that runs through that instance will be tied
to that patient.
To edit these properties:
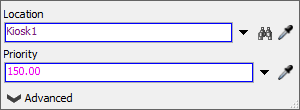
- Click the icon of the Kiosk activity to open its
properties. Next to the Location box, click the
Sampler button
and sample the Kiosk1 object in the 3D view.
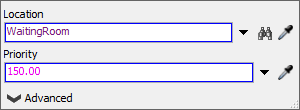
- Click the icon of the Waiting Room activity to open its
properties. Next to the Location box, click the
Sampler button
and sample the WaitingRoom object in the 3D view.
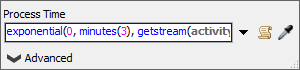
- Click the icon of the Process activity in the Sign In container to open its properties. In the Process Time field change minutes(10) to minutes(3)
Consider saving your simulation model at this point.
Step 6 Test Your Model
In this step, you'll run your simulation model. In general, it's a good idea to regularly test your model logic after you've built a small section of it. When you run the model, you'll notice errors or things that didn't work as expected. See Running a Simulation Model for more information.
To run the model, press the Reset button
 on the simulation control bar to clear the simulation and
reset it to its starting values. Press the Run button
on the simulation control bar to clear the simulation and
reset it to its starting values. Press the Run button
 to start the simulation and Stop
button
to start the simulation and Stop
button  to stop it.

As you watch the 3D model, the patient arrives through the door, walks to the kiosk and then to the waiting room:
Notice that the actions in the 3D model correlate with what is happening in the PatientFlow process flow. As the tokens move through the process flow, they correlate with the patient's actions in the 3D model. The process flow activities take care of all the actions and logic for the patient as it interacts with different types of locations and staff members.
Conclusion
At this point, you've created the first phase of your health care clinic simulation model. You've added a few FlexSim Healthcare 3D objects to your model and you've seen how to build the model's logic using the process flow tool and the people activity sets. In the next tutorial, you'll continue building out the rest of the patient track for the health care clinic and you'll learn how to use staff. Continue on to Tutorial Task 1.2 - Add Staff