Adding Elevators to AGV Networks
Introduction to Adding Elevators to AGV Networks
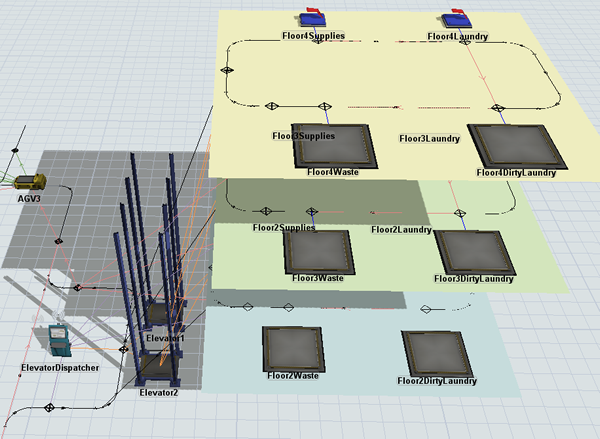
Some AGV systems will require AGVs to use elevators to travel to multiple floors. In the following example, AGVs transport items to three different upper floors using elevators to move between floors:
If you are simulating a business system in which AGVs will travel on elevators to multiple floors, you will need to complete the tasks explained in the rest of this topic. These tasks are presented in the suggested order in which you would need to complete them.
Creating Multiple Floor Layouts
The first step will create a layout with multiple floors. You can possibly create a model in which the floors are stacked on top of each other in the simulation model, as shown in the following image:
You could alternatively just locate the upper floors in different sections of the model while still keeping them on the same plane as the ground floor, as shown in the following image:
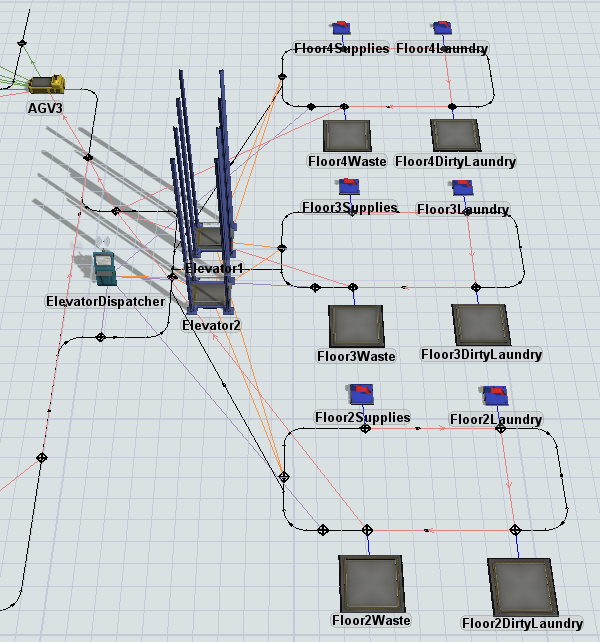
The stacked floor model has the advantage of looking a little more realistic. However, keeping the floors on the same plane has the advantage of being much easier to work with. You could also consider building the floors on the same plane to start and then moving the floors into a stacked position toward the end of the simulation project. See Creating Model Layouts for more information about working with multi-level simulation models.
Types of Elevator Control Point Connections
As was discussed in Building AGV Network Logic, control points are the basic building blocks of logic in an AGV network. AGV elevator systems use control points with the following possible connection types:
| Type | Description | Appearance |
|---|---|---|
| Elevator Floor CP | Elevator floor control points become the point where AGVs enter and exit the elevator on each floor. When an AGV passes over an elevator floor control point, it will appear inside the elevator. When an AGV exits an elevator, it will appear on the elevator floor control point. | 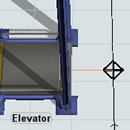 |
| Elevator Redirect CP | Elevator redirect control points handle requests for elevator transport. When an AGV passes over the redirect control point, it will attempt to acquire an elevator for transport. If one is available, it will then proceed on the path until it reaches an elevator floor control point. If an elevator is not available, it will wait at this control point until an elevator is free. | 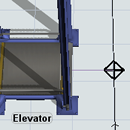 |
| Elevator Entry CP | Elevator entry control points connect to elevator redirect control points. If an elevator is not available when an AGV passes over an upstream elevator control point, it can travel to the elevator entry control point to wait until the elevator is available. | 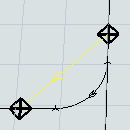 |
Adding Elevators and Dispatchers to 3D Models
Elevators can be found under the Task Executer group in the Library. Add an elevator to your model using the same method that you would use to add any 3D object to a model.
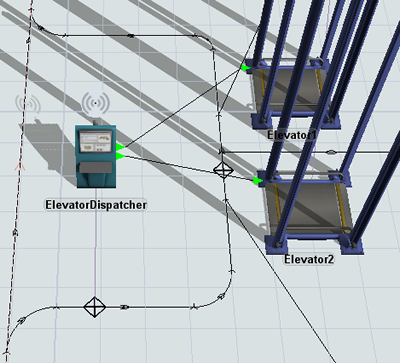
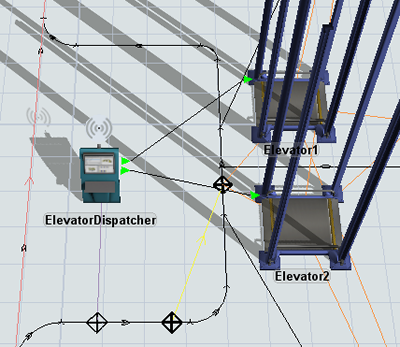
If you need to add multiple elevators to the same area, you will need to add a dispatcher as well:
- From the Library under the Task Executer group, add a Dispatcher to the elevator area.
- Create port connections (A-connects) going from the Dispatcher to each Elevator in the area.
Setting up the AGV Elevator Process Flow Template
At some point, you should add and set up the AGV Elevator process flow template:
- On the main toolbar, click the Process Flow button to open a menu. Point to Add a Task Executer Sub Flow and then select AGV Elevator.
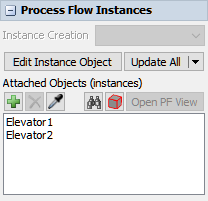
- In the newly created process flow template, click a blank area to ensure nothing is selected.
- In Quick Properties under the Process Flow Instances
find the Attached Objects (instances) box. Click the
Sampler button
 to enter sampling mode.
 - In the 3D model, click each Elevator to attach it to the process flow template.
Adding and Connecting Elevator Control Points
After you've got your floor plan and AGV network laid out and you've connected the elevators to the process flow, you'll need to add control points to direct the AGV to the elevator. Depending on your simulation model, you might need to set up four different types of control point connections in your AGV elevator system, as discussed in the following sections.
Next Look for Work Connections
Next Look for Work connections tell AGVs where their next destination should be if they are looking for work. You'll need these kinds of connections between control points if you want your AGVs to travel on a loop throughout the AGV network.
To create these connections:
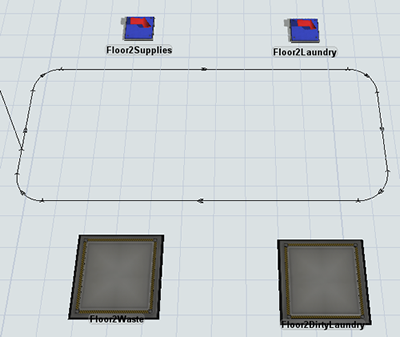
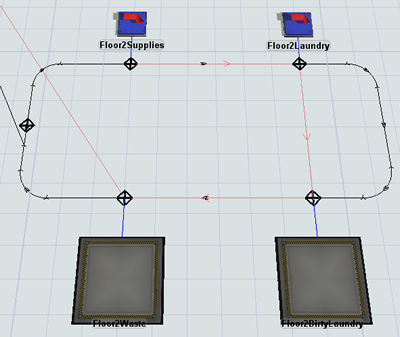
- Create a looping AGV path on each of the upper floors where AGVs will travel to look for work, as shown in the following example:
- Add multiple control points along the AGV path as needed. For example, you might want to add control points to connect to fixed resources along the path. You might also want to add a control point where the AGV will enter and exit the elevator.
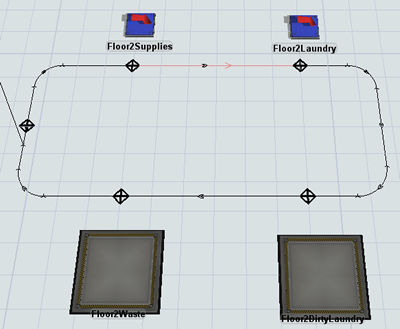
- Press and hold the A key to enter connection mode. When you are in connection mode,
your mouse pointer will change to a plus sign with a chain link symbol next to it:

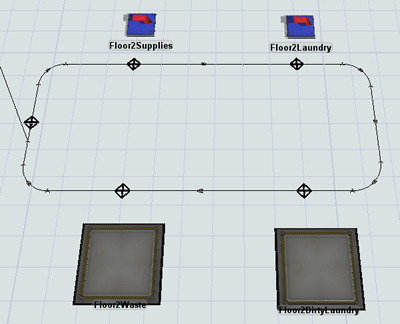
- Click the first control point that the AGV will pass over while it begins the loop on this floor. You will notice as you move your mouse that a yellow line will appear between the control point you clicked and your cursor.
- Click the second control point that the AGV will pass over to open a menu. Select NextLookForWork from the menu. A red line will appear to show that there is a Next Look For Work connection between these two control points. Check that the directional arrow is going the same direction as the path the AGV will travel.
- Repeat the previous steps to connect all the control points in a continuous Next Look For Work Loop.
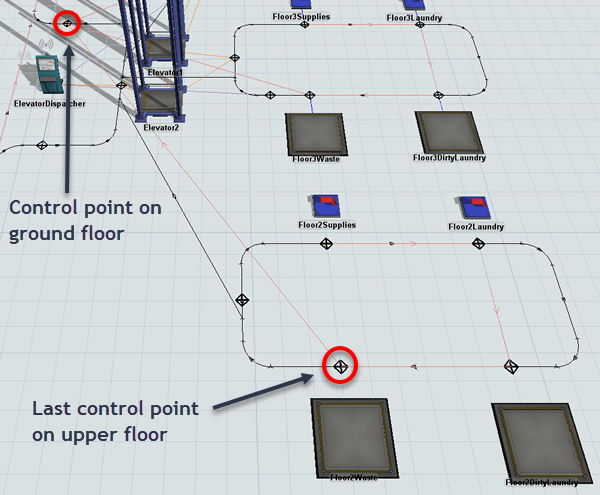
- To complete the Next Look for Work loop, you'll need to create a Next Look For Work Loop connection from the last control point on the loop on this floor to the next control point the AGV should travel to after leaving this floor. In the following example, the last Next Look For Work control point is connected to the control point the AGV will pass over immediately after exiting the elevator on the ground floor:
- Check that the fixed resources on the upper floor have all been connected to control points. See Connecting Fixed Resources to the AGV Network for more information.

Elevator Redirect Connections
Elevator redirect control points handle requests for elevator transport. When an AGV passes over the redirect control point, it will attempt to acquire an elevator for transport. If one is available, it will then proceed on the path until it reaches an elevator floor control point. If an elevator is not available, it will wait at this control point until an elevator is free.
To set up a redirect control point:
- Add a control point roughly near the entry point for the elevator area. Ideally, it should be the first control point the AGV will pass over when it enters the elevator area.
- Press and hold the A key to enter connection mode. When you are in connection mode,
your mouse pointer will change to a plus sign with a chain link symbol next to it:
- Click the control point that you added in the earlier step. You will notice as you move your mouse that a yellow line will appear between the control point you clicked and your cursor.
- Click the elevator to which the AGV should be redirected to open a menu. Select ElevatorRedirectCP. A purple line will appear connecting the control point and the elevator.
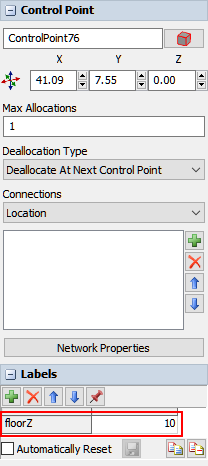
- If you are using a model in which the upper floors will be on the same plane as the ground floor, click the redirect control point on the upper floor to select it.
- In Quick Properties, under the Labels group, click the
Add button
 to
open a menu. Select Add Number Label to add a new
label.
to
open a menu. Select Add Number Label to add a new
label. - Name the label
floorZ. - Set the value as the z-height the elevator should raise to when sending an AGV to this floor. When the elevator sends an AGV to this floor, it will raise the elevator to the z-height you specified in this label.
Elevator Floor Connections
Elevator floor control points become the point where AGVs enter and exit the elevator on each floor. When an AGV passes over an elevator floor control point, it will appear inside the elevator. When an AGV exits an elevator, it will appear on the elevator floor control point.
To set up an elevator floor connection:
- Add a control point to the area on the AGV network where the AGV should enter and exit the elevator.
- Press and hold the A key to enter connection mode. When you are in connection mode,
your mouse pointer will change to a plus sign with a chain link symbol next to it:
- Click the control point that you added in the earlier step. You will notice as you move your mouse that a yellow line will appear between the control point you clicked and your cursor.
- Click the elevator to which the AGV should be redirected to open a menu. Select ElevatorFloorCP. An orange line will appear connecting the control point and the elevator.
Elevator Entry Connections
Elevator entry connections are optional. If an elevator is not available when an AGV passes over an upstream elevator control point, it can travel to the elevator entry control point to wait until the elevator is available.
To set up an elevator entry connection:
- Add a control point to the area where the AGV should wait for an elevator to be free.
- Press and hold the A key to enter connection mode. When you are in connection mode,
your mouse pointer will change to a plus sign with a chain link symbol next to it:
- Click the control point that you added in the earlier step. You will notice as you move your mouse that a yellow line will appear between the control point you clicked and your cursor.
- Click the elevator floor control point to open a menu. Select ElevatorEntryCP. A yellow line will appear connecting the two control points.
Creating AGV Paths to Additional Floors
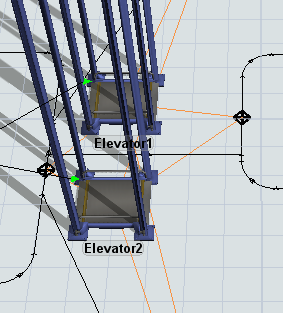
The AGV network needs to be able to find a travel path from one floor to another. For that reason, you need to create a two-way AGV path that connects the AGV network on the ground floor to each of the AGV networks on the upper floors, as shown in the following image:
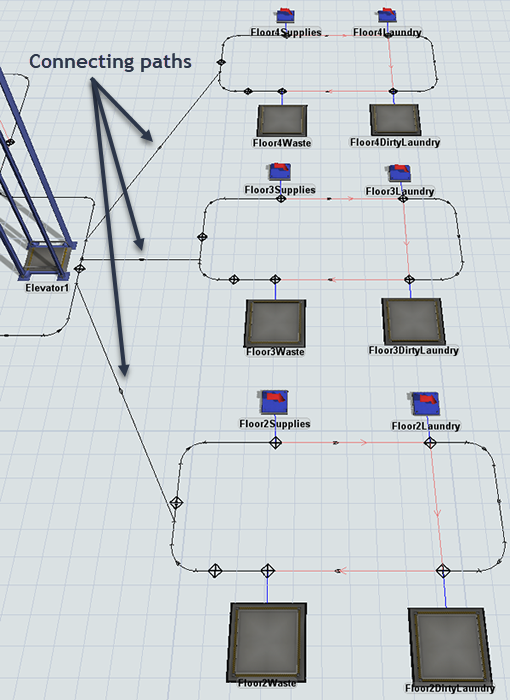
Be aware that the AGV will not actually use this path to travel to the upper floors. In fact, if the AGV does travel on this path instead of using one of the elevators during a simulation run, it means that you haven't set up your elevator control point logic correctly.
The path needs to be two-way so that the AGV can navigate back and forth between the floors. You also need to make sure that the AGV will pass over an elevator redirect control point before it reaches the connecting path. Otherwise, the AGV will travel on the connecting path rather that using the elevator. You can probably avoid this problem by creating the connecting path from a point on the AGV network that is relatively close to the elevator's position in the 3D model.
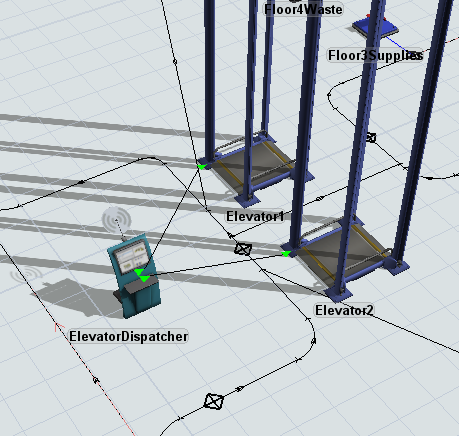
For example, in the following image, the AGV will pass over the redirect point and will be sent to the elevator before traveling on the connecting path:
