Using Containers as a Model Management Tool
Introduction to Using Containers
The plane is a 3D object in the FlexSim library (a visual 3D object) that can be used as a container. Containers can hold other 3D objects, which makes them helpful for managing complex models. The following sections explain different ways you can use planes to make your model more efficient and well-organized.
Organizing Objects Visually
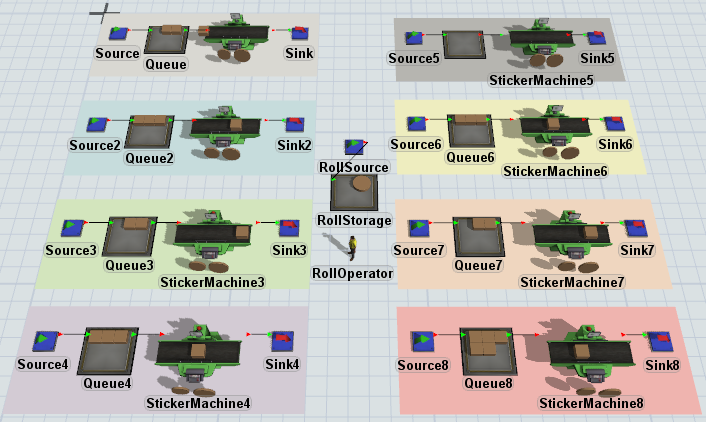
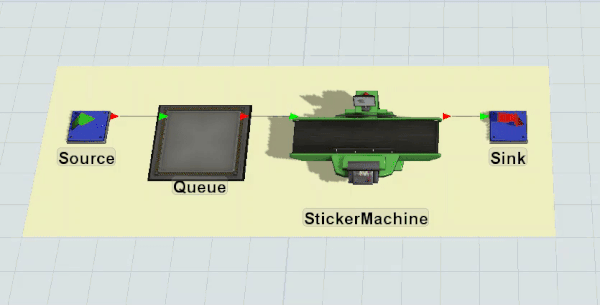
Perhaps you have a group of objects that are related in some way, such as a workstation that contains various 3D objects. One way that containers can help you better manage groups of 3D objects is by keeping these objects organized visually, as demonstrated in the following image:
Moving Groups of Objects
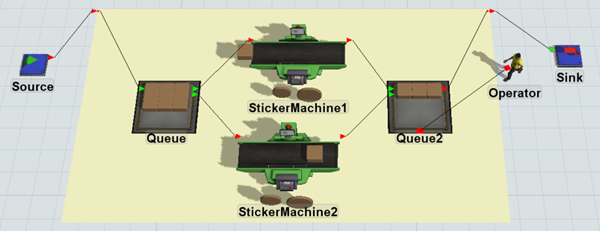
When you put a group of objects in a container, you can also easily move all the objects at once in your model:
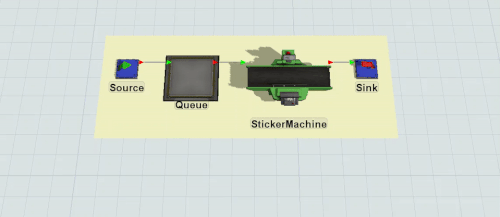
See Moving, Rotating, Resizing 3D Objects for more information.
Duplicating Groups of Objects
You can copy and paste groups of objects in a container by simply copying the whole container:
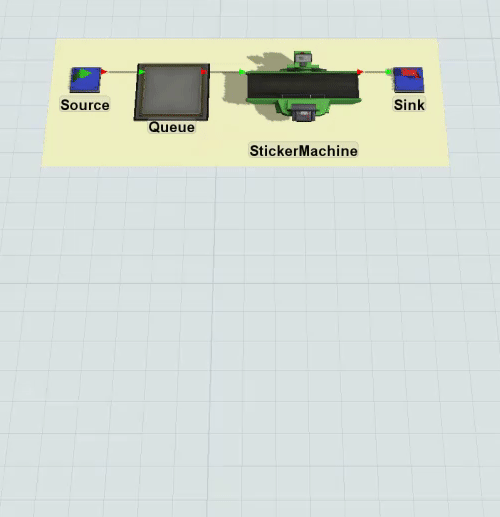
See Copying and Pasting Objects and Properties for instructions on duplicating objects.
Creating Custom Libraries
Custom libraries make it so that you can easily add copies of an object with custom properties. Using custom libraries, you can drag and drop a custom object directly from the library into your model. For example, if you've made several complex changes to the properties of a specific processor, you can add this processor to your custom object library. Then you can simply drag and drop the custom processor from the library into your model and the new processors will have identical properties.
You can do the same thing with containers to create copies of multiple custom objects. For example, if you have a workstation with several 3D objects that you will copy throughout your model, it might be helpful to put the entire workstation in a container and add it to your custom library.

See Creating Custom Object Libraries for instructions on creating custom libraries.
Merging Models Created by Other Modelers
If you are working with a team of modelers to create different portions of a complex simulation model, using containers can make the process of merging models much simpler. Not only do containers make it easy to move large sections of a model at the same time, they also make it so that you can quickly change the names of objects inside that container if needed for model functionality.
For example, two FlexSim users were working on different portions of the same model and didn't realize they gave their objects the same names. Identical names would have caused problems in the model's behavior because their model's logic frequently referenced specific objects by name. Fortunately, all of their objects were in separate containers. Rather than rename every single object, one modeler simply changed the name of the container and easily updated the model's logic.
Creating Additional Floors and Model Layouts
If you need to model a facility that has multiple floors, you can use planes to create those floors:
Hiding the Contents of Objects in the Container
If you don't want to display the objects inside the container, you can hide the contents of a container.
For example, the container in the following image contains a processor that paints flow items red. The first queue connects directly to the container itself. The container than passes the flow item to the processor. The processor passes the flow item back to the container. Then the container passes the flow item to the second queue:

Adding Objects to a Container
You can put 3D objects inside a container using two different methods. This section will explain both methods.
Drag and Drop Objects into the Container
If you are adding new objects from the library, you can drag and drop them directly onto the plane. FlexSim will automatically move these objects into the plane.
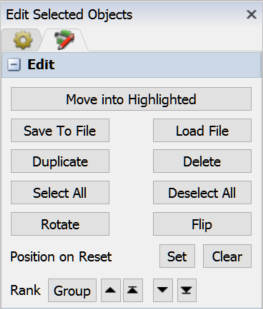
Use the Edit Selected Objects Tool
If you want to put existing objects into a container, you will need to use the Edit Selected Object tool:
- Add a plane to your model (from the Library under Visual).
- Position the plane underneath the objects you want to contain. Click the plane to select it. Using the colored cones, resize the plane so that it is centered underneath all the objects.
- Hold the Shift key and draw a box over all the objects to select them. A red box will appear around the selected objects.
- Hold the Ctrl key and click the plane to deselect it. It will still have a yellow border around it to indicate that it is the currently highlighted.
- On the main menu, click View, then Edit Selected Objects. This tool will open in the right pane (where you normally see Quick Properties).
- Under the Edit group, click the Move into Highlighted button.
- If needed, click the X in the corner of the Edit Selected Objects pane to close this tool and return to Quick Properties.
- Hold the Shift key and click in a blank area of the model to deselect the objects.
- Test to ensure that you successfully moved the objects into the plane by clicking the plane and moving it around. If you were successful, all the objects should move together when you move the plane.
Removing Objects from a Container
If you want to remove objects from a container, you will use the Edit Selected Objects tool:
- Use Ctrl+click to select the objects you want to remove from the container one by one.
- On the main menu, click View, then Edit Selected Objects. This tool will open in the right pane (where you normally see Quick Properties).
- Under the Edit group, click the Move into Model button.
- If needed, click the X in the corner of the Edit Selected Objects pane to close this tool and return to Quick Properties.
- Hold the Shift key and click in a blank area of the model to deselect the objects.
- Test to ensure that you successfully moved the objects out of the plane by clicking the plane and moving it around. If you were successful, all the objects should remain stationery when you move the plane.
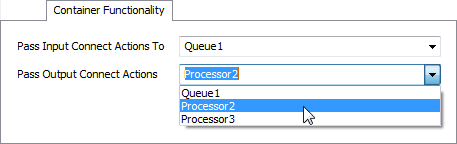
Creating Port Connections to Containers
You can create port connections from objects that are inside a container to outside objects or vice versa. However, you can also create port connections directly to containers. Connecting directly to containers can make it easy to duplicate the objects inside the container while still making it easy to manage your port connections.
To connect objects to a container, you will use the same methods to connect any other object. See the chapter about Overview of 3D Object Flows for more information about connecting objects.
When creating port connections to objects inside the container, you can either:
- Connect objects outside the container directly to objects inside the container,
- Connect objects outside the container directly to the container and then connect the container directly to the objects inside the container, OR
- Connect objects outside the container directly to the container and then set which object inside the container it should send flow items to.
To use the last option:
- Double-click the container to open its properties window.
- In the Container Functionality tab, select which objects the container should connect to using the Pass Input and Pass Output menus. These menus will display all the objects that are currently inside the container.
Hiding the Content of Containers
To hide the content of containers:
- Double-click the container to open its properties window.
- In the General tab under the Flags group, uncheck the Show Contents checkbox.