Task 1.6 - Create Independent Staff Tasks
Task Overview
Up to this point in the tutorial, you've learned how to create tasks that are patient-centered, meaning tasks that are tied to a patient entering the health care system and working through the patient track from beginning to end. In this tutorial task, you'll learn how to create independent staff tasks, which are tasks that are not tied to a specific patient that is currently in the system. Staff members work on these kinds of tasks independently of patients.
In this tutorial task, you'll learn how to add a maintenance task to a location after it has been used and you'll learn how to create routine tasks that might temporarily take a staff member away from caring for a patient. Then, you'll learn how to create a shift schedule for staff members that will determine when they are available to work (as opposed to being off work or on a break).
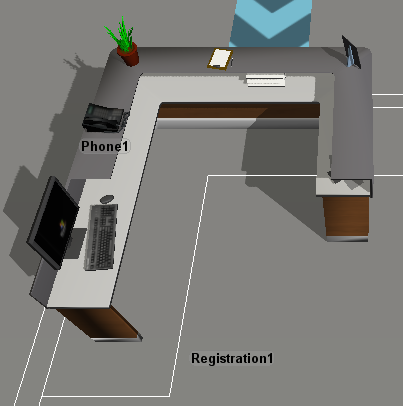
In the final step of the tutorial, you'll add more patients to the model and see how it operates when there are several patients in the health care clinic at a time. When you're finished, your simulation model will function similar to the following image:
Step 1 Create a Location Maintenance Task
Usually after a patient leaves an examination room, a nurse needs to lightly clean and prepare the room for the next patient. You can add those types of cleaning tasks by adding maintenance tasks to a location. This step will show you how to edit the properties for the exam tables to add a maintenance task. This task will be assigned to one of the nurses after a patient leaves the exam table. The amount of time it takes to complete the maintenance task will represent the amount of time it takes to clean and prepare the exam room for the next patient. After the maintenance task is complete, the exam room can be acquired by another patient.
To add maintenance tasks to the exam tables:
- Make sure the 3D model is open and active and that you are in FlexSim Healthcare mode.
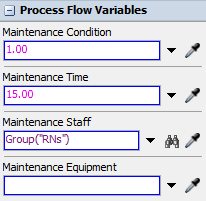
- In the 3D model, click Exam Table 1 to select it. In Quick Properties (the panel on the far right), look for the Process Flow Variables group.
- In the Maintenance Condition box, type
1.00. - In the Maintenance Time box, delete the current number
and type
15.00. - Click the arrow next to the Maintenance Staff box to open a menu. Point to Group, then select RNs.
- Repeat these steps to add maintenance tasks to the other five exam tables.
Reset and run the simulation model:

Notice that after a nurse escorts a patient to the exit, the nurse then returns to the exam room that the patient just left. The nurse remains in the exam room for a certain period of time, representing the amount of time it takes to perform the necessary maintenance tasks to prepare the exam room for the next patient.
Step 2 Add a Phone Call Process Flow
In this step, you'll learn how to create a system for staff members to receive and answer phone calls. To create this system, you'll need to add a phone to the 3D model. Then you'll create a new process flow that will create phone calls and assign those phone call tasks to the clerk at the registration desk.
When you're finished, your process flow should look similar to the following image:
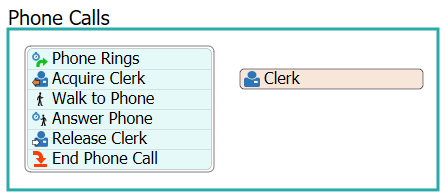
For now, you'll merely add and connect these activities to the process flow. You'll edit the properties to add logic in a later step.
To add a phone and create a new phone call process flow:
- Make sure the 3D model is open and active and that you are in the FlexSim Healthcare environment.
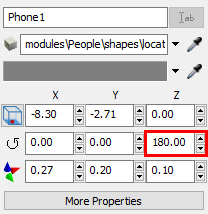
- In the Library under the Healthcare group, click the Location object to open a menu of location objects. Drag a Phone object into the model and place it near the Registration1 desk.
- Change the phone's Z-rotation
 to
to 180.00. - Move Phone1 so that it is on the Registration1 desk.
- On the main toolbar, click the Process Flows button to open a menu. Select Add a General Process Flow.
- In Quick Properties, rename this process flow PhoneCalls.
- From the Library under the HC Activity Sets group, drag a Process with Staff activity set into the process flow.
- Rename this shape container as Phone Calls.
- From the Library under the Token Creation group, drag an Inter-Arrival Source activity into the process flow, adding it to the beginning of the activity set.
- From the Library under the Basic group, drag a Sink activity into the process flow, adding it to the end of the activity set.
- Rename the activities and shared assets as follows:
| Activity or Shared Asset | New Name |
|---|---|
| Staff | Clerk |
| Source | Phone Rings |
| Acquire Staff | Acquire Clerk |
| Walk | Walk to Phone |
| Process | Answer Phone |
| Release Staff | Release Clerk |
| Sink | End Phone Call |
Check to ensure that your process flow looks similar to the image at the beginning of this step.
Step 3 Edit the Phone Call Process Flow
In this step, you'll add the logic for the process flow you created in the previous step. You'll create the logic that will randomly generate phone calls and then instruct the clerk to answer those calls.
The following is an overview of how the activities and shared assets in the process flow will function:
| Activity or Shared Asset | Explanation |
|---|---|
| Clerk | This shared asset will link to the Clerks group in the 3D model. |
| Phone Rings | This activity will determine how frequently the phone rings. You'll set it to ring at random approximately every 10 seconds. |
| Acquire Clerk | This activity will acquire a member of the Clerks group. If all members of the Clerks group are busy working on other tasks, the token will wait at this activity until a Clerk is free. |
| Walk to Phone | This activity will tell the acquired clerk to walk to the phone and pick it up. |
| Answer Phone | This activity will represent the amount of time it takes to take the phone call. You'll set that time to 15 seconds for now. |
| Release Clerk | This activity will release the clerk that was acquired earlier in the process flow. Afterwards, the clerk will then be free to work on other tasks or to be acquired by other patients. |
| End Phone Call | This activity will remove the token representing the phone call from the process flow. |
To build this logic:
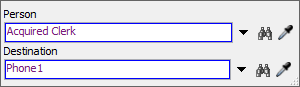
- In the Phone Calls shape container, click the Clerk shared asset to select it. In Quick Properties, click the arrow next to the Staff box to open a menu. Point to Staff Groups, then select Clerks.
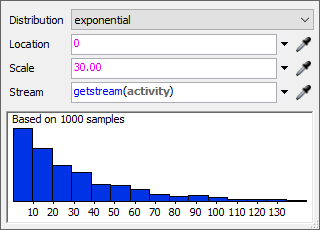
- Click the Phone Rings activity to select it. In Quick
Properties next to the Inter-Arrivaltime box, click the
Edit Properties button
 to open the properties for this
statistical distribution.
to open the properties for this
statistical distribution. - In the Scale box, delete the current number and type
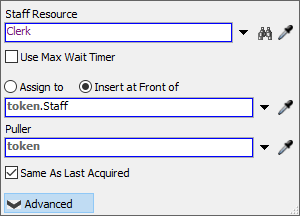
30.00. - Click the Acquire Clerk activity to select it. In Quick
Properties, click the Advanced button to expand the
properties. In the Puller box, delete the current text and
type
tokeninstead. - Click the Walk to Phone activity to select it. Next to
the Destination box, click the
Sampler button
 to enter sampling mode.
 - In the 3D model, click Phone1 to sample it.
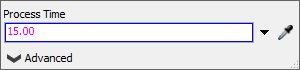
- Click the Answer Phone activity to select it. In the
Process Time box, delete the text and type
15.00.
Reset and run the simulation model:
As you watch, you'll notice that the phone eventually starts to ring. The clerk alternates between registering a patient and taking a phone call.
Step 4 Change the Priority Level of Phone Calls
In this tutorial step, you'll learn more about the priority and preemption system in FlexSim Healthcare. Using this system, you have the ability to add different priority levels to staff, location, equipment, and transport resources in a patient flow. Priority levels help you to determine the best way to allocate resources when there may be a limited supply. See HC Staff and Resource Priorities for a more in-depth explanation of the priority and preemption system.
In this example, you'll learn how to make the clerk prioritize answering phone calls before registering patients. You'll do this by changing the priority level of the staff resource that is associated with answering phone calls:
- Make sure the PhoneCalls process flow is open an active.
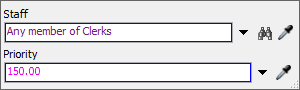
- Click the Clerk shared asset to open its properties. In
the Priority box, delete the current number and type
200.00instead.

Reset and run the simulation model:
As you watch, notice that the clerk starts to register the first patient but then gets interrupted by a phone call. The Register Patient task is paused momentarily while the clerk answers the phone. The clerk resumes registering the patient unless another phone call arrives.
Step 5 Add a Members to a Shift Schedule
In this step, you'll learn how to use the Time Table tool to create a shift schedule for your staff members. The shift schedule will determine when staff members are off schedule, on break, or when they are available to work on tasks. In this first step, you'll learn how to create a time table and add staff members to the time table.
To create a time table:
- Open the Toolbox in the left pane.
- Click the Add button
 to open a menu. Select
Time Table.
to open a menu. Select
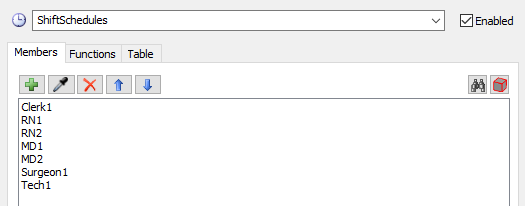
Time Table. - In the Time Table properties window, change the name of the time table to ShiftSchedules.
- On the Members tab, click the
Sampler button
to enter sampling mode.
- Click Clerk1 to sample it.
- Repeat the previous steps to add all of the staff members to the time table.
Leave the Time Table properties window open and continue to the next step.
Step 6 Add Off Hours and Breaks to a Schedule
In this step, you'll continue working on the time table that you created in the previous step. You'll learn how to set the schedule's hours for times when the staff members are off schedule and when they are on break. You'll also learn how to set a schedule so that it repeats over a week.
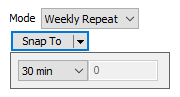
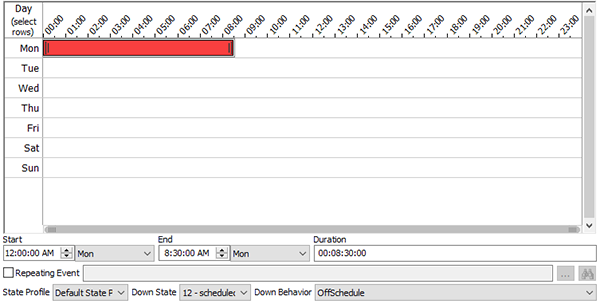
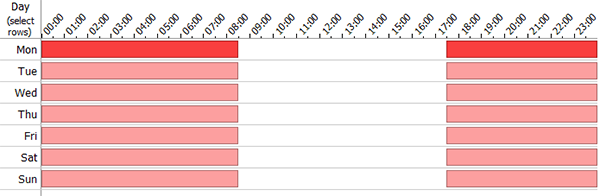
- In the Table tab, click the Mode menu and select Weekly Repeat.
- Click the Snap To menu to open another menu and select 30 min.
- Click inside the Monday row near the 0:00 time slot and drag the cursor to the right to draw a box. Release the cursor at the 8:30 time slot. If needed, you can resize the box using the sizer handles at either end of the box.
- Click the Down Behavior menu and select OffSchedule. The box you drew in the previous step will turn red.
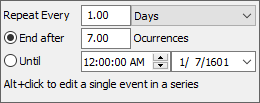
- With the new box selected, check the Repeating Event box.
- Find the box next to the Repeating Event box and click
the ... button
 to its right.
 - In the End after box, delete the current number and
type
7.00instead. - Click the first box and press Ctrl+C to copy all the boxes. Move your cursor closer to the right on the Monday row and press Ctrl+V to paste the box. Resize the copied box so that it covers 17:30 to 24:00.
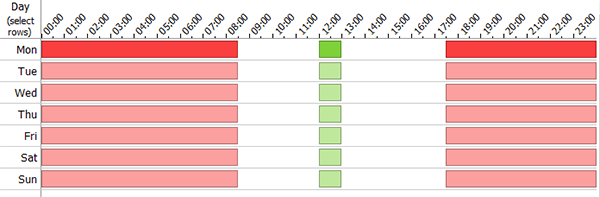
- Click inside the Monday row near the 12:00 time slot and drag the cursor to the right, releasing it at 13:00.
- Click the Down Behavior menu and select Lunch.
- With the new box selected, check the Repeating Event box.
- Find the box next to the Repeating Event box and click
the ... button
to its right.
- In the End after box, delete the current number and
type
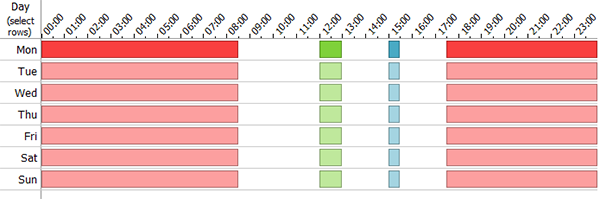
7.00instead. - Click inside the Monday row near the 15:00 time slot and drag the cursor to the right, releasing it at 15:15.
- Click the Down Behavior menu and select Break1.
- With the new box selected, check the Repeating Event box.
- Find the box next to the Repeating Event box and click
the ... button
to its right.
- In the End after box, delete the current number and
type
7.00instead. - Press the OK button to save the changes and close the properties window.
You could also use this same method to build different schedules for staff that are on a morning shift or an evening shift or scheduling events such as staff meetings.
Step 7 Change the Patient Arrival Schedule
Now that you've built out a fairly complex simulation model and tested it, it's time to increase the number of patients that move through the health care clinic model. In this step, you'll change the patient arrival schedule on the Date Time Source activity in the PatientArrival process flow. Because patients in a walk-in clinic often arrive at varying rates depending on the time of day, the Date Time Source activity will allow you to define the rates that they commonly arrive.
To change the patient arrival pattern:
- Open the PatientArrivals process flow.
- With the Patient Arrival Schedule activity selected, in Quick Properties, click the Edit Arrivals button to open this activity's properties window.
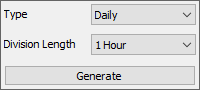
- Click the Generate Table button to expand the properties.
- Confirm that the Type menu is set to Daily.
- Confirm that the Division Length menu is set to 1 hour. Then click the Generate button.
- Click the ... button next to the Time Mode menu to open the Model Settings.
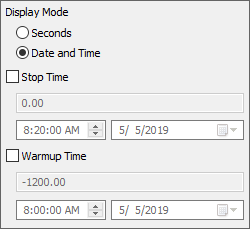
- Change the Model Start Time to
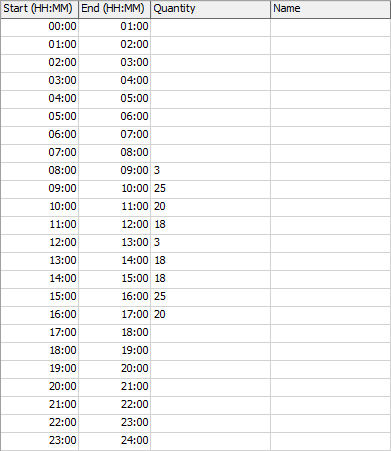
8:20:00 AM. Close the window. - Each cell will indicate the number of patients who will arrive during each hour of each day. Click each cell and type a number to change it. If desired, you can create your own custom arrival schedule. Otherwise, fill in the cells as follows:
- Confirm that the Arrival Spacing menu is set to Randomly spaced.
- Close the properties window.
- On the simulation control bar, click the arrow next to the Run Time controls to open a menu. Select Date and Time.
- On the simulation control bar, click the arrow next to the Run
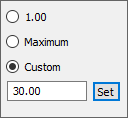
Speed controls to open a menu. Select Custom. Then
in the box just below this option, delete the current text and type
30.00.
Reset and run the model.
Notice that the simulation model will immediately begin receiving phone calls and a patient arrives fairly quickly, but the clerk doesn't begin to answer calls or register patients until 8:30, when the shifts officially begin.
Continue observing the model:
As you watch, several patients will now arrive randomly during the hour and patients will randomly be assigned to one of three treatment tracks.
Conclusion
This concludes the FlexSim Healthcare Tutorial. By now you should have a good sense of all the different tools that are available to you when building a FlexSim Healthcare model. Be aware that in a normal simulation project, you'd go on to make sure your data inputs were correct by studying the times that it takes to complete registration, patient vitals, examinations, and other treatment times.