Task 1.2 - Adding a product table and a mixer
Task Overview
In the previous task, we used numbers to represent various products in a dairy production facility:
| Product | Name |
|---|---|
| 1 | Raw milk |
| 2 | Milk cream |
| 3 | Skimmed milk |
| 4 | Whole milk |
Even with this small number of products in the model, it becomes tedious to remember which number represents which product. FloWorks allows you to create a product table with more descriptive names. In the previous task, you have created a model with inline blending. In this task, you will produce a new product, chocolate milk, using a flow mixer which collects its ingredients separately and allows processing steps to take place in between those collection stages.
Step 1 Creating the product table
First things first: we did not use the product numbers completely consistently. You may want to change the first “milk tank” to use product 3 (skimmed milk) instead of 1 (raw milk) now.
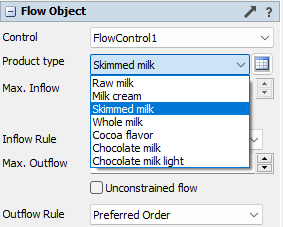
In the properties of any of your flow objects, find the Product field and click the table button next to the Product field.
Depending on the original product number, the table will be pre-filled with several products. If necessary,
add more products to the table using the Add button at the top left ( ) and name them according to the table above.
Also add three more products:
| Product | Name |
|---|---|
| 5 | Cocoa flavor |
| 6 | Chocolate milk |
| 7 | Chocolate milk light |
The Product field will change to a dropdown, showing the product names which you have just defined.
Step 2 Adding some flavor to the mix
Assume that we have a non-limiting supply of cocoa flavor. Add a flow source to the model with a flow rate of 2 L/s and set the product type to Cocoa flavor. The recipe for chocolate milk is as follows:
- Collect 20,000 L of whole milk and 2,500 L of cocoa flavoring.
- Stir and settle for 1 hour.
- Collect 2,500 more L of flavoring.
- Stir and send a sample to the lab for quality testing (total processing time approx. 2 hours).
- Release the batch into a black box process until the mixing tank is empty.
Add a flow mixer to the model, and connect the whole milk tank to it, then the cocoa source. We are not interested in the subsequent process, so connect the mixer to a sink.
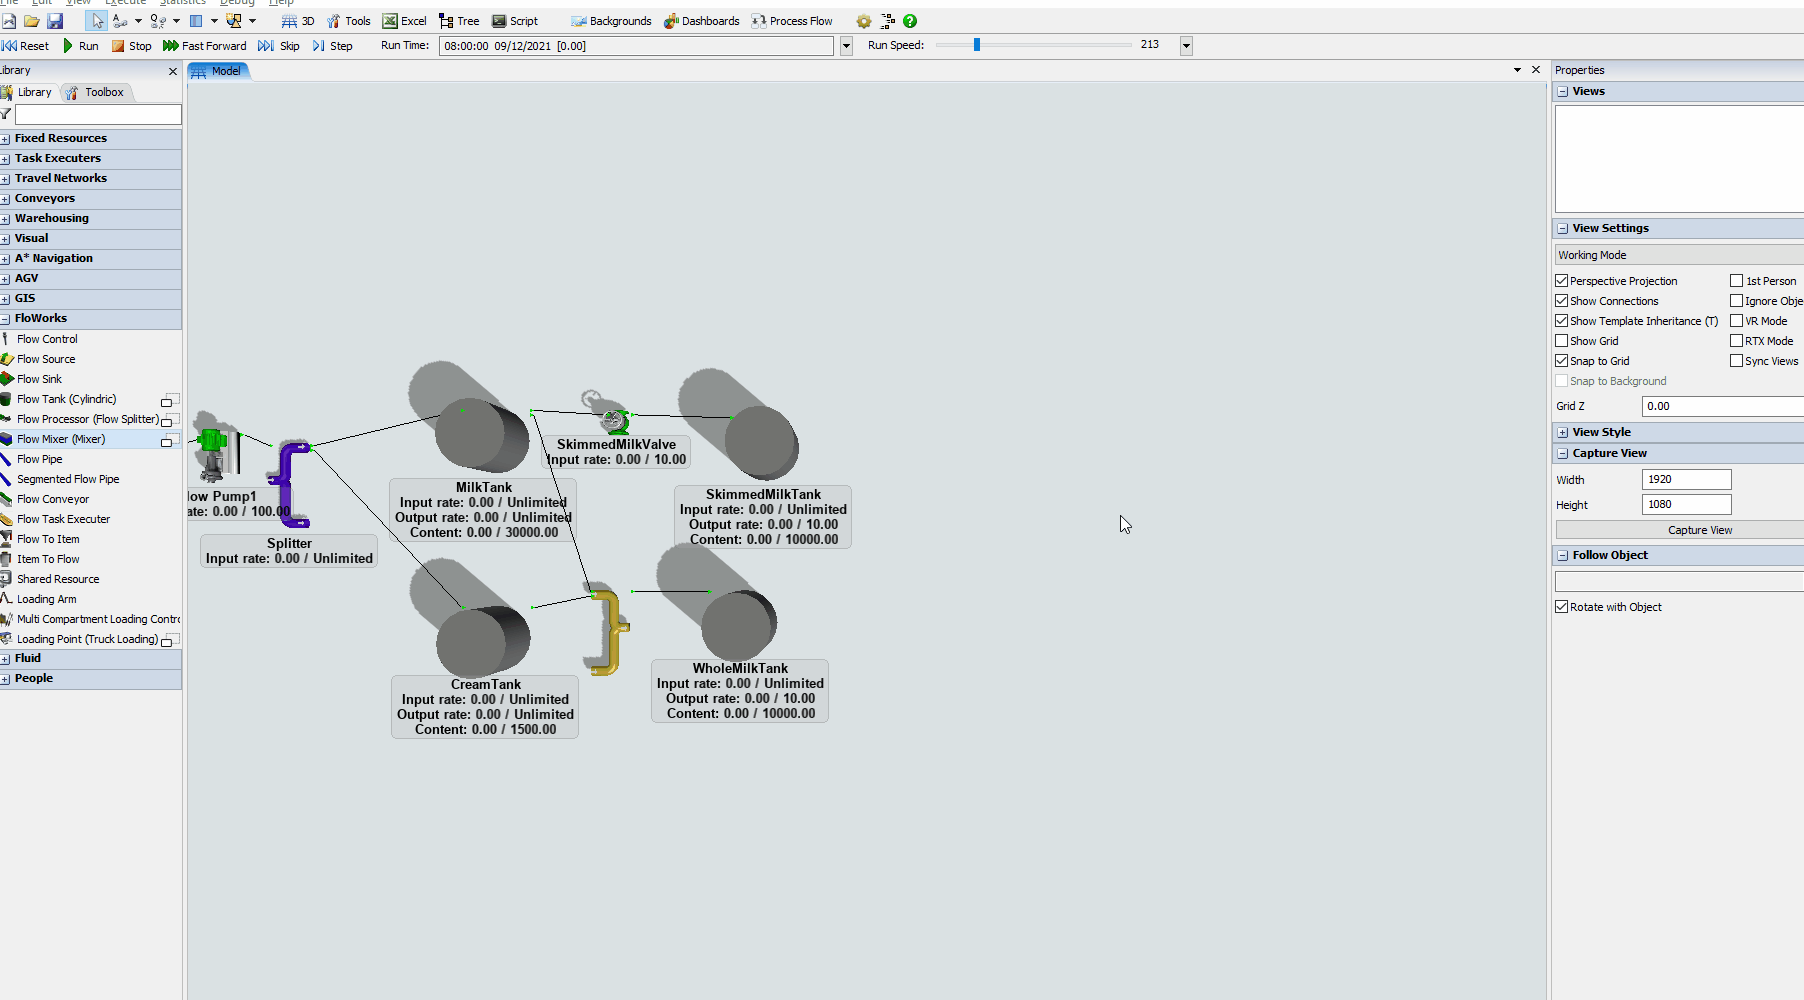
Make sure that the whole milk tank and the cocoa source have maximum output rates of 10 L/s and 2 L/s, respectively. Also check the inflow rate is non-constraining (the input objects have their own maximum outflow rates) and the maximum outflow rate is set to 10 L/s (these should be the defaults).
Open the properties of the mixer. Select Chocolate Milk as the (final) product. The mixer needs to have a maximum content of at least 25,000 L in order to process a full batch.
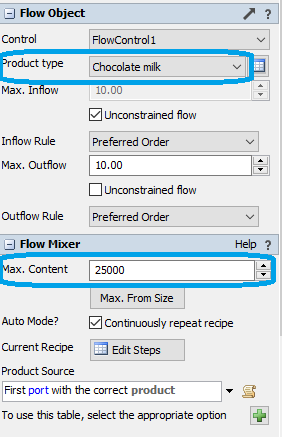
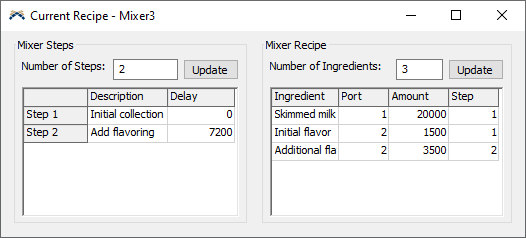
Click the "Edit Steps" button behind "Current Recipe" to enter the recipe for chocolate milk. Add two steps by entering 2 as the Number of steps and clicking the Update button next to it. Name step 1 “Initial collection” and enter a Delay of 3,600 (1 hour, assuming you have chosen seconds as the time units for your model). For step 2, enter “Add flavoring" as the description with a post-step delay of 7,200 seconds.
| Description | Delay | |
|---|---|---|
| Step 1 | Initial collection | 3600 |
| Step 2 | Add flavoring | 7200 |
In the panel to the right, create three rows in the ingredients table. In the first two rows, have the mixer collect the ingredients for the first step: 20,000 L from input port 1 and 2,500 L from input port 2. Then in the third row, add another 2,500 L from input port 2. The first column, Ingredient, can be used as a free-text description, for example:
| Ingredient | Port | Amount | Step |
|---|---|---|---|
| Milk | 1 | 20000 | 1 |
| Initial flavor | 2 | 2500 | 1 |
| Additional flavor | 2 | 2500 | 2 |
Run the model.
Step 3 Increasing the production capacity
The model now comes to a halt quite quickly because eventually one of the source tanks fills up and then due to the splitter at the beginning of the line, the whole production stops.
Copy/paste the mixer three times and connect all four copies to the sink. Connect one of them the same way as the original: to the whole milk tank and the cocoa flavoring source.
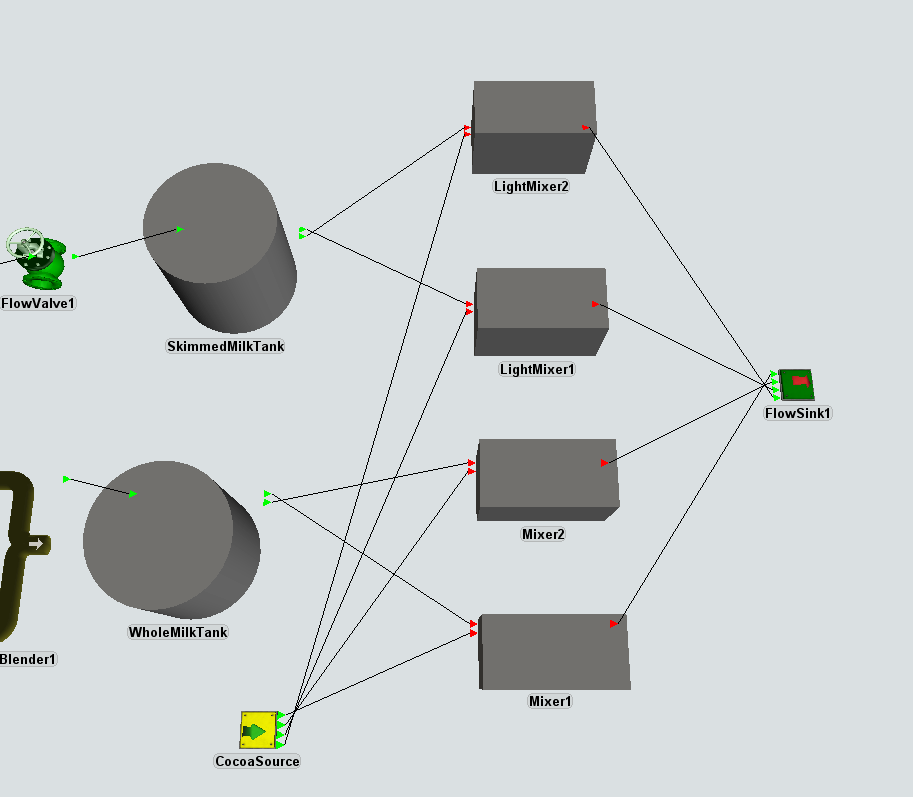
Connect the other two copies to the skimmed milk tank and the cocoa flavoring source. Change recipe slightly: in the first step only 1500 L of flavoring is added, in the second step the remaining 3500 is added. Also, the delay in the first step does not apply for the light chocolate milk product which we had anticipated when expanding the products table in the first step.
Conclusion
In the next tutorial task, you'll learn how to define product recipes globally in your model and drive a mixer team to produce multiple products on a schedule. Continue to Tutorial Task 1.3 - Dynamically changing the mixer recipe.