Time Tables
Overview and Key Concepts
Time Tables are used to schedule down-time, such as state changes, for specific objects in the model. Each Time Table may control many objects, and each object may be controlled by many Time Tables. A model may contain any number of Time Tables.
Time Tables are accessed from the Toolbox.
Down Periods
The main purpose of the Time Table object is to define scheduled periods of down-time for objects in the model. These down periods are defined by two numbers: a down time and a duration. The down period begins at the specified down time and will last for the specified duration in model time units. The functions on the Functions tab give you control over what happens to the objects listed in the Members tab at the beginning and end of each down period.
For convenience in working with down periods that wrap around the end of a day or week the Time Table will combine touching down periods that either set the same state and state profile or use the same down behavior. For example, in a weekly schedule, a down period that goes from Monday 10 PM to 12 AM will combine with a down period that goes from Tuesday 12 AM to 2 AM if the state / down behavior is the same.
Functions
When the Time Table hits a down time, two sets of functions are called. First, the Down Function is fired. This happens once for each member of the Time Table. This allows you to stop the associated object, send a TaskExecuter to some specified location, etc. After all of the Down Functions have fired, the On Down function will fire once. The On Down function passes in the list of members and the table row associated with the down time.
At the end of the down period's duration the set of resume functions are called. First, the Resume Function is fired. This happens once for each member of the Time Table. This allows you to resume the associated object, resume input on the object, etc. After all of the Resume Functions have fired, the On Resume function will fire once. The On Resume function passes in the list of members and the table row associated with the down time.
Down State and State Profiles
For each down time you can specify the state and state profile that the members will go to during that down period. These values are designed to be used with the stopobject() and resumeobject() commands found by default in the Down and Resume Functions. An object can be tied to multiple Time Tables and be stopped multiple times. Each object stores it's set of states each time it is stopped so the object can then be resumed and move back through the subsequent set of states.
Down Behaviors
Down periods can also optionally be associated with a down behavior. If a down behavior is specified, the down and resume functions will be called on the down behavior instead of on the time table itself. This allows you to define different kinds of down events that can be shared between different time tables and also allows down periods within the same time table to behave differently from each other. See Down Behaviors for more information.
Modes
The Time Table can be set up in different modes allowing for non-repeating/repeating schedules or schedules based upon date and time. The Daily Repeat, Weekly Repeat, and Date Based modes all utilize the Model Start Time and Date as defined in Run Time Tools.
- None When the mode is set to none, the times listed in the table are absolute times based upon the model time units. The schedule will not repeat.
- Daily Repeat If you set your Time Table to repeat daily, the Model Start Time (as defined in Run Time Tools) does not come into effect. For example, if your Model Start Time is set to 08:00:00 AM and your Graphical Table looks like the above table, the members of the Time Table will begin the Model in an Operational state, and no functions will be fired. If however, you change the Model Start Time to 07:00:00 AM, when you reset and run your model, the Down functions will fire and the members will begin in a Down state. One hour later (based on the model time units, so 3600 seconds if the model time is set to seconds), the Resume functions will be fired and the members will begin their Operational Time.
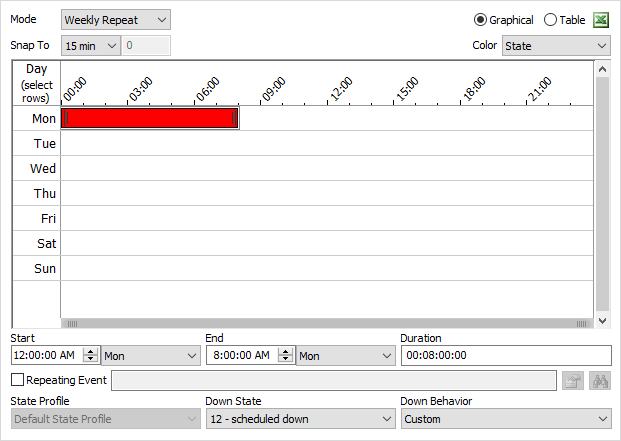
- Weekly Repeat Setting the Time Table to repeat weekly will behave similarly to the Repeat Daily, except that the Time Table will also take into account the Model start day of the week. If the Model Start Time (as defined in Run Time Tools) begins on a Tuesday at 08:00:00 AM and our Time Table is set to the above values, then the Time Table will skip all of Monday and jump to Tuesday at 08:00:00 AM with the Time Table's members being Operational. When the Model Time hits Friday at 05:00:00 PM, the members will go Down and remain down until Monday at 08:00:00 AM where the Time Table will start over.
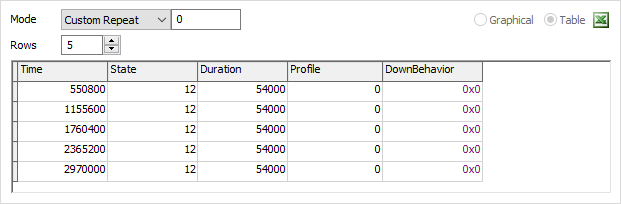
- Custom Repeat The custom repeat mode is similar to the None mode, except you now have the option of specifying the repeat time for the table.
- Date Based The date based mode allows you to set up down times where each down time is associated with a specific date. These dates are based upon the Model Start Date and Time (as defined in Run Time Tools) as well as a Time Table start date and time. This mode does not repeat, however, you can create repeating events.

General Settings
The following general settings are available:
Name
The name of the Time Table. The combobox has a list of all Time Tables in the model, allowing you to quickly jump to different Time Tables.
Enabled
Specifies whether the Time Table should execute it's down times for all of the members of the Time Table. The Experimenter allows you to enable and disable Time Tables for different scenarios.
| Icon | Description |
|---|---|
 |
Adds the Time Table to a User Library as either a Draggable Icon or an Auto-Install Component. |
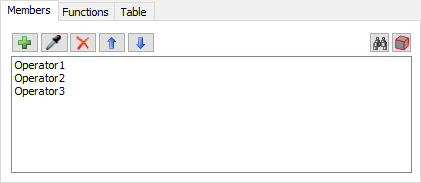
The Members Tab
The Members tab has the following properties:
| Icon | Description |
|---|---|
 |
This will open an object selection GUI where you can select multiple objects in the model. |
 |
Click to sample any object in the model to add it as a member. |
 |
Removes the selected member(s) from the list. |

 |
Reorders members Up or Down in the list. |
 |
Centers the 3D view on the selected member from the list. |
 |
Selects (puts a red box around) the selected member(s) from the list. |
The Functions Tab
The Functions tab has the following properties:

Down Function
This picklist is executed when the objects in the member list go down. It is executed once for each object in the member list. This is where you specify what to do to stop the object.
Resume Function
This picklist is executed when the objects in the member list resume their operation. It is executed once for each object in the member list. This is where you specify what to do to resume the object.
On Down
This picklist is fired immediately after the Down Function has been fired for all objects, but it is only executed once, instead of once for each object in the member list.
On Resume
This picklist is fired immediately after the Resume Function has been fired for all objects, but it is only executed once, instead of once for each object in the member list.
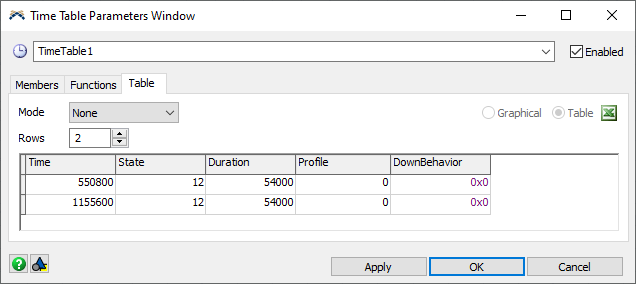
The Table Tab
The Table Tab has the following properties:
General Controls
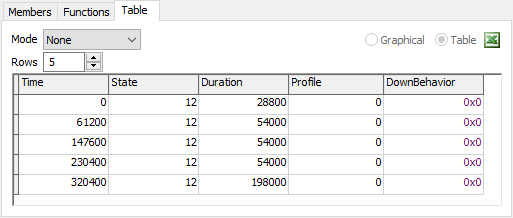
- Mode - This specifies the mode of the Time Table, None, Daily Repeat, Weekly Repeat, Custom Repeat or Date Based.
- Graphical / Table - Switch between the graphical and the table editors.
 - This button will add the table to the
model's Excel Importer. The imported table takes the form of the table
(Time, State, Duration, Profile, DownBehaviour).
- This button will add the table to the
model's Excel Importer. The imported table takes the form of the table
(Time, State, Duration, Profile, DownBehaviour).
Table Editor
The Table Editor has the following properties:
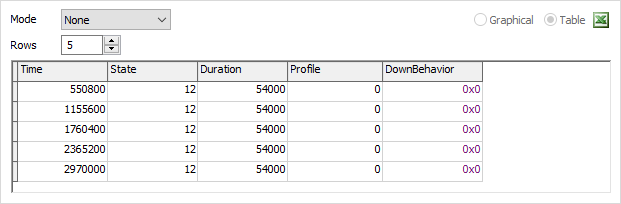
- Rows - This is the number of rows in the table.
- Table - Each row records the following:
- Time - This is the time since the table began that the state change should occur. If the mode is set to None, the table does not repeat, so the times listed in the Time column are absolute.
- State - This is the state that the objects controlled by this table will change into when the Time Table tells it to go down. If you click on this column, a drop-down box will appear at the top, giving you a list of possible states. Refer to the 3D object reference for more information about what each state means to each object. Refer to the state list for a quick reference of each state's number and macro definition.
- Duration - This is how long the objects will stay in the new state before changing back to their original state.
- Profile - This is the state profile that the Down State is associated with. If you click on this column, a drop-down box will appear at the top, giving you a list of possible state profiles. Changing the State Profile will update the State column drop-down.
- DownBehaviour - This is the Down Behaviour that will be used with the entry. If you click on this column, a drop-down box will appear at the top, giving you a list of possible Down Behaviours. A NULL Down Behaviour will use the behaviour defined on the Functions tab.
- Repeat Time - Specify the time, in model time units, to repeat the Time Table.
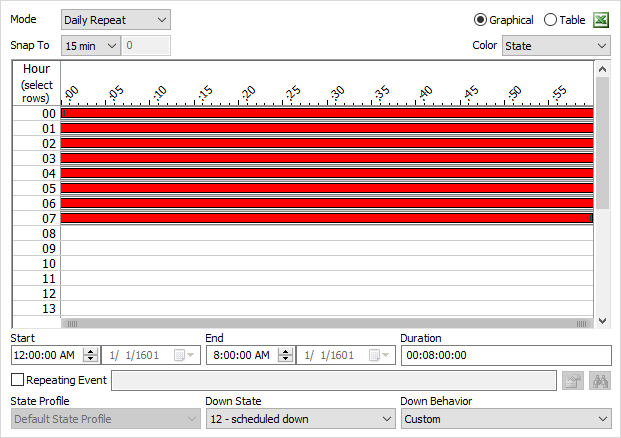
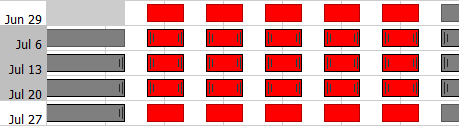
Graphical Table
The Graphical Table has the following properties:
- Snap To - Specifies the time to snap entries to in the view. You can specify the preset 10 min, 15 min, 30 min and 1 hour, or set your own custom snap to time. The custom time is in model time units.
- Calendar Start - Specifies the start date and time of the Time Table. Events that occur before the start time will not fire, however, the data will remain. This allows you to temporarily turn off parts of your Time Table if needed.
- Color - Select a label to color the events by. The
color of the event will be equal to
Color.byNumber(labelValue)orcolor(labelValue). - Start - The start date and time of the selected entry.
- End - The end date and time of the selected entry.
- Duration - The duration of the selected entry. Of form DD:HH:MM:SS.
- Repeating Event - If checked, the event will become a repeating event. Here you can define how often the repeat occurs and either how many times it repeats or until which date and time it repeats to.
 - Displays the properties of the repeating
event.
- Displays the properties of the repeating
event.- - If the selected event is part of a
repeating event but is not the parent event, this will center the parent event in the
view and select it.
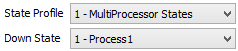
- State Profile - Specifies the state profile for the down state of the selected entry.
- Down State - Specifies what state the members should go to for the selected entry.
- Down Behaviour - Specifies the Down Behaviour that will be used with the selected entry. A NULL Down Behaviour will use the behaviour defined on the Functions tab.


Using the Graphical Table:
- Creating entries - Click and drag anywhere in the white space to create a new down time. Snaps to the Snap To time.
- Modifying entries - Click and drag in the middle of an entry to change the start time of the entry. Drag left or right to change the time along the week, or drag up or down to change weeks. Click and drag at the left or right edge of an entry to modify the duration. Snaps to the Snap To time. Start and end times as well as duration can also be modified through the property below the editor view.
- Selecting weeks - Click and drag along the left
side of the view under the Date column to select a week of entries. Any entries with
their start time in the selected week will be selected.
- Zoom - Hold the Ctrl key while using the scroll wheel to zoom in or out on the mouse location.
- Scroll - Use the scroll wheel to scroll up and down in the view.
- Horizontal Scroll - Hold the Shift key while using the scroll wheel to scroll left and right.
- Bottom Scroll Bar - Click and drag along the bottom scroll bar to zoom in/out and scroll left and right.
- Drag to Copy - Hold the Ctrl key and click and drag an entry to create a copy.
- Ctrl + C - Copy selected entries.
- Ctrl + X - Cut selected entries.
- Ctrl + V - Paste selected entries. If a single entry was copied, the pasted entry will be pasted below the cursor position. If an entire week was selected, the entries are pasted based upon the week that the cursor is positioned over, keeping start times relative to the start of the week.
- Arrow Keys - Select an entry or a week of entries and use the up, down, left and right arrow keys to adjust the entry start times based upon the Snap To time.
Events
Down Function
This event is fired once for each member when the table hits a down time.
It has the following parameters:
| Event Parameter | Type | Explanation |
|---|---|---|
| Down Object | Object | The object going down |
| State | int | The state the object will go into |
| Table Row | int | The row corresponding to this down time in the table |
| Duration | double | The duration of the down time |
| State Profile | int | The state profile on the object that will be updated |
Resume Function
This event is fired once for each member when the table ends a down time.
It has the following parameters:
| Event Parameter | Type | Explanation |
|---|---|---|
| Down Object | Object | The object that was down and is now resuming |
| State | int | The state the object was in |
| Table Row | int | The row corresponding to this down time in the table |
| State Profile | int | The state profile on the object that will be updated |
On Down
This event is fired once after the Down Function has fired for all members.
It has the following parameters:
| Event Parameter | Type | Explanation |
|---|---|---|
| Table Row | int | The row corresponding to this down time in the table |
On Resume
This event is fired once after the Resume Function has fired for all members.
It has the following parameters:
| Event Parameter | Type | Explanation |
|---|---|---|
| Table Row | int | The row corresponding to this down time in the table |