Custom Code
Overview and Key Concepts
You can use the Custom Code activity to create custom behavior in the Process Flow module. You can select pre-defined picklist options or write your own code in FlexScript. When a token enters the Custom Code activity, it will evaluate the user-defined code and then immediately be released to the next activity without any model time passing.

Connectors
The Custom Code activity only allows one connector out. See Adding and Connecting Activities for more information.
Properties
The following image shows the properties that are available for the Custom Code activity:
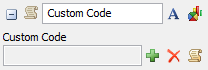
Each of these properties will be explained in the following sections.
Name
Used to change the name of the activity. See Name for more information about this property.
Font
The Font button
 opens a window to edit the activity's
background color and font properties. See
Font for more information
about this property.
opens a window to edit the activity's
background color and font properties. See
Font for more information
about this property.
Statistics
The Statistics button
 opens the activity's statistics
window. See Statistics
for more information about this property.
opens the activity's statistics
window. See Statistics
for more information about this property.
Custom Code
Use the Custom Code box to choose the custom code that should be executed when a token enters this activity. You can use pre-defined code templates (picklists) or write your own custom code if you are comfortable with Flexscript.
To use a picklist, click the Add button
 next to the Custom
Code box to open a menu listing different picklists that are currently available
for this object. Try clicking on this menu and exploring some of the different options to
see what's available.
next to the Custom
Code box to open a menu listing different picklists that are currently available
for this object. Try clicking on this menu and exploring some of the different options to
see what's available.
Alternatively, if you are comfortable with Flexscript and want to enter in your own
custom code, click the Code Editor button
 next to the Custom
Code box to open the code editor. In the code editor, you would enter in the code
you want the activity to execute every time a new token enters the activity.
next to the Custom
Code box to open the code editor. In the code editor, you would enter in the code
you want the activity to execute every time a new token enters the activity.