Creating Model Layouts
Introduction to Model Layouts
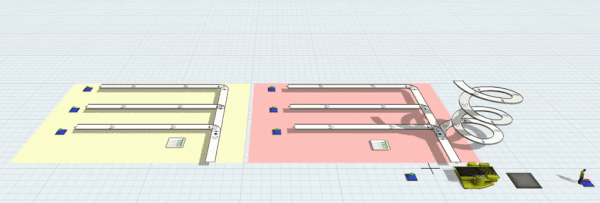
Sometimes you might want to view your model with different layouts. For example, perhaps you have a model with multiple floors. (Floors can be created by using the Plane object.) With a multi-level simulation model, you might want to build your model with all the floors on the same flat plane, but still be able to view it with the floors stacked on itself. You can use model layouts to quickly change between different model views:
You will use the Model Layouts tool to create these different views. This topic will explain how to use the Model Layouts tool in more detail.
Opening the Model Layouts Tool
To open the Model Layouts tool:
- On the main toolbar, click View, then select Model Layouts.
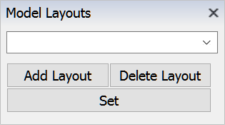
- The Model Layouts tool will appear in the bottom of the left pane, under the 3D Library:
Adding and Renaming Layouts
To add a new layout:
- In the Model Layouts tool, click the Add Layout button.
- By default, the new layout will be named Layout 1. Double-click the layout name in the Model Layouts menu and type in a more descriptive name. Press enter to save the changes.
Deleting Layouts
To remove a layout:
- Select the layout from the Model Layouts menu.
- Click the Delete Layout button.
Setting and Viewing a Layout
To set a layout:
- Put the 3D objects in the model in the position you'd like them to be set.
- Select the layout you want to set from the Model Layouts menu.
- Click the Set button.
To view a different layout, select it from the Model Layouts menu.