Task 2.2 - Creating a tank pool
Task Overview
In this task, you will extend the previous model to use a concept similar to the use of tank pools in chemical processing. You will create one or more receiving tanks for each of the allowed product types, and switch the flow from the flow pipe into one of the tanks with the correct product type.
Step 1 Adding more tanks
In order to keep the time required for this tutorial reasonable, we will first reduce the amount of products.
In the On Empty trigger of the producing tank, you had entered the expression duniform(1, 10) to sample a new
product for each batch. Change this to only use three products instead of 10.
Remove the receiving tank from the model and create a new tank with a content of 800. Set the product type of the tank to 1, and the maximum outflow rate to 100 (you can leave the inflow on unlimited, it will be constrained by the pipe's maximum outflow rate).
Using the Triggers tab, open the inputs and close the outputs of the tank on reset and on tank empty. When the tank is full, do the opposite:
![]()
Copy this tank about eight times, and connect all copies to the final sink:
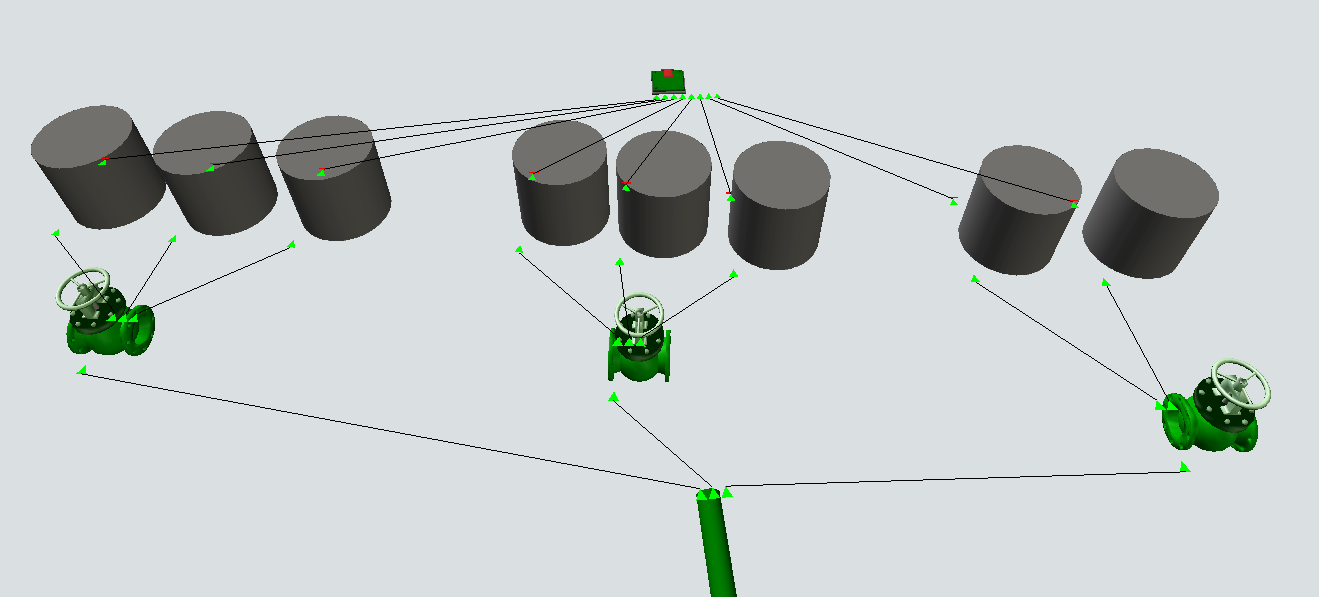
Set three of the tanks to product type 1, three to product type 2 and two to product type 3 and group them together into three tank pools. Create a pump for each tank pool, set its flow rate to unlimited, and connect all the tanks in that tank pool to the pump. Then connect the second flow pipe to each of the pumps. The model should now look more or less as follows.
Step 2 Redirecting the flow
In the previous task, you told the second pipe that whenever the product at the output changes, it should close the receiving object's inputs because you wanted that tank to empty. You will now change this to redirect the flow to one of the connected pumps, depending on the product type. If you connected the pumps in the correct order, then product 1 will go to the first output port; product 2 to the second output port and product 3 to the last output port.
Double click on the flow pipe, go to the Triggers tab and use the Delete button ( )
to remove all existing logic from the On Product Out Change field. Then use the Add (
)
to remove all existing logic from the On Product Out Change field. Then use the Add ( )
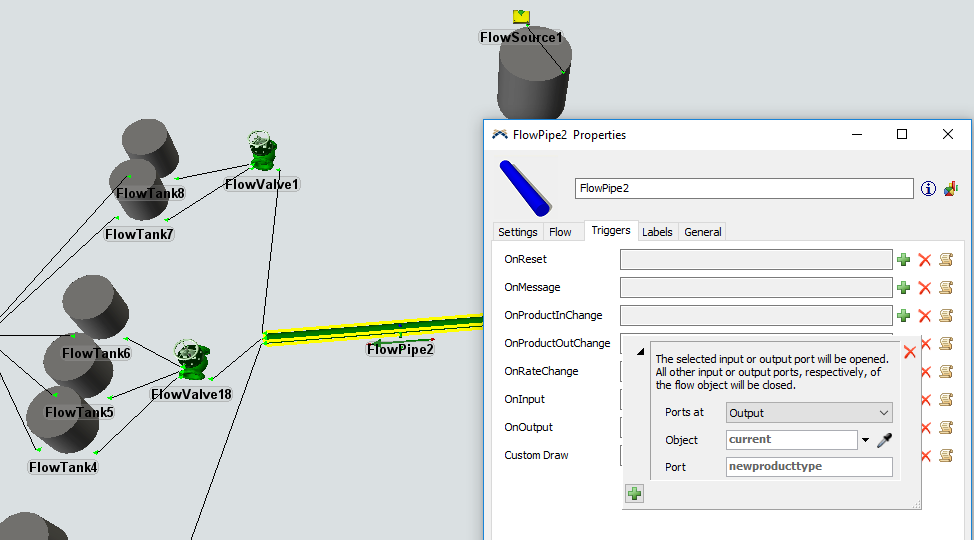
button to create a new action: from the “Open or close flow” submenu select “Open only a specific port”.
)
button to create a new action: from the “Open or close flow” submenu select “Open only a specific port”.
Select that you want to open an Output port of the current object. For the port, enter the expression newproduct.
This is a variable available to you in this trigger, together with oldproduct, so that you can write logic for the
“Product Out Change” event based on the old and new product type at the interface. In this case,
newproduct will be 1, 2 or 3 based on the product after the fluid interface, which will be converted to
an output port. So if the flow changes to product 3, then only output port 3 will be opened and all other ports will be closed.
Now if you run the model, you will see all arrows turn red except the arrow of the product flowing from the pipe. The material will flow into one of the pumps, which will use their “Preferred Order” flow rule to forward the flow into the first available tank. Because of the logic you put on those tanks, the tanks will fill up until they are full and then close their input until they are empty, making them unavailable for inflow during that time.
This is the final result:
Conclusion
In this task you have used implemented a tank pool concept, where flow will go to the first available tank of a set of tanks that is assigned to the current product. In Tutorial Task 2.3 - Adding tank certification, the final task of this tutorial, you will adapt one of FloWorks' standard Process Flow templates to implement certification