Task 1.3 - Dynamically changing the mixer recipe
Task Overview
Rather than defining the product recipes for chocolate milk on each mixer separately, you can define them on a product level in the FloWorks product table. This has the additional advantage that you will be able to load different product recipes onto any mixer during the model run.
Step 1 Move the product recipe to the product table
Open the product table, either by double clicking on an object and clicking the Table button next to the product dropdown, or by finding the "Floworks Products" item in the Toolbox and double clicking it.
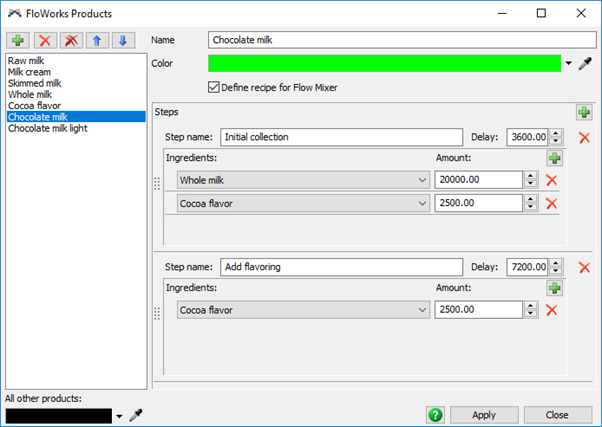
Click on the Chocolate milk product in the selection box on the left, and check the “Define recipe for Flow mixer” checkbox. Add two steps using the Plus button in the top right corner of the panel that appears. Give it descriptions and delays according to the table in the previous task, to wit:
| Description | Delay | |
|---|---|---|
| Step 1 | Initial collection | 3600 |
| Step 2 | Add flavoring | 7200 |
Use the Add button to add two ingredients to the first step, and one ingredient to the second step, to complete the recipe as it is now on the mixer:
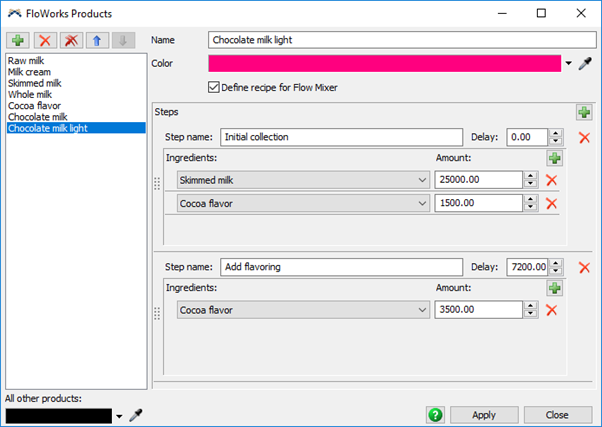
Add a similar recipe for the light product:
Step 2 Prepare a mixer team
Because each mixer can theoretically be connected to product sources in a different way, the recipes are specified using the product names, as you have seen. The mixers have a Product Sources table, which determines for that particular mixer which input port it should use when it needs a specific product. By default, mixers will check the product type of each object connected to them, and will use the first one whose product type matches, which we will use for now. However, you should remember that the input ports are only selected when the recipe is loaded explicitly, which we will accomplish using Process Flow.
Connect all four mixers to both of the tanks, and make sure that also the cocoa source is connected to all of the mixers. Because of the Product Source property, the order in which objects are connected to the mixer does not matter.
Step 3 Add the control layer
FloWorks provides a Process Flow template which you can use to have a team of mixers run through a production schedule. For example, let’s say we want to create three batches of regular chocolate milk and then one batch of the light version; repeating this over and over.
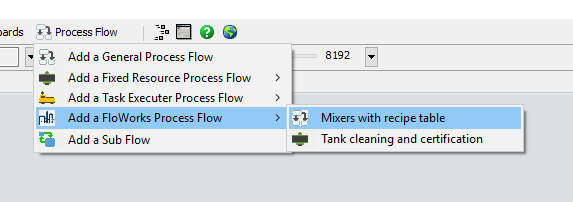
From the Process Flow button on the toolbar, select “Add a FloWorks Process Flow”, then select the “Mixers with recipe table” option.
You'll need to modify the template in two different places.
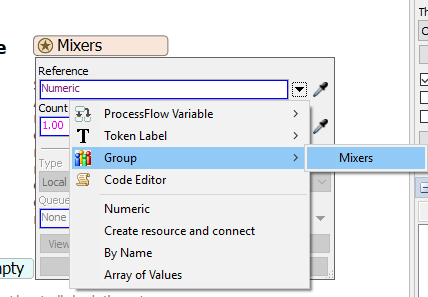
First of all, put all the mixers in an object group.
Then point the Mixers resource at the top right at the newly created object group.
In addition, you need to specify the production schedule on the source. Make sure the source creates three tokens: two for the regular product and one for the light version.
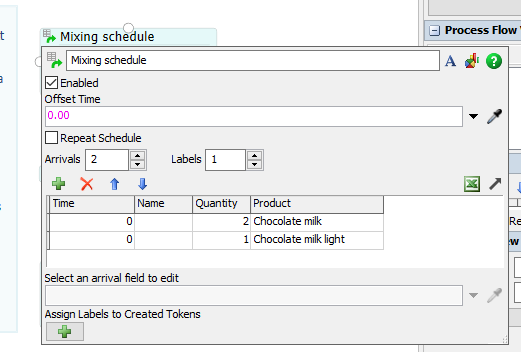
Instead of repeating the schedule, change the process flow so that the tokens keep going back to the top of the process:
- Cut the process flow “Mixing schedule” source and draw an arrow to the Acquire Mixer activity
- Remove the sink from the end of the activity block
- Connect the end of the activities back to the start to create a loop
Conclusion
This task concludes the FloWorks Basics tutorial.