Changing Process Flow Visuals
Overview of Process Flow Visual Tools
Each process flow has a variety of properties (settings) you can use to change the way process flows appear visually. You can use these settings to:
- Improve how your process flow communicates visually.
- Assist with debugging so that you can better observe potential problems in your process flow.
- Make your process flow more aesthetically appealing, perhaps for branding.
There are basically two tools in process flow that can control process flow visuals: using the Visualization tab on the process flow's properties window and the Process Flow Visual Theme window.
Process Flow Properties - Visualization Tab
You can change the way tokens and activities look during a simulation run using in a process flow's general properties. You can change things such as the whether to show or hide links between activities or child and parent tokens. You can also make the color or shape of tokens change dynamically during a simulation run.
These kind of visuals can help with trouble-shooting or making aspects of your process flow logic more explicit.
In this topic, the relevant sections for using the process flow visualization properties are:
Visual Themes
A visual theme is a group of visual settings that can be applied to an entire process flow. A theme can affect:
- The color of the background, activities, shared assets, etc.
- The styles of the connectors
- The font and style of the fonts
- The color and visual functionality of the containers (flow chart objects)
FlexSim comes with six different pre-set themes you can use. You can use these themes to quickly implement these visual styles. You can also adapt these visual themes or make your own custom themes using the Process Flow Visual Theme dialog box.
In this topic, the relevant sections for using the process flow visualization properties are:
Changing Activity Link Displays
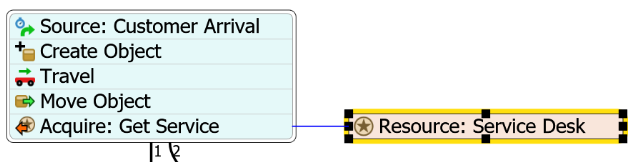
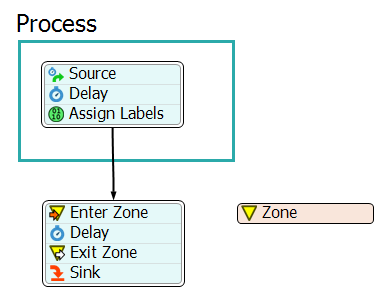
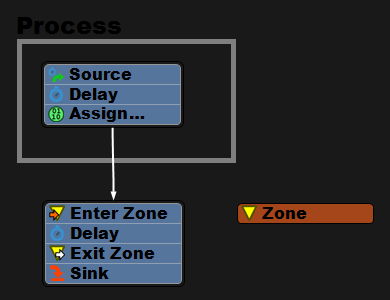
Activities are frequently linked to other activities or to shared assets. For example, an Enter Zone activity will almost always be linked to a Zone shared asset. A Run Sub Flow activity is almost always connected to a Start activity on a sub flow.
By default, process flow only displays the links between these activities when the activities (or the activity block that contains them) is currently selected. When selected, the process flow will display a thin blue line to indicate the activities and/or shared assets are linked:
You can change the default settings so that it always displays the activity links or never displays the activity links. To change these settings:
- Click an empty area somewhere in the process flow to ensure nothing is selected.
- In Quick Properties, at the bottom of the Process Flow Properties group, click the More Properties button.
- In the Visualization tab, find the Display Inter-Activity Links menu.
- Select an appropriate option from the menu based on your preferences. See Process Flow General Properties for more information about the menu options.

Changing Token Text, Colors, and Shapes
The following sections will explain how to control the way tokens are displayed.
Changing Token Text Displays
By default, tokens do not display any text unless they own child tokens in a sub process flow:

However, you can change this so that tokens can display text. For example, you could set tokens to display the values of a specific label as it interacts with a process flow during a simulation run.
To change a token's text display options:
- Click an empty area somewhere in the process flow to ensure nothing is selected.
- In Quick Properties, at the bottom of the Process Flow Properties group, click the More Properties button.
- In the Visualization tab, find the Token Text group. From the Display menu, select the text you want to display. See Process Flow General Properties for more information about the menu options.
- If you selected Label Value from the Display menu, select the label value you want to display in the Label menu.
- If you selected Custom from the Display menu, enter the custom FlexScript code in the Custom box.
- Use the Color box to select the color of the text display.
Changing Token Colors
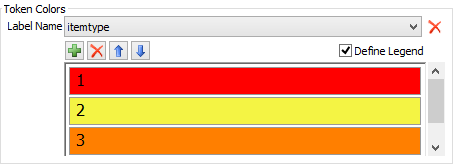
You can change a token's default colors so that it display a color based on the token's label value:
To change a token's color based on a label:
- Click an empty area somewhere in the process flow to ensure nothing is selected.
- In Quick Properties, at the bottom of the Process Flow Properties group, click the More Properties button.
- In the Visualization tab, find the Token Colors group.
- In the Label menu, select the label you will use to control the token's color.
- By default, FlexSim will assign unique label values a unique color. Therefore, the rest of the steps are only necessary if you want to control which colors are assigned to a specific label value. Check the Define Legend checkbox.
- Press the Add button
 to add a value to the legend.
 - Click inside the box to type a label value.
- Use the drop-down menu or the Sampler button
 to select a color to assign this
value.
to select a color to assign this
value. - Repeat these steps for additional label values to which you want to assign a color.
Changing Token Shapes
You can also change a token's default shape so that it displays a shape based on the token's label value. The process for changing a token's shape is nearly identical to the process for changing a token's color, except that you will use the Token Shape group of properties instead.
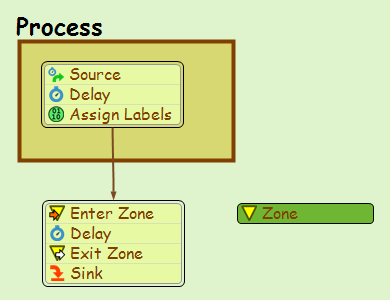
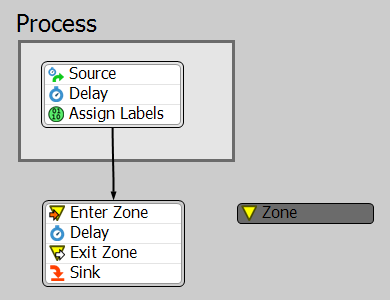
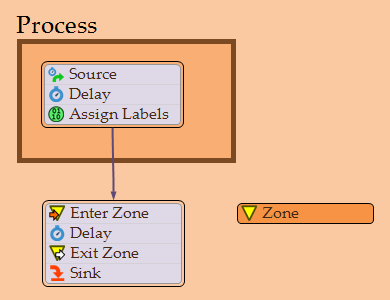
The Six Pre-Set Visual Themes
FlexSim comes with six different pre-set themes you can use. You can use these themes to quickly implement these visual styles:
The Classic Theme
The Aqua Theme

The Dusk Theme
The Forest Theme
The Gray Theme
The Sunset Theme
Applying a Pre-Set Visual Theme
To apply a pre-set or custom theme:
- Click an empty area somewhere in the process flow to ensure nothing is selected.
- In Quick Properties, select a theme from the Theme menu. The theme will automatically be applied to the current process flow.
Creating a Custom Visual Theme
To create a custom theme:
- Click an empty area somewhere in the process flow to ensure nothing is selected.
- In Quick Properties, under the Theme menu, click the More Theme Settings button to open the Process Flow Visual Theme window.
- If you would like to use one of the pre-set themes as a the starting point for your custom theme, select the desired theme from the Themes menu at the top of the dialog box. You'll notice that the properties for that theme will appear in all of the properties in the dialog box. However, the theme will not immediately be applied to the current process flow.
- Click the Add button
next to the
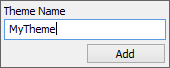
Themes menu to add a new theme. The Theme Name poop-up will
appear, as shown in the following image:
- Type a descriptive name and click the Add button next to the Themes menu.
- Change any of the visual properties that you would like to make part of this theme. (See Theme Dialog Box Properties for a complete description of each property.)
- Click the Update button
 next to the
Themes menu to save your changes to the currently selected
theme.
next to the
Themes menu to save your changes to the currently selected
theme. - Click the Apply Theme to Objects button to apply this theme to your current process flow. NOTE: If you only want the theme to be applied to future objects rather than the current process flow objects, do not press the Apply Theme to Objects button. Simply click the Apply button at the bottom of the dialog box instead.
- Click the OK button to close the Themes dialog box.
Your custom theme will now appear in the Themes menu in Quick Properties and will be avaiable for any future process flows you create.