Arranging Windows and Tabs
Resizing Windows and Panes
You can change the default size of various windows or panes in FlexSim. For example, while you have the User Manual open, the Quick Properties pane (right pane) changes to show the Table of Contents. You could resize this pane if you want to make the Table of Contents a little bit larger so that the topic titles fit on one line.
To resize a window or pane:
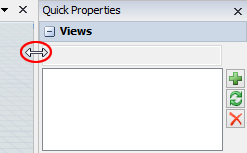
- Position your mouse over the edge of a window or pane until it changes from a mouse pointer to a set of arrows, as shown in the following image:
- Click on the edge of the window or pane and drag it until the window or pane is the preferred size.
Rearranging Windows and Tabs
If needed, you can change the way that FlexSim displays windows and tabs in the center pane. See Window and Tab Display Options for images with examples of each of the different window and tab arrangements.
To re-arrange the way windows or tabs are displayed or docked:
- Click on the tab for the process flow you want to move and begin dragging it to another part of the screen.
- Before you release the mouse button, you'll notice that the window becomes undocked and floats as an independent window outside of the main FlexSim window. If you release your mouse button at this point, the window will continue to be undocked as a separate window.
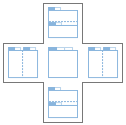
- Also as you click on the tab or the window's title bar and drag it around the screen, notice that a Guide Diamond appears near the center of the main FlexSim window, as shown in the following image:
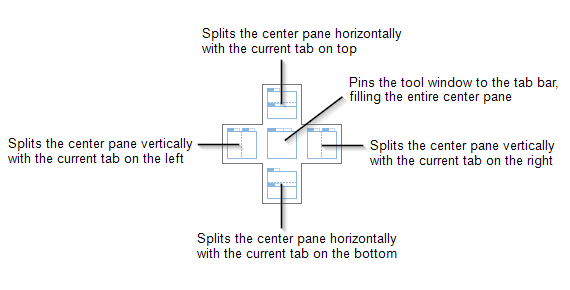
- While still pressing the mouse button, drag the mouse to the Guide Diamond. Notice that the Guide Diamond has five different areas. Each area corresponds to a different way of displaying or docking the window, as explained in the following image:
- As your mouse moves over different areas in the Guide Diamond, notice that the area turns gray to indicate it is selected. Release your mouse when your mouse is positioned over the desired screen position.
Window and Tab Display Options
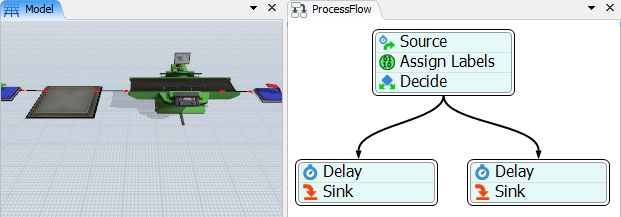
When you first open a model, the center pane displays the model. But sometimes using certain tools will open up a new window or tab in the center pane as well. For example, when you first opened the User Manual, it probably split the center pane into two panes with the model on the left and the User Manual on the right.
By default, FlexSim splits the center pane into two panes when you open a tool that requires a separate window or tab. However, you can customize the way windows are displayed. You can dock (pin) these windows in a variety of ways for easier access, as described in the following sections.
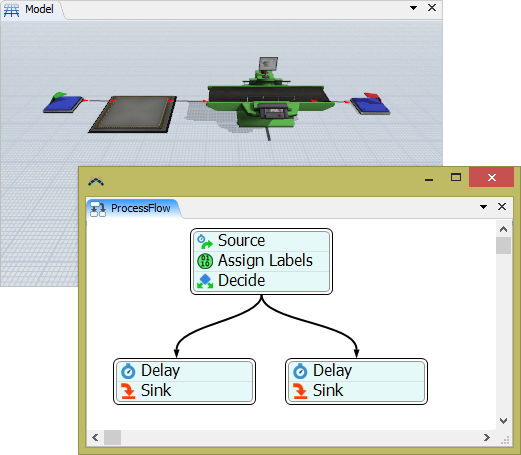
Undock the Window
You can undock the tool's window and float it as an independent window, separate from the main FlexSim window:
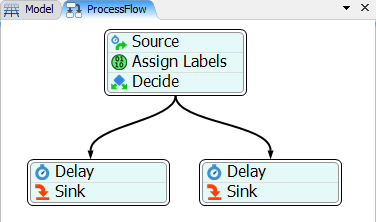
Pin the Window as a Tab
You can pin the tool window to the tab bar. This allows you to display the tool as a separate tab that will fill the entire center pane. You will be able to switch between various tabs by clicking the tabs you want to view (similar to tabbed browsing in a web browser):
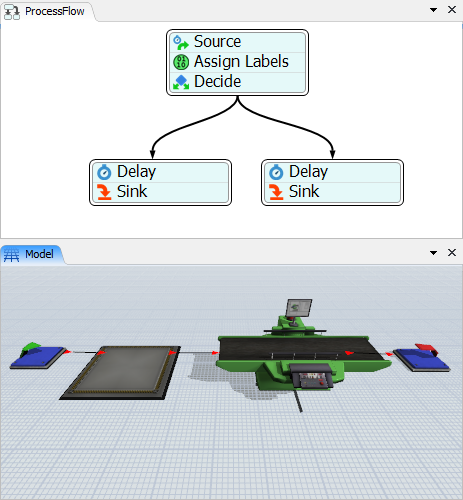
Horizontal Split
You can split the center pane horizontally with the model on either the top or the bottom pane:
Vertical Split
You can split the center pane vertically with the model on either the left or right pane: