Using Container Flow Items
Introduction to Container Flow Items
You can pack a container flow item with basic flow items, possibly preparing the container and its contents for transportation or storage. You can customize how flow items get packed into the container flow items using the Flow Item Bin.
FlexSim provides three container items:
- Pallet
- Tote
- Truck
The following sections will discuss how to use containers in a 3D model and how to customize their packing methods.
Packing Methods for Containers
Container flow items are a special type of flow items that can be packed with basic flow items, as demonstrated in the following image:
You will use the Flow Item Bin to determine the packing logic for the container flow item.
The following sections explain the available packing methods:
Default
The default packing method is used by the pallet container. This method stacks flow items on top of the container, filling up as much of the available space as possible before moving onto the next layer. It is nearly identical to how the queue stacks flow items by default.
Simple
The simple packing method is used by the tote container. This method stacks flow items inside the container, filling up as much of the available space as possible before moving onto the next layer.

Layer Stacking
The layer stacking method stacks flow items based on the uniformity of their size. When flow items have a consistent height (Z axis), they will be put on one layer of the container. As soon as the height of the flow item differs from the other flow item, it will be put on a new layer. You can change the layer stacking so that it checks for width (X axis) or depth (Y axis) instead.
In the following example, the red, green, and blue boxes all have slightly different heights:
Truck
The truck stacking method is used by the truck (and can only be used by the truck). This method stacks flow items in the back of the truck on top of each other and gradually moves to the front.

Custom
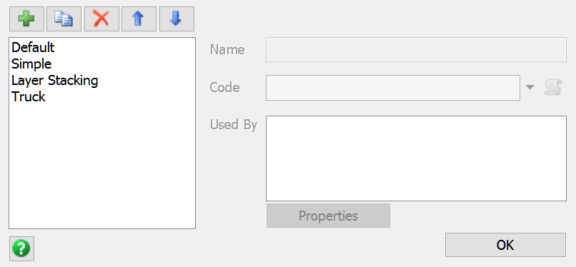
If you are comfortable with FlexScript, you can create your own custom packing logic. To create custom packing logic:
- In the Flow Item Bin, click the Edit Packing Methods button located at the bottom of the Flow Item List to open the Packing Editor.
- Click the Add button
 to add a new custom packing method or click the
Duplicate button
to add a new custom packing method or click the
Duplicate button
 to copy and modify an existing packing
method.
to copy and modify an existing packing
method.
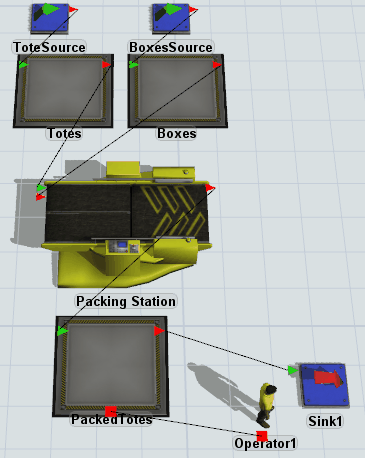
Using Containers in a 3D Model
The most typical way to use a container in a 3D model is to use a combiner to pack the container. When using a combiner, keep in mind that you'll need at least two sources in your model. One source will create the container flow items and the other source will create the basic flow items that will be packed into the container. These sources do not need to be directly connected to the combiner, but the flow that will feed the containers into the combiner will need to be connected to the first port. See Overview of 3D Object Flows for more information.
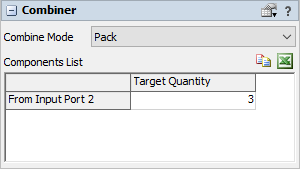
The combiner determines how many flow items will be packed into the container. To adjust this number:
- Click the combiner to update the Properties window.
- In the Combiner panel, under the Components List, change the number in the Target Quantity cell.
Changing a Container's Packing Method
To change a container flow item's packing method:
- In the Flow Item Bin, select the container flow item you want to change.
- In Properties under FlowItem, click the Pack Contents menu to open it. Select the packing method you'd like to use.