Task 4.2 - Optimizer
Task Overview
In addition to using the Experimenter to explicitly define scenarios, you can use the Optimizer. The Optimizer will automatically create scenarios and then test those scenarios, trying to find a scenario that best meets an objective.
FlexSim uses the word Solution to indicate that a scenario was generated by the optimizer, rather than by the user. The concept is identical, though; both solutions and scenarios are simply a set of parameter values.
Step 1 Designing the Optimization
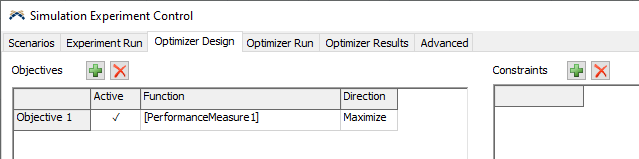
Go to the Optimizer Design tab in the Experimenter window. You will see an area to specify Objectives, as well as an area to specify Constraints. For this tutorial, we'll specify a single Objective.
- Click on the Function cell for the first objective.
- Click on the
 button that appears.
 - Point to Performance Measures, then choose PerformanceMeasure1.
Step 2 Running the Optimization
-
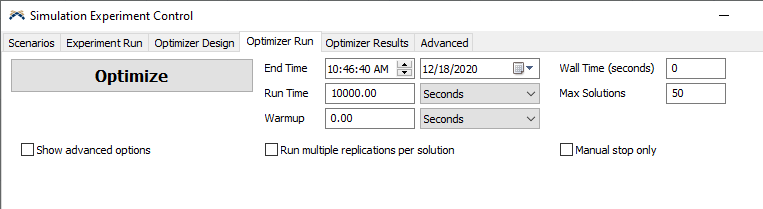
Go to the Optimizer Run tab in the Experimenter window. Then:
- Set the Run Time to
10000. This is how long the Optimizer will run each model configuration (called a solution) to evaluate it. - Set the Wall Time to
0. This usually means how long the Optimizer is allowed to run in real time. The value 0 means it has no time limit. - Set Max Solutions to
50. This means the Optimizer will try no more than 50 different solutions to find the optimal solution. - Click the Optimize button.
- Set the Run Time to
-
The Experimenter window will automatically switch to the Optimizer Results tab. The Optimizer then begins running through the following loop:
- Guess values for Parameter1 and Parameter2.
- Run a model with those values for 10000 seconds.
- Evaluate the performance measures.
- Calculate the objective function.
- Rank this solution.
- Use the information from this solution to create a new solution - new values for Parameter1 and Parameter2.
- Repeat from Step 2.
-
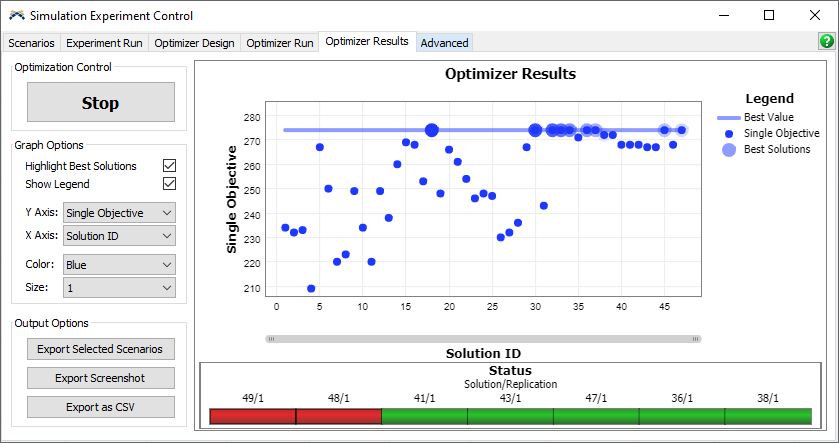
Because the Optimizer shares the multi-threaded capability of the Experimenter, it can evaluate multiple solutions at the same time. As the optimization progresses, the Optimizer Results graph will update and show the Optimizer's progress.
-
Once the Optimizer evaluates 50 solutions, a message will appear stating why the Optimizer stopped. In this case, it will say that the Optimizer reached the maximum number of solutions. If something went wrong, the message will contain information about the error.
Step 3 Analyzing the Results
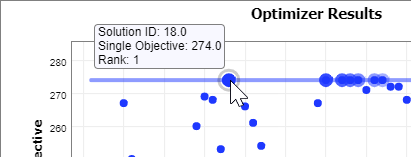
When the optimization is finished, the Optimizer Results chart should look something like this:
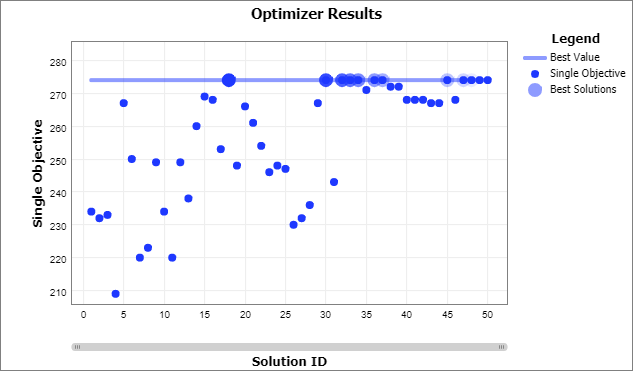
The Y Axis is called "Single Objective". For this example, it is synonymous with Throughput. The best solutions are highlighted. The circles with a lighter border around them represent better solutions. For a single objective, the top 10 solutions are marked this way.
As the optimization progressed, the Optimizer got better and better at creating good solutions, so that the last 15 solutions were all very good. This is called convergence, and it is one way to tell if an optimization is finished; if the objective value has not improved for a while, it may be that it will not improve with further searching, and the current best solution should be used.
Answering the Original Question
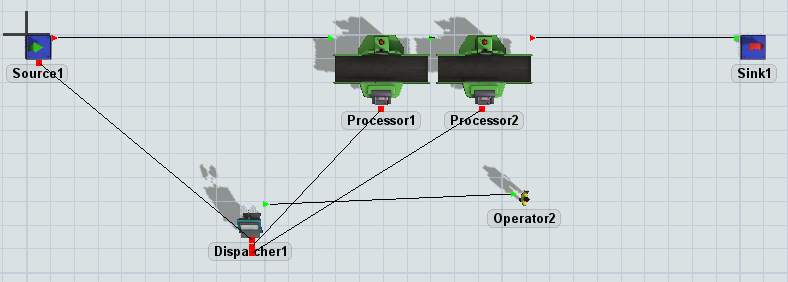
The goal of this optimization was to figure out where to put the two processors. We can now very easily find the answer to this question.
-
Hover over the best solution (the largest blue circle) on the chart; a small popup will appear.
-
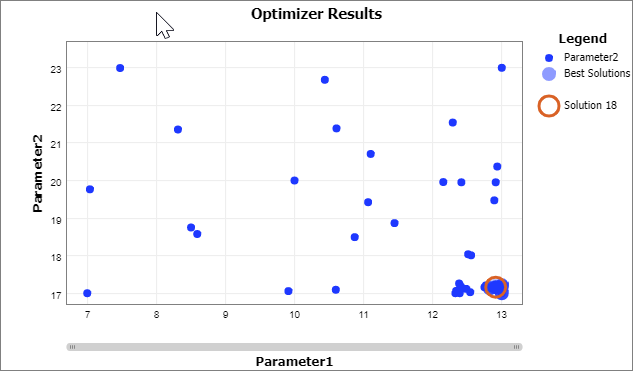
Click on this solution to select it. Now, in the Graph Options panel, change the Y Axis to Parameter2, and the X Axis to Parameter1.
-
The best solution (and all the other best solutions) is found where Parameter1 is greatest, and where Parameter2 is least. Remember that all top 10 solutions produced the same results; in this case, having the two processors right next to each other is the best configuration for this model.
Setting the Model to the Best Solution
It can be very useful to set the model to match the best solution. To do this:
-
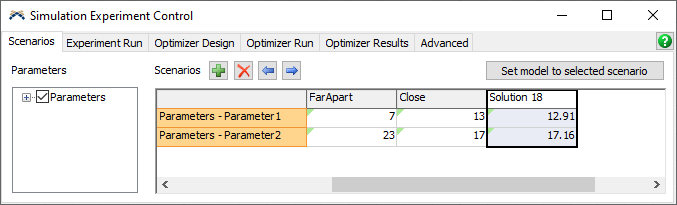
Click the Export Scenarios button. This takes all the selected solutions and creates Experimenter scenarios for them.
-
Click the column header for the exported solution. Then click the Set model to selected scenario button. Finally, reset the model. The processors are set to the best solution.
Conclusion
The optimizer is a powerful tool that allows you to try hundreds of configurations automatically, as part of a search for the best objective value. Even if there are dozens of variables, the optimizer can determine values for each one, in order to optimize your system.