Task 1.4 - Add Transport and Equipment Objects
Task Overview
In this task, you'll build out three different possible treatment tracks for the patient. These different treatment tracks will teach you how to use transports and equipment, which are a special class of objects in people-based models.
In the first track, the patient will go to the operating room for sutures and will be transported back to the exam room using a wheelchair. In the second track, a nurse will get an EKG machine from a storage area to monitor the patient. In the third track, the patient will go to the x-ray room for radiology.
You'll build and test each track in this tutorial. In the final step of the tutorial, you'll add more patients to the model and see how it operates when there are several patients in the emergency room at a time.
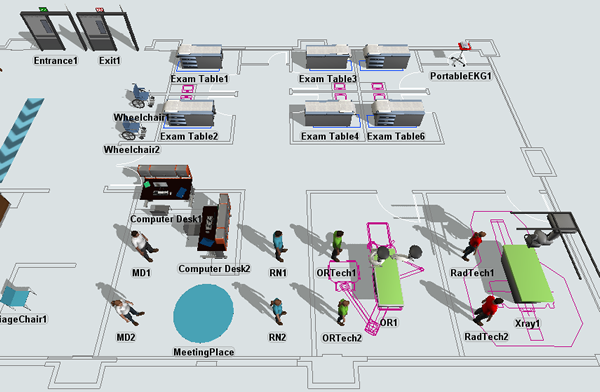
When you're finished, your simulation model will function similar to the following image:
Step 1 Add Additional Locations, Equipment, and Staff
In this step, you'll add additional location objects and staff objects to the 3D model to create an operating room and x-ray center. You'll also add some transport objects to the model (wheelchairs) and an equipment object (an EKG machine).
Lastly, you'll also add some additional staff members to this model and create groups for the new staff members. When you're finished, your simulation model should look similar to the following image:
To make these changes:
- Make sure the 3D model is open and active. In the Library under the People group, click the Location object to open a menu of location objects. Drag an OR object into the model. (Use the image at the beginning of this guide on the placement of objects.)
- Click OR1 to select it. In Quick Properties, change the
Z-rotation
 to
to -90.00. - Repeat the previous steps to add an Xray object to the
model. Change its Z-rotation to
-90as well. - In the Library under the People group, click the
Transport object to open a menu. Click (don't drag) the
Wheelchair to enter Create Objects mode. Your mouse pointer
will change to the Create Objects icon
 when you're in Create Objects mode. Click the area in the model where you want to add
the first wheelchair.
when you're in Create Objects mode. Click the area in the model where you want to add
the first wheelchair. - While still in Create Objects mode, click in the model to add a second Wheelchair.
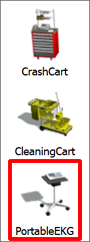
- In the Library under the People group, click the Equipment object to open a menu of location objects. Drag a PortableEKG object into the model.
- In the Library under the People group, click the Staff object and drag two Males into the model.
- Repeat the process to add two Females into the model as well.
- Rename the new staff members as follows:
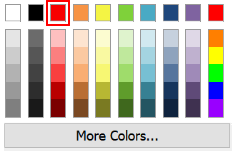
- In Quick Properties, change the color of ORTech1 and ORTech2 to green.
- Change the color of RadTech1 and RadTech2 to red.
- Double-click the A* Navigator to open its properties window. In the Visual tab, check the Show Members checkbox. Click OK to save the changes and close the window.
- Create connections (A-connects) from the A* Navigator to all of the new 3D objects, including all the staff, location, equipment, and transports.
- Confirm that there is a light blue background under all the new 3D objects. If desired, turn off the Show Members checkbox in the A* Navigator after you're done.


![]()
| Object | New Name |
|---|---|
| Male1 | ORTech1 |
| Female1 | ORTech2 |
| Female2 | RadTech1 |
| Male2 | RadTech2 |

Check that your simulation model looks similar to the image at the beginning of this step.
Step 2 Create Additional Object Groups
Since you added several new 3D objects to your simulation model in the previous step, you need to create object groups for those new objects in order to make your model scale well. In this step, you'll create an equipment group named EKGs for EKG machine, a transport group named Wheelchairs, a staff group named ORTechs, and a staff group named RadTechs.
To create additional object groups:
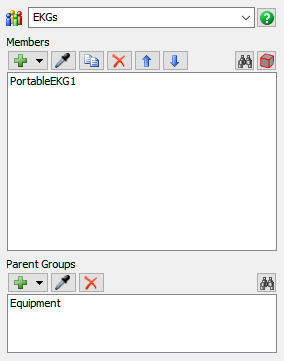
- In the 3D model, right-click PortableEKG1 to open a menu. Point to Equipment Groups, then select Add to New Group to open a group properties window.
- In the Group Name box, rename this group EKGs. Close the group window.
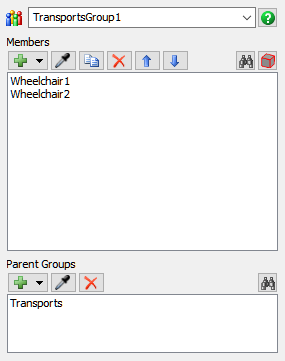
- Right-click Wheelchair1 to open a menu. Point to Transport Groups, then select Add to New Group to open a group properties window.
- In the Group Name box, rename this group Wheelchairs.
- Click the Sampler button
 to enter sampling mode.
 - Click Wheelchair2 to sample this object. Close the group window.
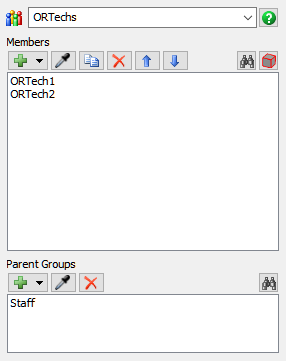
- Right-click ORTech1 to open a menu. Point to Staff Groups, then select Add to New Group to open a group properties window.
- In the Group Name box, rename this group ORTechs.
- Click the Sampler button
to enter sampling mode.
- Click ORTech2 to sample this object. Close the group window.
- Right-click RadTech1 to open a menu. Point to Staff Groups, then select Add to New Group to open a group properties window.
- In the Group Name box, rename this group RadTechs.
- Click the Sampler button
to enter sampling mode.
- Click RadTech2 to sample this object. Close the group window.

Consider saving your model at this point.
Step 3 Use a Transport in a Treatment Phase
In this step, you'll add your first treatment track to the PatientTrack process flow. You'll add a treatment track in which the patient will go to the operating room for sutures. This treatment track will show you how to work with transport objects because the patient will need to be transported back from the operating room on a wheelchair.
When you're finished, the process flow will look similar to the following image:

The following is an overview of how the activities and shared assets will function:
| Activity | Explanation |
|---|---|
| OR | This shared asset will link to the OR1 object in the 3D model. |
| Wheelchairs | This shared asset will link to the Wheelchairs transport group in the 3D model. |
| ORTechs | This shared asset will link to the ORTechs staff group in the 3D model. |
| Acquire OR | This activity will attempt to acquire the OR1 location. If another patient is using the OR1 location, the token will wait until the OR1 location is available. |
| Acquire ORTech | This activity will acquire a member of the ORTechs group. |
| Escort Patient to OR | This activity will tell the acquired ORTech to escort the patient to the OR1 location. |
| Suture Patient | This activity will represent the amount of time it takes to test the patient. You'll set that time to 30 seconds for now. |
| Acquire Wheelchair | This activity will attempt to acquire a wheelchair for the patient. If all the wheelchairs are already being used by other patients, the current patient will wait. Once a wheelchair is free, the current patient's token will move to the next activity. |
| Transport to Exam Room | This activity will tell the ORTech to get the wheelchair and bring it to the patient. After the patient gets on the wheelchair, the ORTech will transport the patient back to the exam table the patient had used originally. |
| Return Wheelchair | Once the patient has been transported, the ORTech will move the wheelchair back to its original storage area. You'll use a picklist option that sets the destination back to the wheelchair's original reset position in the model, which is the storage area. |
| Release ORTech | This activity will release the ORTech that was acquired earlier in the process flow. The ORTech will then be free to work on other tasks or to be acquired by other patients. |
| Release Wheelchair | This activity will release the wheelchair so that it can be acquired by other patients in the simulation model. |
| Release OR | This activity will release the OR1 location so that it can be acquired by other patients. |
To build this logic:
- In the PatientTrack process flow, delete the Treatment shape.
- In the empty space where the Treatment shape used to be, add a Transport then Process activity set (under People Activity Sets).
- Rename this shape as Treatment 1: Sutures.
- In Quick Properties for this shape, change the Color to red.
- Press and hold the Ctrl key. Click the Acquire Transport activity and move it so that it is after the Process activity.
- Repeat the previous step to move the Transport Person activity after the Acquire Transport activity.
- From the Library under the People Sub Flows group, drag an Escort Person activity into the process flow and insert it after the Acquire Staff activity.
- From the Library under the People Sub Flows group, drag a Move Equipment activity into the process flow and insert it after the Transport Person activity.
- Rename the activities and shared assets as follows:
- Create the following connectors:
- From Decide Treatment to Acquire OR
- From Release OR to Acquire Exam MD
- Click the OR shared asset to select it. In Quick
Properties next to the Location box, click the
Sampler button
to enter sampling mode.
- Click the OR1 location in the 3D model to sample it.
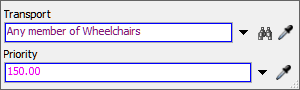
- Click the Wheelchairs shared asset to select it. In Quick Properties, click the arrow next to the Transport box to open a menu. Point to Transport Groups and select Wheelchairs.
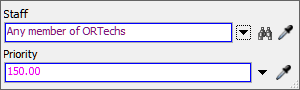
- Click the Staff shared asset to select it. In Quick Properties, click the arrow next to the Staff box to open a menu. Point to Staff Groups, then select ORTechs.
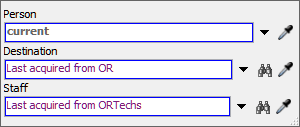
- Click the Escort Patient to OR activity to select it.
Next to the Destination box, click the
Sampler button
to enter sampling mode.
- Click the OR shared asset to sample it.
- Next to the Staff box, click the
Sampler button
to enter sampling mode.
- Click the ORTechs shared asset to sample it.
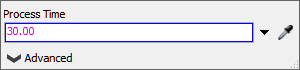
- Click the Suture Patient activity to select it. In
Quick Properties in the Process Time box, delete the
current text and type
30.00. - Click the Transport to Exam Room activity to select it.
In Quick Properties next to the Destination box, click the
Sampler button
to enter sampling mode.
- Click the Exam Rooms shared asset in the Escort to Exam Room shape to sample it.
- Click the Return Wheelchair activity to select it. In
Quick Properties, next to the Equipment box, click the
Sampler button
to enter sampling mode.
- Click the Wheelchairs shared asset to sample it.
- Click the arrow next to the Destination box to open a menu. Select Equipment's Reset Position.
- Next to the Staff box, click the
Sampler button
to enter sampling mode.
- Click the ORTechs shared asset to sample it.
| Activity or Shared Asset | New Name |
|---|---|
| Location | OR |
| Transport | Wheelchairs |
| Staff | ORTechs |
| Acquire Location | Acquire OR |
| Acquire Staff | Acquire ORTech |
| Escort Person | Escort Patient to OR |
| Process | Suture Patient |
| Acquire Transport | Acquire Wheelchair |
| Transport Person | Transport to Exam Room |
| Move Equipment | Return Wheelchair |
| Release Staff | Release ORTech |
| Release Transport | Release Wheelchair |
| Release Transport | Release OR |
![]()

Reset and run the simulation model:
After the staff consultation phase, an ORTech then comes and escorts the patient to the operating room and sutures the patient. The ORTech then gets a wheelchair and returns the patient back to the exam room.
Step 4 Use Equipment in a Treatment Phase
In this step, you'll learn how to work with equipment in people-based models. You'll add a second phase of treatment in which an RN will get an EKG machine from its storage area and use it to test the patient. When the patient is done being tested, the RN will return the EKG machine to its storage closet.
When you're finished, the process flow will look similar to the following image:
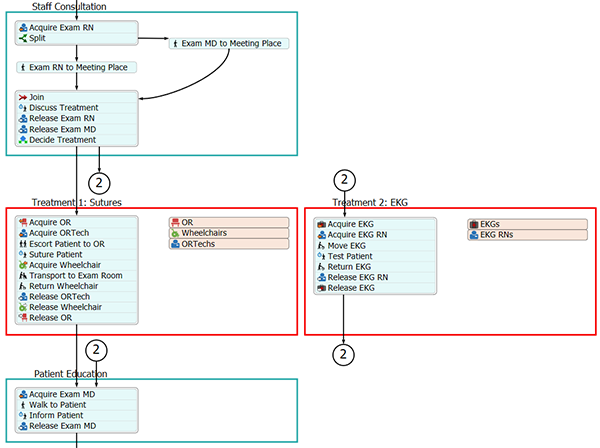
The following is an overview of how the new activities will function:
| Activity or Shared Asset | Explanation |
|---|---|
| EKGs | This shared asset will link to the EKGs equipment group in the 3D model. |
| EKG RNs | This shared asset will link to the RNs staff group in the 3D model. |
| Acquire EKG | This activity will attempt to acquire an EKG for the patient. If all the EKGs are already being used by other patients, the current patient will wait. Once an EKG is free, the current patient's token will move to the next activity. |
| Acquire EKG RN | This activity will acquire a member of the RNs group. If all members of the RNs group are busy working on other tasks, the token will wait at this activity until an RN is free. |
| Move EKG | This activity will tell the RN to get the EKG and bring it to the patient's current location. |
| Test Patient | This activity will represent the amount of time it takes the RN to test the patient. You'll set that time to 30 seconds for now. |
| Return EKG | Once the patient has been tested, the RN will move the EKG back to its original storage area. You'll use a picklist option that sets the destination back to the EKG's original reset position in the model, which is the storage area. |
| Release EKG RN | This activity will release the EKG RN that was acquired earlier in the process flow. Afterwards, the RN will then be free to work on other tasks or to be acquired by other patients. |
| Release EKG | This activity will release the EKG so that it can be acquired by other patients in the simulation model. |
To build this logic:
- In the PatientTrack process flow, add a Move Equipment then Process activity set (under People Activity Sets) placing it to the right of the Treatment 1: Sutures shape.
- Rename this shape as Treatment 2: EKG.
- In Quick Properties for this shape, change the Color to red.
- From the Library under the People Sub Flows group, drag a Move Equipment activity into the process flow and insert it after the Process activity.
- Rename the activities and shared assets as follows:
- Create a connector from the Decide Treatment activity to the Acquire EKG activity. Click the connector to select it. In Quick Properties, open the Line Style menu and select Split. Change the name of the connector to 2 for clarity.
- Repeat the previous step to create another split connector from the Release EKG to the Acquire Exam MD activity.
- Click the EKGs shared asset to select it. In Quick Properties, click the arrow next to the Equipment box to open a menu. Point to Equipment Groups, then select EKGs.
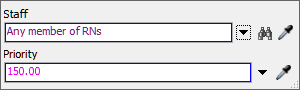
- Click the EKG RNs shared asset to select it. In Quick Properties, click the arrow next to the Staff box to open a menu. Point to Staff Groups, then select RNs.
- Click the Test Patient activity to select it. In Quick
Properties inside the Process Time box, delete the current
text and type
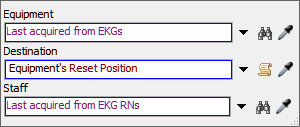
30.00. - Click the Return EKG activity to select it. In Quick
Properties next to the Equipment box, click the
Sampler button
to enter sampling mode.
- Click the EKGs shared asset to sample it.
- In Quick Properties, click the arrow next to the Destination box to open a menu. Select Equipment's Reset Position.
- Next to the Staff box, click the
Sampler button
to enter sampling mode.
- Click the EKG RNs shared asset to sample it.
- Since you only want to test this new track right now, click the
Decide Treatment activity to select it. In Quick Properties
in the Send Token To box, delete the current number and
type
2.
| Activity or Shared Asset | New Name |
|---|---|
| Equipment | EKGs |
| Staff | EKG RNs |
| Acquire Equipment | Acquire EKG |
| Acquire Staff | Acquire EKG RN |
| Move Equipment | Move EKG |
| Process | Test Patient |
| Move Equipment | Return EKG |
| Release Staff | Release EKG RN |
| Release Equipment | Release EKG |


Reset and run the simulation model:
After the staff consultation phase, an RN brings the EKG machine to the patient. After a brief delay, the RN then returns the EKG to its storage room.
Step 5 Add an Additional Treatment Phase
In this phase, the patient will go to the radiology area for an x-ray. When you're finished, the process flow will look similar to the following image:
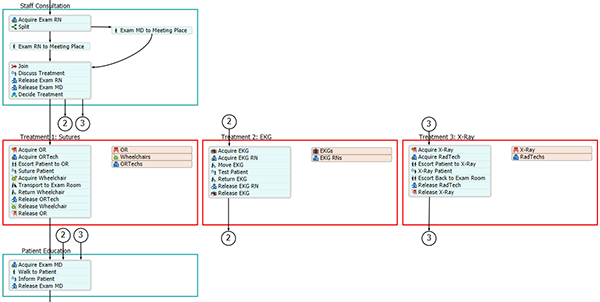
The following is an overview of how the new activities will function:
| Activity or Shared Asset | Explanation |
|---|---|
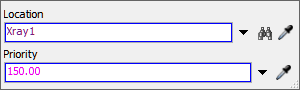
| X-Ray | This shared asset will link to the Xray1 object in the 3D model. |
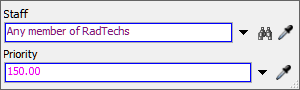
| RadTechs | This shared asset will link to the RadTechs staff group in the 3D model. |
| Acquire X-Ray | This activity will attempt to acquire the Xray1 location. If another patient is using the Xray1 location, the token will wait until the Xray1 location is available. |
| Acquire RadTech | This activity will acquire a member of the RadTechs group. |
| Escort Patient to X-Ray | This activity will tell the acquired RadTech to escort the patient to the Xray1 location. |
| X-Ray Patient | This activity will represent the amount of time it takes to x-ray the patient. You'll set that time to 30 seconds for now. |
| Escort Back to Exam Room | This activity will tell the ORTech escort the patient back to the exam table the patient had used originally. |
| Release RadTech | This activity will release the RadTech that was acquired earlier in the process flow. Afterwards, the RadTech will then be free to work on other tasks or to be acquired by other patients. |
| Release X-Ray | This activity will release the Xray1 location so that it can be acquired by other patients. |
To build this logic:
- From the Library under People Activity Sets, add an Escort then Process activity set to the process flow.
- Rename the shape Treatment 3: X-Ray.
- In Quick Properties for this shape, change the Color to red.
- From the Library under the People Sub Flows group, add an Escort Person activity after the Process activity.
- Rename the activities and shared assets as follows:
- Create a connector from Decide Treatment to Acquire X-Ray. Click the connector to select it. In Quick Properties, open the Line Style menu and select Split. Change the name of the connector to 3 for clarity.
- Repeat the previous step to create another split connector from Release X-Ray to Acquire Exam MD.
- Click the X-Ray shared asset to select it. In Quick
Properties next to the Location box, click the
Sampler button
to enter sampling mode.
- In the 3D model, click the Xray1 location to sample it.
- Click the RadTechs shared asset to select it. Click the arrow next to the Staff box to open a menu. Point to Staff Groups, then select RadTechs.
- Click the X-Ray Patient activity to select it. In
Quick Properties in the Process Time box, delete the
current text and type
30.00. - Click the Escort Back to Exam Room activity to select it.
- Click the Escort Patient to OR activity to select it.
Next to the Destination box, click the
Sampler button
to enter sampling mode.
- Click the Exam Rooms shared asset in the Escort to Exam Rooms shape to sample it.
- Next to the Staff box, click the
Sampler button
to enter sampling mode.
- Click the RadTechs shared asset to sample it.
- Since you only want to test this new track right now, click the
Decide: Which Treatment activity to select it. In Quick
Properties in the Send Token To box, delete the current
number and type
3.
| Activity or Shared Asset | New Name |
|---|---|
| Location | X-Ray |
| Staff | RadTechs |
| Acquire Location | Acquire X-Ray |
| Acquire Staff | Acquire RadTech |
| Escort Patient | Escort Patient to X-Ray |
| Process | X-Ray Patient |
| Escort Person | Escort Back to Exam Room |
| Release Staff | Release RadTech |
| Release Location | Release X-Ray |

Reset and run the simulation model:
After the staff consultation phase, a RadTech then comes and escorts the patient to the x-ray room and performs the x-ray. The RadTech then returns the patient back to the exam room.
Step 6 Change the Patient Arrival Schedule
Now that you've built out a fairly complex simulation model and tested it, it's time to increase the number of patients that move through the emergency room model. In this step, you'll change the patient arrival schedule on the Date Time Source activity in the PatientArrival process flow. Because patients in an emergency room often arrive at varying rates depending on the time of day, the Date Time Source activity will allow you to define the rates that they commonly arrive.
To change the patient arrival pattern:
- Open the PatientArrivals process flow.
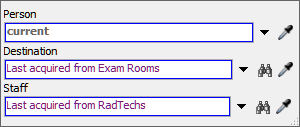
- With the Source: Simulation Starts activity selected, in Quick Properties, click the Edit Arrivals button to open this activity's properties window.
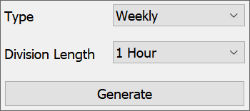
- Click the Generate Table button to expand the properties.
- Click the Type menu and select Weekly.
- Confirm that the Division Length is set to 1 Hour and then click the Generate button.
- Click the ... button next to the Time Mode menu to open the Model Settings.
- Change the Model Start Time to
12:00:00 AM. Close the window. - Each cell will indicate the number of patients who will arrive during each hour of each day. Click each cell and type a number to change it. If desired, you can create your own custom arrival schedule. Otherwise, fill in the cells as follows:
- Confirm that the Arrival Spacing menu is set to Randomly spaced.
- Close the properties window.
- On the simulation control bar, click the arrow next to the Run Time controls to open a menu. Select Date and Time.
- Open the PatientTrack process flow.
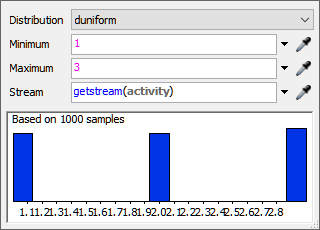
- In the MD Consultation shape, click the Decide: Which Treatment activity to select it. In Quick Properties, click the arrow next to the Send Token To box to open a menu. Point to Statistical Distribution, then select D Uniform.
- Delete the number in Maximum and change it to
3.

Reset and run the model. Since the first patient likely won't arrive at time 0, you might want to click the Step button to skip ahead to the first arrival. You might also want to increase the speed of the simulation model.
As you watch, several patients will now arrive randomly during the hour and patients will randomly be assigned to one of three treatment tracks.
Conclusion
This concludes the people-based models tutorial. By now you should have a good sense of all the different tools that are available to you when building a people-based model in FlexSim. Be aware that in a normal simulation project, you'd go on to make sure your data inputs were correct by studying the times that it takes to complete registration, triage, examinations, and other treatment times.