Task 1.1 - Use an Activity Set
Task Overview
FlexSim's people-based 3D objects and process flow activities make it easy to build simulation models that involve people moving through a system, such as a health care facility or a customer service center. In this tutorial task, you'll learn about the basics of building a people-based model. You'll learn how to:
- Add a floor plan to a 3D model
- Add locations and staff to your 3D model
- Create object groups
- Build a process flow that will create people inside the 3D model
- Use an activity set in a process flow for faster logic building
To teach you how to use the people-based 3D objects and process flows, you'll build a portion of a small hospital emergency room. In this tutorial task, you'll only build the section of the system that handles new patient arrivals. You'll add the necessary objects and create the basic behavior of a patient that arrives at the emergency room and registers at the front desk.
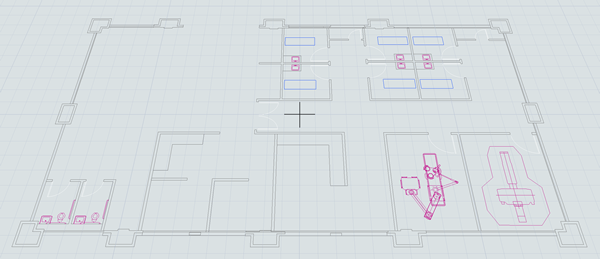
When you're finished with this task, your model will look similar to the following image:
Step 1 Add a Floor Plan
In this step, you'll add a floor plan of the emergency room that you will simulate in this tutorial. This floor plan is included with FlexSim when you installed the software. When you're finished adding the floor plan, your model should look similar to the following image:
To add this floor plan:
- In the left pane, click the Toolbox tab to open the Toolbox.
- Click the Add button to open a menu. Point to Visual, then select Model Background.
- On the What type of background drawing do you have? page, confirm that AutoCAD Drawing is selected and click the Next button.
- On the Where is the AutoCAD file? page, next to the Filename box, click the ... button to open your computer's file directory.
- Navigate to your computer's Documents folder, then to the FlexSim 2019 Projects folder. Double-click the ER_small.dwg file to select it. Click the Next button.
- You'll use the default settings on the Background Orientation and Properties page, so click the Next button.
- On the Customize layer visibility and color page, click the green-colored box next to the Wall Layer and select a dark gray color to make the walls more visible. Click the Next button to continue.
- You'll use the default settings on the Snap to Background Settings page, so click the Finish button.
Check to ensure your model looks similar to the image in the beginning of this step.
Step 2 Add Locations to Your 3D Model
The 3D Library has a set of objects that are specifically designed to work well with people-based models. In this step, you'll learn how to add people-based locations and multi-locations to a 3D model.
If you're familiar with FlexSim, locations are similar to fixed resources for flow items in FlexSim. People will move to these locations and interact with them based on the type of object they are. Usually the interaction will involve changing something about the person's visuals or animations while they are at that location. For example, when people interact with a chair, it will animate them sitting in a chair.
You'll also add a multi-location to your 3D model in this step. A multi-location is a location that contains a group of related locations. When a person attempts to acquire the multi-location, any of the individual locations in this group could be acquired. In this model, you'll add a chairs multi-location to represent chairs in a waiting room area. Each individual chair can potentially be acquired by the patients, but you don't need to add each chair to the model; you can simply add the group of chairs. In this step, you'll also learn how to edit a multi-location to add additional chairs to the group.
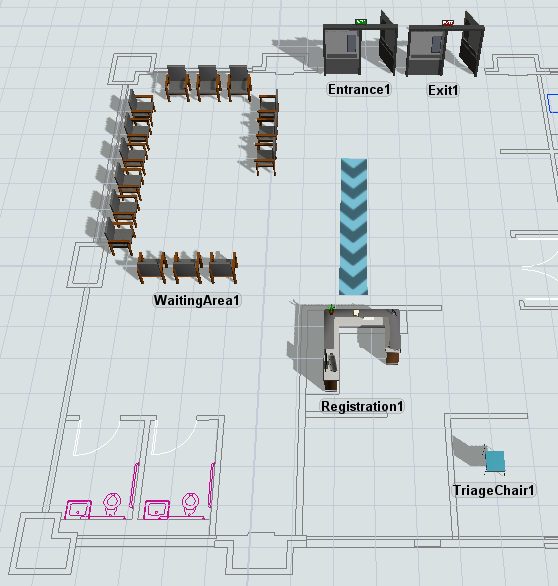
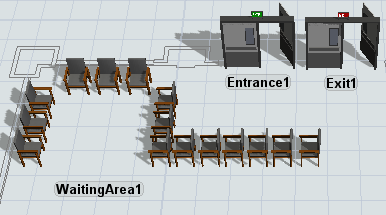
At this point, you'll just build the registration area of the model, which will include an entrance and exit for patients, a registration desk where they will sign in when they arrive, and a waiting area. When you're finished, your 3D model will look similar to the following image:
To add these locations to your model:
- In the left pane, click the Library tab to open the Library.
- Expand the People group of objects. Click the Location object to open a menu of location objects. Drag a Registration object into the model. (Use the image at the beginning of this guide on the placement of objects.)
- In the Library under the People group, click the Location object to open a menu of location objects. Drag an Entrance into the 3D model.
- Repeat the previous step to add an Exit location to the model.
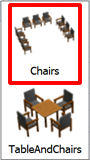
- In the Library under the People group, click the MultiLocation object to open a menu of multi-location objects. Drag the Chairs object into the model.
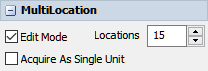
- In the 3D model, click the Chairs1 multi-location to select it. In Quick Properties, rename the object as WaitingArea1.
- In Quick Properties under the MultiLocation group, check the Edit Mode checkbox.
- In the Locations box, increase the number to
15. - Notice that there are now 15 chairs in the WaitingArea1 multi-location.
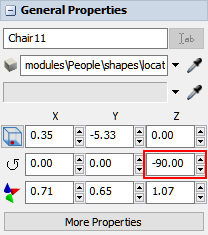
- Move and rotate the newly added chairs so that they look like a larger waiting room
area. (Right-click the blue sizer arrow to rotate the chairs or use Quick Properties to
change their Z-rotation
 to
to
-90or0.) - When finished, clear the Edit Mode checkbox.
- In the Library under the People group, drag a Waiting Line into the model.
- Click the end of the WaitingLine1 and drag it to rotate it 90 degrees and resize it as needed.
- Double-click WaitingLine1 to open its properties window.
- On the WaitingLine tab in the Stanchions group, clear the Draw Stanchions check box.
- Click the OK button to save the changes and close the properties window.
- In the Library under the People group, click the Location object to open a menu of location objects. Drag a Chair into the model.
- Click Chair1 to select it. In Quick Properties, rename it as TriageChair1.
- Change the TriageChair's Z-rotation
to
-90.00.


Check to make sure your 3D model looks similar to the image shown at the beginning of this step.
Step 3 Create Object Groups
In this step, you'll learn how to add staff objects to your 3D model. You'll then learn how to create staff and location object groups. You'll also explore how groups work with people-based 3D objects in general by exploring groups in the Toolbox.
By default, all locations are automatically added to a generic group named the Locations group and all staff are added to the Staff group. However, you also have the ability to create additional groups or sub-groups to help better organize your model. As you'll see in a later step, these groups are important to building the logic for people-based objects.
In this step, you'll add a staff member that will act as a receptionist. You'll create a sub-group of the Staff group called Receptionists that will contain this new staff member. Then you'll add two additional staff members and add them to a group called RNs. You'll also add the WaitingArea to a group called WaitingAreas.
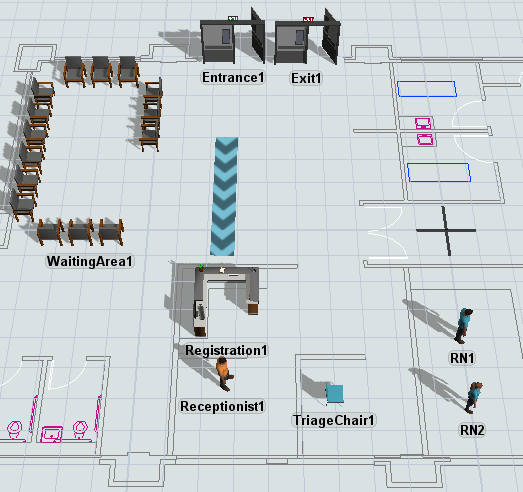
When you're finished, your 3D model will look similar to the following image:
To add a staff member and create an object group:
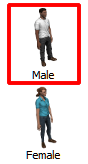
- In the Library under the People group, click the Staff object to open a menu of staff objects. Drag two Males into the model.
- In the Library, click the Staff object to open a menu. Drag a Female into the model.
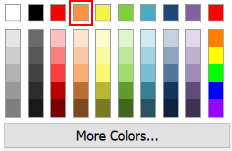
- Click Male1 to select it. In Quick Properties, rename the object as Receptionist1.
- Change the color of Receptionist1 to orange.
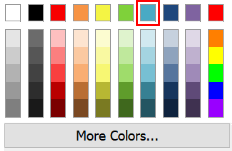
- Click Male1 to select it. In Quick Properties, rename the object as RN1.
- Change the color of RN1 to blue.
- Click Female1 to select it. In Quick Properties, rename the object as RN2.
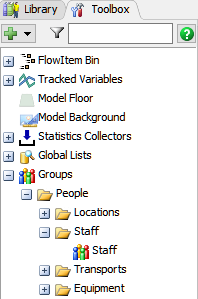
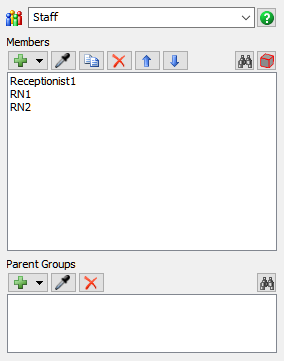
- In the left pane, click the Toolbox tab to open the Toolbox. Expand the Groups folder, then expand the People folder, and then expand the Staff folder.
- Double-click the Staff group to open its properties window. Notice this automatically includes Receptionist1, RN1, and RN2 as members.
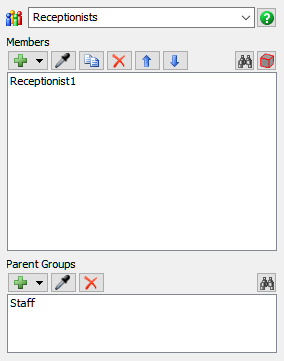
- In the 3D model, right-click Receptionist1 to open a menu. Point to Staff Groups, then select Add to New Group to open a group properties window.
- In the name box, delete the current text and rename the group Receptionists.
- Confirm that Receptionist1 is listed as a member and that Staff is listed as the parent group. Close the group window.
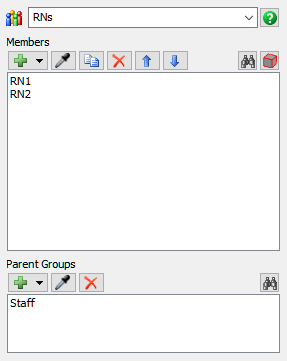
- In the 3D model, right-click RN1 to open a menu. Point to Staff Groups, then select Add to New Group to open a group properties window.
- In the name box, delete the current text and rename the group RNs.
- Click the Sampler button
 to enter sampling mode.
 - In the 3D model, click RN2 to sample it. Close the group window.
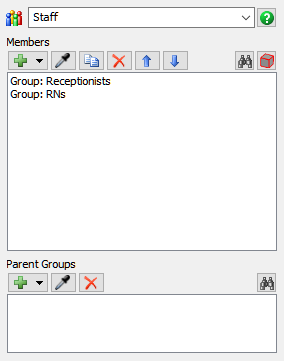
- In the Toolbox, confirm that the Staff folder now includes the Receptionists group and the RNs group. Double-click the Staff group to open its properties window. Confirm that this group now includes the Receptionists group and the RNs group as sub-groups. Close the group window.
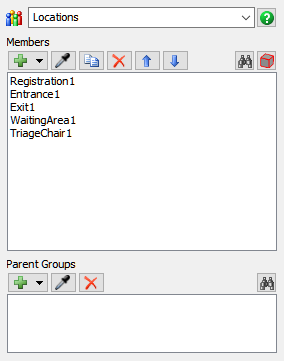
- In the Toolbox, expand the Locations folder, and then double-click the Locations group to open its properties window. Notice this automatically includes all the locations that have been added to the 3D model as members.
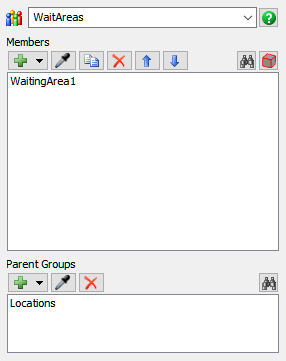
- In the 3D model, right-click the WaitingArea1 to open a menu. Point to Location Groups, then select Add to New Group to open a group properties window.
- In the name box, delete the current text and rename the group WaitAreas. Close the group window.
- In the Toolbox, confirm that the Locations folder now includes the WaitAreas group. Double-click the Locations group to open its properties window. Notice this group now includes the WaitAreas group as a sub-group. Close the group window.

Consider saving your simulation model at this point.
Step 4 Add Activities to Process Flows
In this step, you'll learn how to set up process flows. The Process Flow tool allows you to build a flowchart of your model's logic. Inside that flowchart, you'll add activities that contain small chunks of pre-programmed logic or instructions. When a simulation model runs, small green circles called tokens move through the process flow activities, performing each activity's instructions.
In this step, you'll create two process flows. One will be a person process flow named PatientTrack that you'll use to control how the patient interacts with the 3D model after it has been created. The second will be a general process flow named PatientArrivals that will control how frequently patients will be created inside the 3D model.
Inside the PatientTrack process flow, you'll add an activity set called Walk then Process (or Wait in Line). People-based models have several activity sets you can use to build your simulation model's logic. Activity sets are groups of process flow activities that have been pre-programmed to accomplish some of the most common logical tasks in people-based models.
The activity set you'll add in this step contains activities that will instruct a patient to walk to the registration desk and begin the registration process. If the receptionist is busy helping another patient, the current patient will wait in line.
When you're finished, your process flows should look similar to the following image:

For now, you'll merely add and connect these activities to the two process flows. You'll edit the properties to add logic in a later step.
To add and connect these activities:
- On the main toolbar, click the Process Flow button to open a menu. Select Add a Person Process Flow to create a new process flow. You'll notice two process flows will open in a separate window.
- Click the Arrivals tab to open it. In Quick Properties, change the name of this process flow to PatientArrivals.
- Notice that there is a stacked block of three activities in this process flow. Rename these two activities as follows:
- Click the Person Flow tab to open it. In Quick Properties, change the name of this process flow to PatientTrack.
- Notice that this process flow already has a Schedule Source activity. Rename this activity as Source: Patient Arrives.
- In the Library under the People Activity Sets group, drag a Walk then Process (or wait in line) activity set into the PatientTrack process flow.
- Rename the shape as Patient Registration.
- From the Library under the People Sub Flows, add a Walk activity, inserting it after the Acquire Staff activity.
- For clarity, rename the shared assets and activities in this shape as follows:
- Create a connector from the Source: Patient Arrives activity to the first Acquire Registration activity in the Patient Registration shape.
| Activity | New Name |
|---|---|
| Source | Source: Simulation Starts |
| Create Person | Create Person: Patient |
| Sink | Sink: Patient Was Created |
| Activity or Shared Asset | New Name |
|---|---|
| Staff | Receptionists |
| Location | Registration |
| Acquire Location (on the left) | Acquire Registration |
| Walk (first) | Walk to Registration |
| Acquire Staff | Acquire Receptionist |
| Walk (second) | Walk to Patient |
| Process | Register Patient |
| Release Staff | Release Receptionist |
| Release Location | Release Registration |
| Wait In Line | Wait in Registration Line |
| Acquire Location (on the right) | Acquire Registration |
Check to ensure that your two new process flows look similar to the image at the beginning of this step.
Step 5 Edit the Activity Properties
In this step, you'll edit the properties for the activities in the process flow. One important concept to keep in mind is that in this tutorial you'll use a process flow instance for each patient that is created by the PatientArrival process flow. That means that each patient will run its own individual copy of the PatientTrack process flow based on the template you'll build for the patient in this step. See Process Flow Instances for more information about how process flow instances work.
In practical terms, this means that any time you see the keyword current in
the properties for an activity, it will refer to the current patient that is running
this instance of this process flow. The token that runs through that instance will be tied
to that patient.
In this step, you'll also see how the staff groups you set up earlier in the tutorial will be used in this model's logic. When a staff member is required to help a patient, you can assign any member of the group to help the patient (as opposed to assigning a specific staff member). When needed, the process flow will select the first available member of this group to work on a task.
Using object groups will help your model scale well as it becomes more complex. It makes it so that you can add extra chairs, receptionists, nurses, etc. as needed without having to change the model's logic. When you add new objects to the 3D model, all you will have to do is add the new members to the group and FlexSim will take care of the rest of the logic. These object groups also make it possible to easily study the impact of adding additional staff or location resources to your model to find the most efficient use of resources.
The following is an overview of how each activity in the PatientArrivals process flow will function:
| Activity or Shared Asset | Explanation |
|---|---|
| Source: Simulation Starts | This activity will create a token when the simulation starts and release that token to the next downstream activity. You'll only start with one patient for now to test the simulation model. You'll modify the patient arrival schedule in a later tutorial task. |
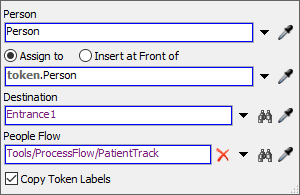
| Create Person: Patient | This activity will create a new person and place it inside the Entrance in the 3D model. This person will represent a patient moving through the system. When this person is created, it will create an instance of that patient that will run its own copy of the PatientTrack process flow. |
| Sink: Patient Was Created | This activity will remove the tokens from the PatientArrivals process flow once the patients have been created. You'll use the default settings. |
And the following is an overview of how each activity in the PatientTrack process flow will function:
| Activity or Shared Asset | Explanation |
|---|---|
| Source: Patient Arrives | This activity will create a token as soon as a new patient is created by the PatientArrival process flow. This token will be associated with the patient that was created in the 3D model. |
| Receptionists | This shared asset will link to the Receptionists group that you created in an earlier step. |
| Registration | This shared asset will link to the Registration1 location in the 3D model. |
| Acquire Registration | This activity will attempt to acquire the Registration1 location. If another patient is using the Registration1 location, the token will move to the Wait in Registration Line activity and the patient will wait in line. If the Registration1 location is acquired, the token will move to the Walk to Registration activity instead. This activity is pre-programmed to work correctly as part of the Walk then Process (or wait in line) activity set, so you'll use its default settings. |
| Wait in Registration Line | This activity will send the current patient to WaitingLine1. This activity is pre-programmed to work correctly as part of the Walk then Process (or wait in line) activity set, so you'll use its default settings. Since you didn't change the default name of this waiting line, this activity will automatically send patients to it. If you had changed the name of the waiting line, you would have to specify the waiting line to which you wanted to send patients. |
| Acquire Registration | This activity is identical to the previous Acquire Registration activity. It will attempt to acquire the Registration1 location for the patient. When the location is free, the token will move to the Walk to Registration activity. |
| Walk to Registration | Once the Registration1 location has been acquired, this activity will tell the patient to walk to the Registration1 location. |
| Acquire Receptionist | This activity will acquire a member of the Receptionists group. If all members of the Receptionists group are busy working on other tasks, the token will wait at this activity until a receptionist is free. |
| Walk to Patient | This activity will send the receptionist to the patient's location at the registration desk. You'll link it to the Receptionist shared asset so that it will use the same receptionist that was acquired in the previous activity. |
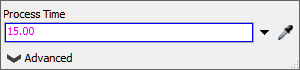
| Register Patient | This activity will represent the amount of time it takes to register the patient. You'll set that time to 15 seconds for now. |
| Release Receptionist | Once the registration process is complete, this activity will release the receptionist that was acquired earlier in the process flow. The receptionist will then be free to work on other tasks or to be acquired by other patients. |
| Release Registration | This activity will release the Registration1 location so that it is free for other patients to acquire. |
To edit these properties:
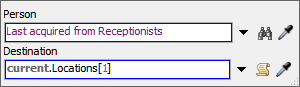
- In the PatientArrivals process flow, click the
Create Person: Patient activity to select it. In Quick
Properties next to the Destination box, click the
Sampler button
to enter sampling mode.
- In the 3D model, click Entrance1 to open a menu. Select Entrance1 to sample it.
- Confirm that the People Flow box indicates that it is
linked to the
PatientTrackprocess flow. - Click the PatientTrack tab to make this process flow active.
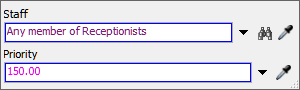
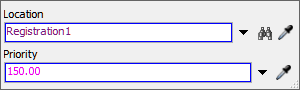
- Click the Receptionists shared asset shared to select it. In Quick Properties, click the arrow next to the Staff box to open a menu. Point to Staff Groups, then select Receptionists.
- Click the Registration shared asset to select it. In
Quick Properties next to the Location box, click the
Sampler button
to enter sampling mode.
- In the 3D model, click Registration1 to sample it.
- Click the Walk to Patient activity to select it. In Quick Properties next to the Person box, click the Sampler button to enter sampling mode.
- Click the Receptionists shared asset to sample it.
- Click the Register Patient activity to select it. In
Quick Properties in the Process Time box, delete the
current text and type
15.00.
Consider saving your simulation model at this point.
Step 6 Test Your Model
In this step, you'll run your simulation model. In general, it's a good idea to to regularly test your model logic after you've built a small section of it. When you run the model, you'll notice errors or things that didn't work as expected. See Running a Simulation Model for more information.
To run the model, press the Reset button on the simulation control bar, which is below the main toolbar. (Pressing Reset clears the simulation model and returns it to its starting values.) Press Play to start the simulation and Stop to pause it.

As you watch the 3D model, the patient arrives through the door, walks to the waiting line and then to the registration desk. The receptionist then walks to the patient at the registration desk. After a short delay, the receptionist completes the registration and walks away from the patient:
Notice that the actions in the 3D model correlate with what is happening in the PatientTrack process flow. As the tokens move through the process flow, they correlate with the patient's actions in the 3D model. The process flow activities take care of all the animations for the patient as it interacts with different types of locations.
Be aware that the patient will remain at the registration desk for now because it has not yet been instructed to move to another location. You'll add those instructions in the next tutorial task.
Conclusion
At this point, you've created the first phase of your emergency room simulation model. You've added a few people-based 3D objects to your model and you've seen how to build the model's logic using the process flow tool and the people activity sets. In the next tutorial, you'll continue building out the rest of the patient track for the emergency room and you'll learn how to set up custom logic in your process flow. Continue on to Tutorial Task 1.2 - Create Custom Logic.