The Polygon Tank Panel
The Polygon Tank panel is shown for Polygon Tanks specifically, excluding tanks of other shapes, mixers or other content holding objects. Properties that apply to all content holding objects are shown in the Flow Content panel and properties that apply to all tank shapes are shown in the Flow Tank panel.
The following properties are on the Polygon Tank panel:
Fill Sideways
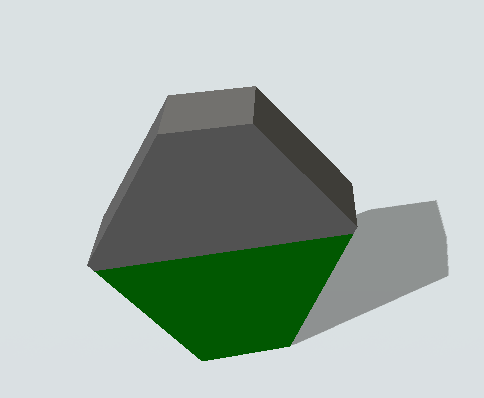
By default, the polygon defined by the vertices table (see below) defines the ground area of the tank. The content of the tank will spread over this area and then start filling upwards.
When the Fill Sideways option is checked, the content of the tank will be drawn at 90° relative to this geometry. In the image below, the polygon tank at the top is filled bottom-to-top (default). The tank at the bottom is filled left-to-right (Fill Sideways enabled).

This allows you to rotate the tank on its side and use the polygon area along the z-axis. For example, giving the bottom tank in the screenshot above a rotation of 90° around the y-axis, the polygon base area becomes the side of the tank, as shown below.
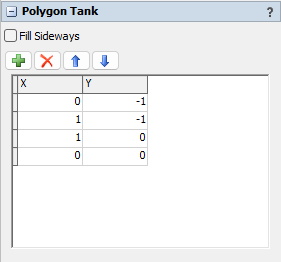
Vertices table
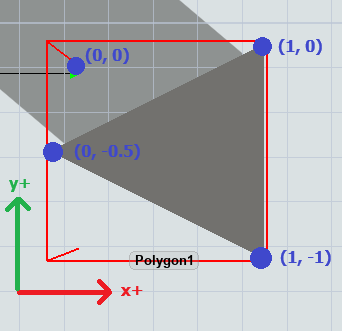
The vertices in this table define the surface area of the polygon tank. The coordinates are defined in the local coordinate system of the object, where the bounding box is defined by the top left coordinates (x, y) = (0, 0) and bottom right (x, y) = (1, –1) as shown int he image below. Note that FloWorks does not automatically order the coordinates to create a convex shape, you need to order them so that they correctly define the desired polygon when drawn in clockwise or counterclockwise order.
The buttons at the top allow you to:
-
 Add a new vertex to the list of vertices. The currently highlighted vertex
will be duplicated, so to insert a vertex at a specific location in the list select
the vertex in the table and then press the Add button.
Add a new vertex to the list of vertices. The currently highlighted vertex
will be duplicated, so to insert a vertex at a specific location in the list select
the vertex in the table and then press the Add button.
-
 Remove the selected vertex from the list. All vertices below it will shift up.
-
 /
/  Move the selected vertex up and down in the list. Note again, that FloWorks draws the polygon with the specified vertex order.