Connecting to an MQTT Broker
Overview
Emulation module makes FlexSim able to connect to an MQTT Broker to publish and subscribe data.
Several steps are necessary to build a fully functional example:
- Install and configure an MQTT Broker.
- Run a MQTT publisher and subscriber.
- Prepare a FlexSim model and connect it to the MQTT broker.
- Test the model with the MQTT broker connection.
Step 1 Install and configure a MQTT Broker.
In the market are available many MQTT Brokers either commercial product or open project.
For this tutorial as MQTT Broker will be used the popular mosquitto, available from Eclipse Mosquitto web site.
Eclipse Mosquitto is an open source (EPL/EDL licensed) message broker that implements the MQTT protocol versions 5.0, 3.1.1 and 3.1
When installed mosquitto broker can be used as a stand-alone application or a windows server.For this tutorial mosquitto will be used as stand-alone application.
The stand alone is a command line application that can be found into the in the mosquitto's installation folder, usually C:\ProgramFiles\mosquitto.
Inside this folder are availbles:
- mosquitto.exe - the MQTT broker.
- mosquitto_pub.exe - a MQTT publisher.
- mosquitto_sub.exe - a MQTT subscriber.
Step 2 Run MQTT broker, test subscriber and publisher
As known, MQTT is a is a lightweight, publish-subscribe, machine to machine network protocol for message queue/message queuing service.
It must run over a transport protocol like TCP/IP.
The MQTT protocol defines two types of network entities: a message broker and a number of clients. An MQTT broker is a server that receives all messages from the clients and then routes the messages to the appropriate destination clients.
Clients that send messages are called publisher, meanwhile clients that wait for messages are called subscriber.
Open 3 windows consoles and change directory to the mosquitto installation folder for all of them.
Then run these 3 commands:
- Console 1 - broker - run mosquitto.exe -p 12345
-v
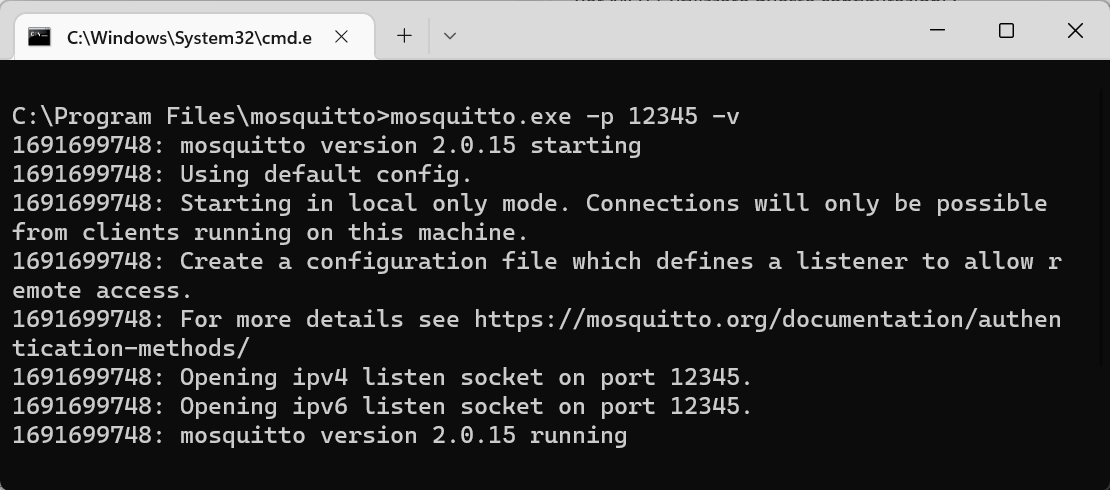
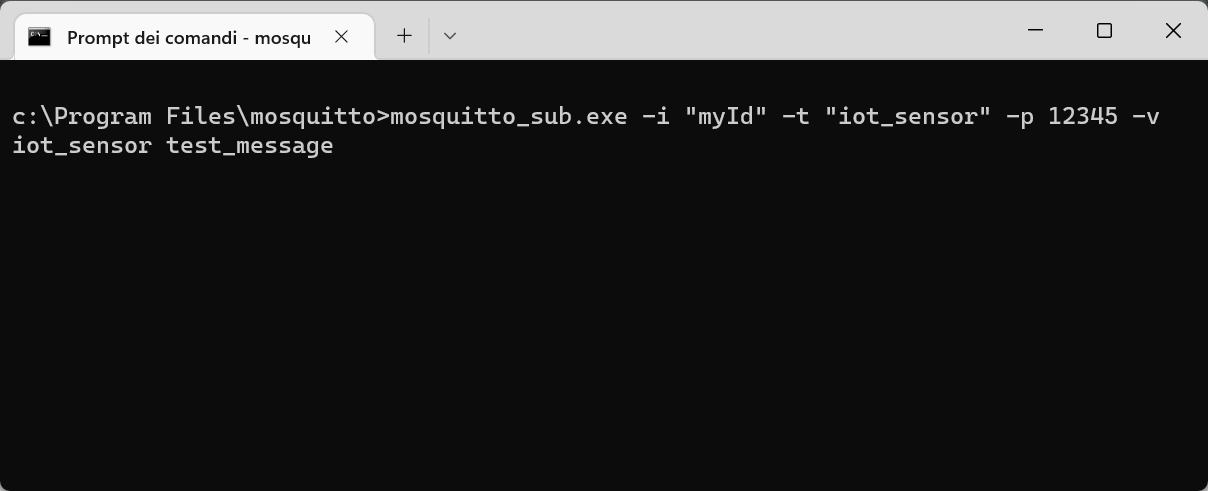
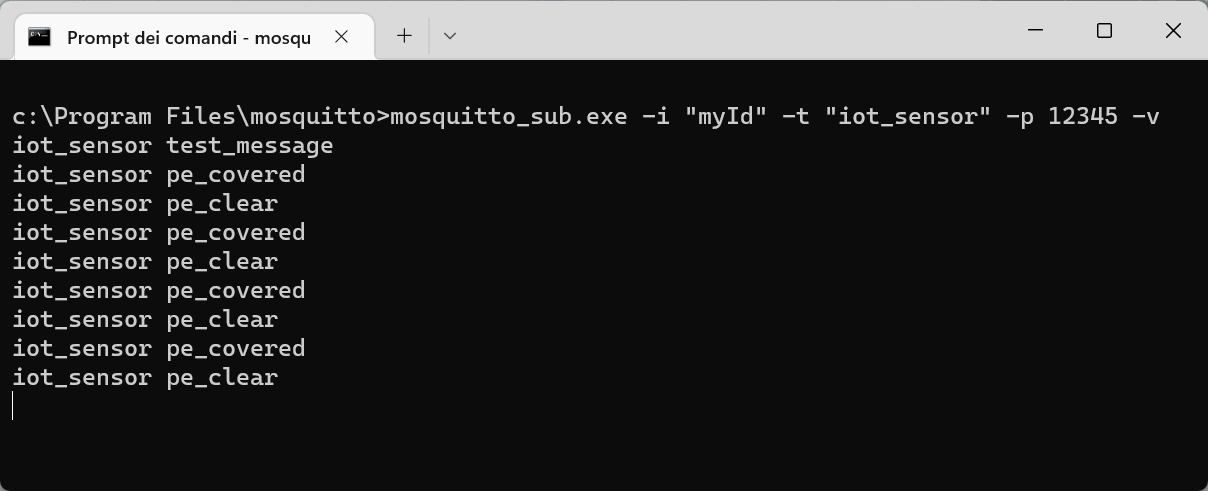
This command run the mosquitto broken on TCP port 12345 in a verbose mode. - Console 2 - client subscriber - run mosquitto_sub.exe -i "myId" -t "iot_sensor"
-p 12345 -v
 This
command run the a mosquitto client with ID equal to 'myID'
that subscribe the topic 'iot_sensor' connecting the broker on the
localhost at port 12345 in a verbose mode.
This
command run the a mosquitto client with ID equal to 'myID'
that subscribe the topic 'iot_sensor' connecting the broker on the
localhost at port 12345 in a verbose mode. - Console 3 - client publisher - run mosquitto_pub.exe
-i "MyID2" -t "iot_sensor" -p 12345 -m "test_message"
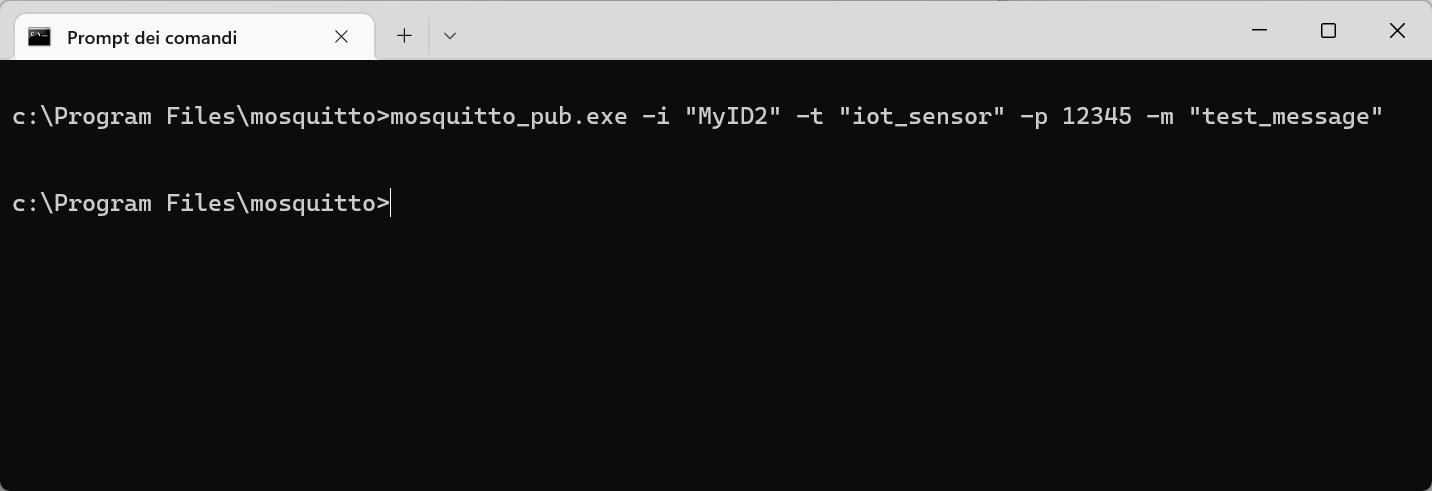
This command run a client with ID equal to 'MyID2' that publish the message 'test_message' on the topic 'iot_sensor'.
After publication the client terminate and the subscribe running on console 2 receive the message:
Step 3 Prepare a FlexSim model
Prepare a FlexSim model to connect to the device.The model that we will use for this tutorial represents a really simple production system where a box item is packaged into a tote:
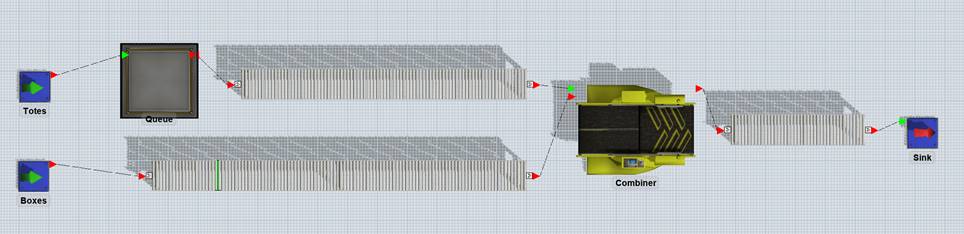
Build a model with two sources (one for boxes and one for totes), a queue for totes and a combiner that will join boxes and totes.>
Connect the elements with conveyors, as represented in the figure above and set conveyor speed to 0.5 m/s.>
Rename the sources to “Boxes” and “Totes”: Totes source is configured to produce 100 totes at time 0, Boxes source is configured to produce a box every 10s.>
A photo-eye is placed on boxes conveyor, approximately 1 meter before totes conveyor start.
Combiner puts a box into a tote in 5 seconds.
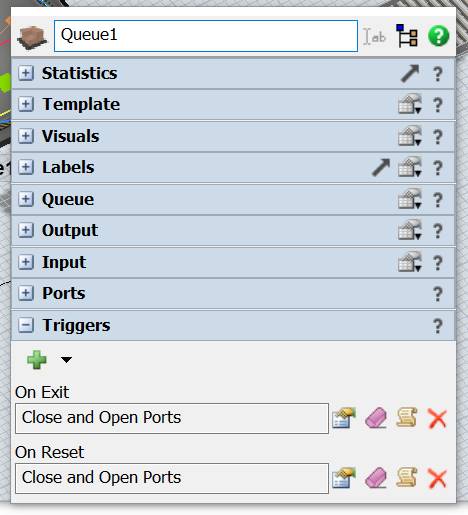
At last, configure the queue to close its outputs at reset and every time that a tote exits from it.
Step 4 Test the model with MQTT connection
At first, we will create an MQTT connection to connect our model to the broker
The MQTT broker is a communication gateway then it is not a tool to
create control logic as PLC do.
This mean that "test the model with MQTT" its only related to the
communication channel, the control logic for this tutorial, must be
provided, by hand, by the user.
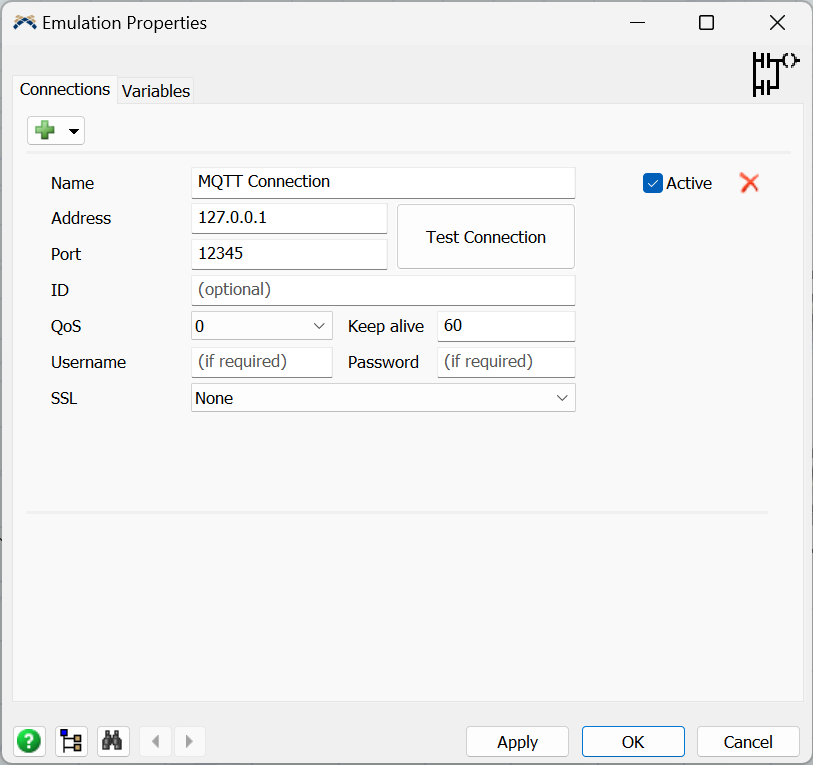
In the "Address" and "Port" enter the values of the MQTT broker: for this tutorial are 127.0.0.1 and 12345.
Leave the other options to their default values.
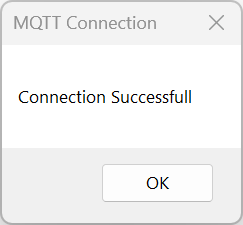
Press "Test Connection" button: if everything is all right you should following message.
Check the Active button and apply the window.
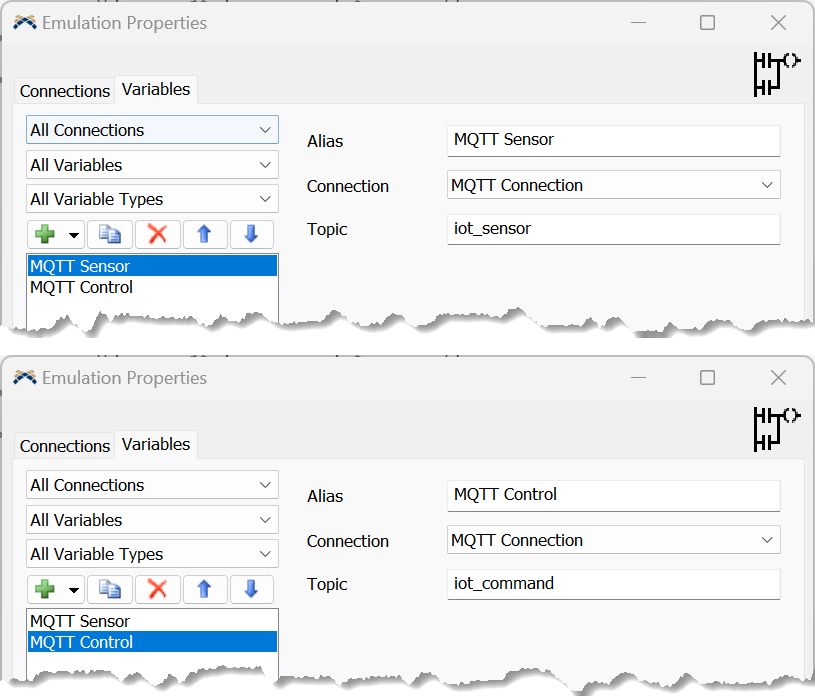
Click on the "Variables" tab and from the (+) sign add a MQTT Sensor (publisher) and a MQTT Control (subscriber)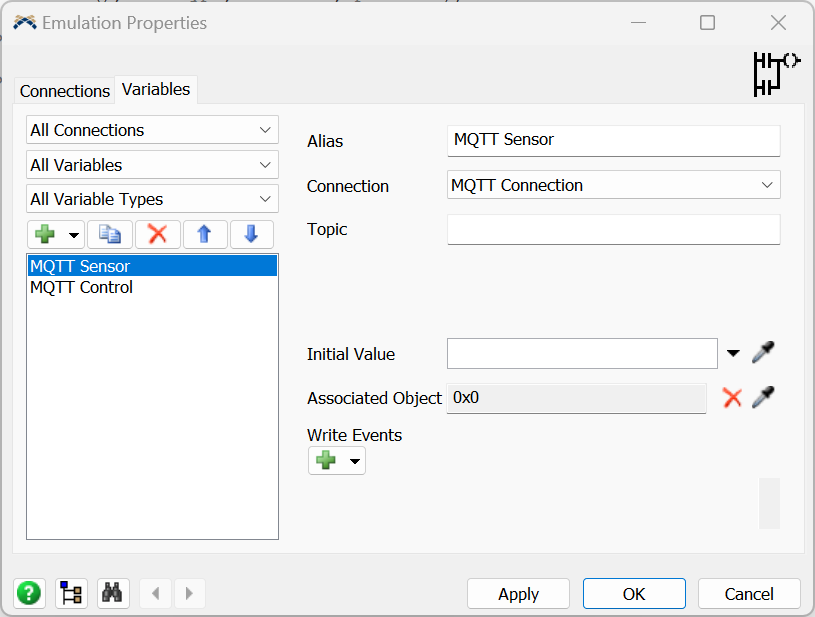
Then for the MQTT Sensor set the Topic field to iot_sensor.
For the MQTT Control set the Topic field to iot_command:
At this point the configuration is done and FlexSim is able to publish
messages and receive messages.
It’s necessary to define how FlexSim models drives PLC input and how
PLC’s output is managed by FlexSim as well.
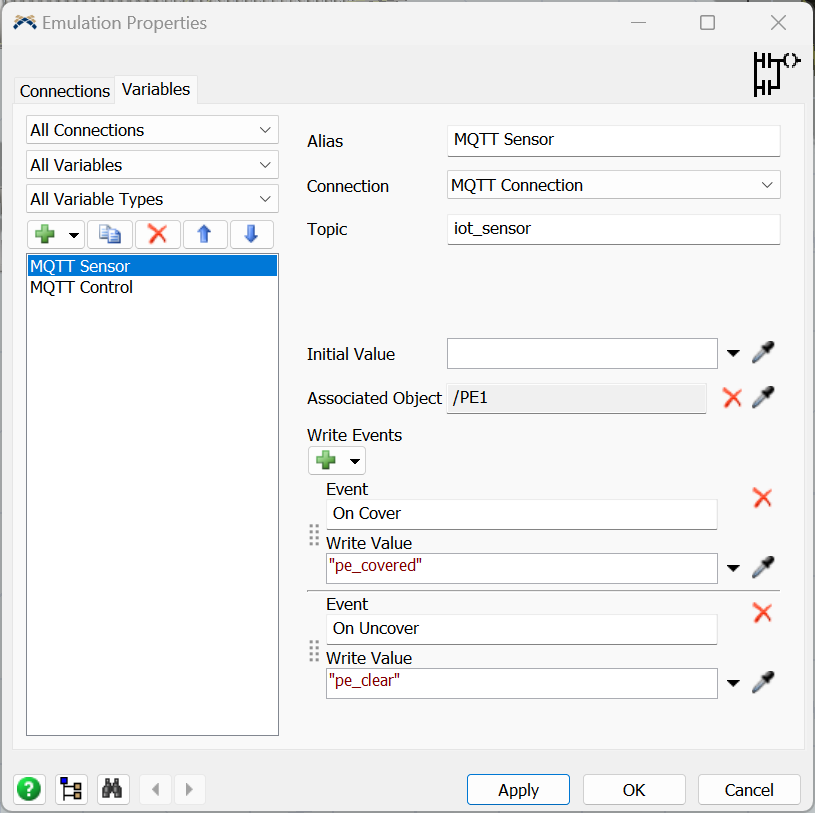
In our model we want that – when a box covers the photoeye – the "input" tag is set to 1 and when the "output" tag is set to 1 a tote is released from its queue.
The "input" tag should be reset to 0 when the photoeye is clear.
To do this, select the "MQTT Sensor", associate it to the photoeye and configure it to send a message "pe_covered" and "pe_clear" when the photoeye is covered and cleared.
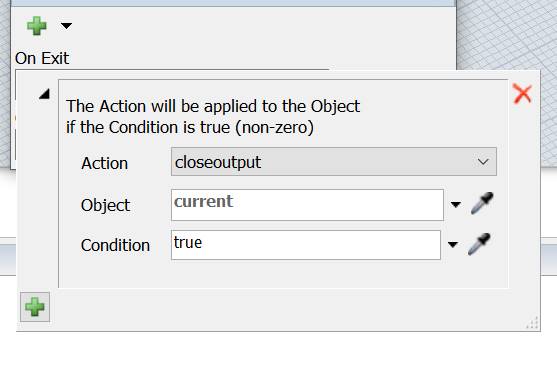
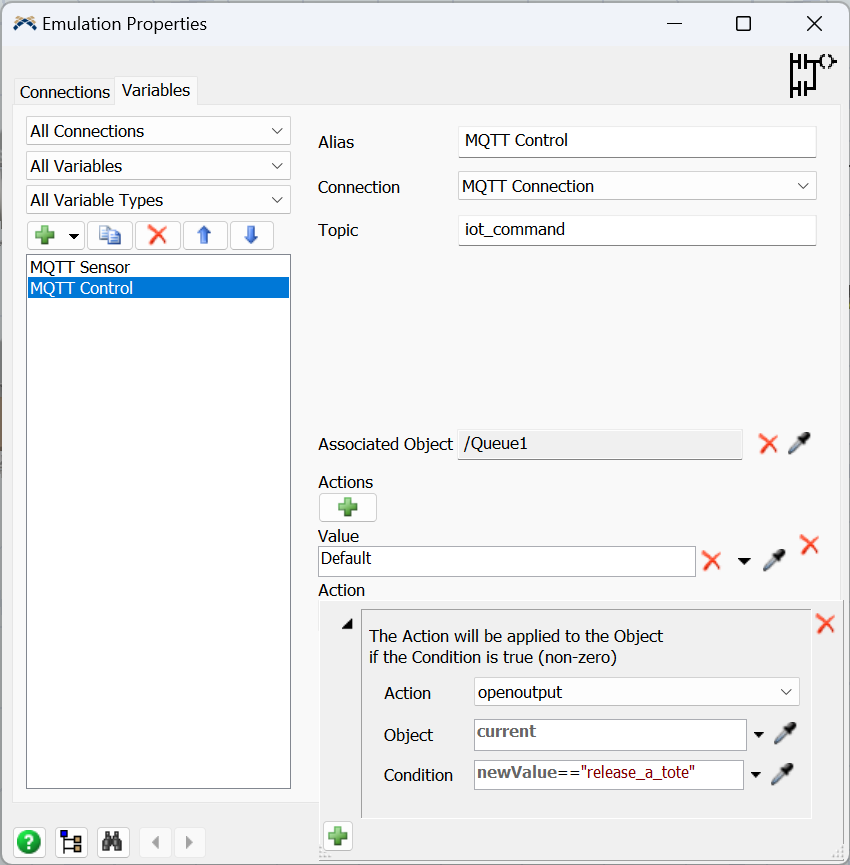
Now select the "MQTT Control" and associate it to the Tote queue.
Then configure a new action and set the queue open its output when a message is published on topic "iot_command":
Now the model is fully configured and can be reset and run.
Remember to set the FlexSim’s run speed to 1.
Remember that the control logic must be supplied manually because MQTT is only a communication gateway.
So to test the model we need to publish the message "release_a_tote" on topic "iot_command" when the message "pe_covered" is published on topic "iot_sensor".
Running the model the message "pe_covered" and "pe_uncovered" will be
send each time a Box flowitem cover and clear the photoeye:
To manually publish the message "release_a_tote" to release a Tote
flowitem from the Queue run the following command:
mosquitto_pub.exe -i "MyID2" -t "iot_command" -p 12345 -m "release_a_tote"

New value will be written and a flowitem will be relased from the
Queue in the FlexSim model.
This conclude this tutorial that shown how to create and connect a MQTT
Broker from Flexsim and how to use to control (manually) a running
model.