Task 1. Creating a FlexSim Model
In this tutorial task, you will create a basic FlexSim model of an imaginary pharmaceutical packaging line. The process consists of three stages:
- Filling, which operates four 8-hour shifts per week nonstop
- Quarantine, an area where the product must be kept for at least 24 hours
- Packaging, the final stage after which the product is sent to the warehouse. Packaging operates five 8-hour shifts per week with lunch breaks

The Filling and Packaging stages are decoupled from each other, allowing flexibility in scheduling working shifts. This provides an opportunity to utilize cheaper and more environmentally friendly solar power in the process.
For more information on creating models and using FlexSim objects, please refer to other FlexSim Tutorials.
Step 1 Add and Configure Objects in the 3D Model
In this step, you will model the production process using a Processor object for Filling and Packaging, and a FloorStorage object for Quarantine.
Start with a new model, and add the following objects to the 3D view of the model:
- Source. Rename it to "Production".
- Processor. Rename it to "Filling".
- FloorStorage (Warehousing library). Rename it to "Quarantine".
- Processor. Rename it to "Packaging".
- Sink. Rename it to "Warehouse".
Connect all objects using connection mode (A). By the end of this task, your model will look approximately like this:
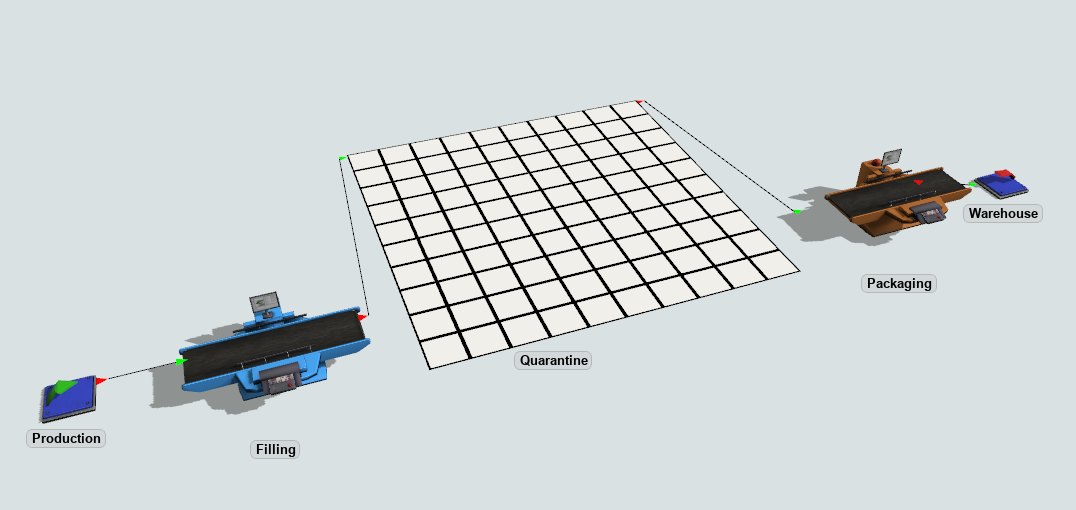
Configure the objects as follows:
| Object Name (Class) | Configuration |
|---|---|
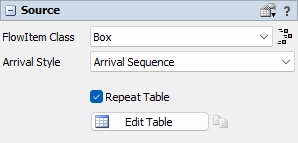
| Production (Source) |
Arrival Style: Arrival Sequence
|
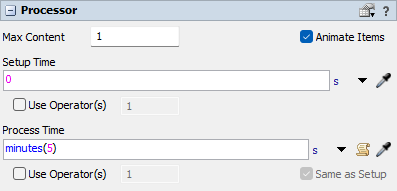
| Filling (Processor) |
Process Time:
|
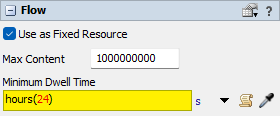
| Quarantine (FloorStorage) |
Object Height: 2 m
Dwell Time:
|
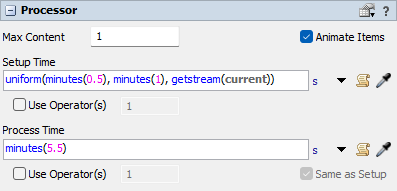
| Packaging (Processor) |
Setup Time: Process Time:
|
Step 2 Create Work Schedules
In this step, you will configure when exactly Filling and Packaging will be operating. Create two Time Table tools and configure them as follows:
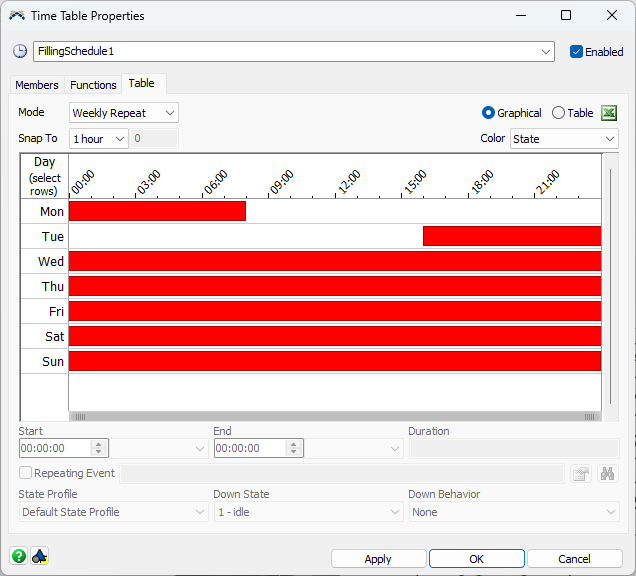
FillingSchedule1 should have 4 × 8 = 32 consecutive hours working, starting at 8:00 on Monday. Set Mode to Weekly Repeat. For the rest of the time, choose Down State 12 scheduled down. Add Filling as its member in the Members tab.
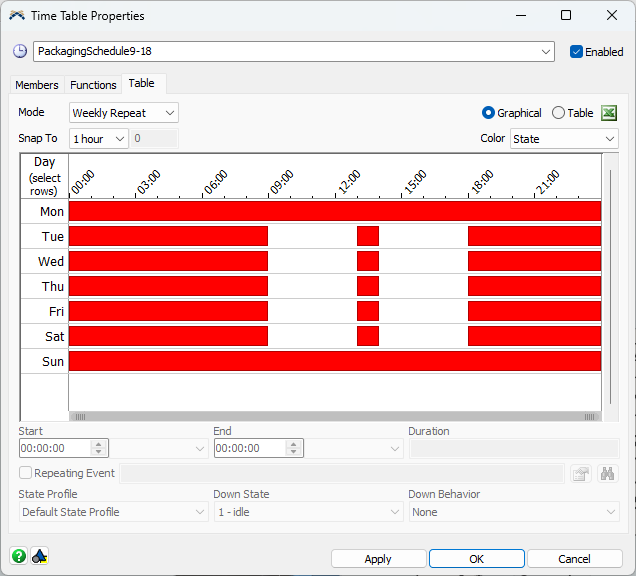
PackagingSchedule9-18 should have 5 × 8 = 40 working hours, starting at 9:00 on Tuesday, 8 hours per day, with a 1-hour lunch break at 13:00. Set Mode to Weekly Repeat. For the rest of the time, choose Down State 12 scheduled down. Add Packaging as its member in the Members tab.
If you run the model for 6 days (stop time at 518400 seconds), the Quarantine area should be empty by the end of the period, and the input statistics of the Sink should be around 383 items.
As both Time Tables use Weekly Repeat, set simulation Start Time to be on Monday.
Conclusion
In the next tutorial task, you will learn how you can define power consumption of Filling and Packaging objects. Continue on to Tutorial Task 2. Defining Energy Use Policies or return back to the Tutorial Overview.
