Getting Started with Bonsai
Bonsai Key Concepts
Bonsai uses some unique vocabulary. Understanding these terms will help you understand the steps required to use Bonsai:
- Brain - a Bonsai brain is an Agent. When you train in Bonsai, the brain will learn how to meet the goals you set.
- Simulator - a Bonsai simulator is the environment the brain uses to learn. The brain will get observations from the simulator, and send actions to the simulator in response.
- Workspace - a Bonsai workspace contains all the brains and simulators you create. The workspace is where you'll create and define each brain. You can also connect a brain to a simulator, and then train it. In the workspace, you'll be able to monitor the brain's progress while it trains. You'll also be able to export the brain, so it can be deployed as a web service.
- Iteration - During training, a Bonsai brain will take an action. The simulator will run, and return an observation. Bonsai will take another action, moving the simulation along, and yielding another observation. Each action/observation cycle is an iteration. Training good agents in complicated systems can require millions of training iterations.
- Episode - During training, Bonsai will reset the simulator and perform many iterations. Bonsai has a built-in EpisodeIterationLimit. Bonsai will continue the episode until the iteration limit is reached, or until certain kinds of goals are satisfied. Then it will reset the simulation, and run another episode. Episodes continue until training is complete.
Brains
A Bonsai brain is defined by a special text file called an Inkling file. In the Inkling file, you can define the following aspects of the brain:
- What observations are visible to the brain.
- What actions are available to the brain.
- What you expect the brain to learn.
A full description of Inkling code is beyond the scope of this walkthrough. More information can be found in the Bonsai Documentation.
The FlexSim AI repository contains Bonsai examples. Each example includes an Inkling file with a .ink extension. Each example also includes a FlexSim model. The model and the Inkling file are configured to work together in the following ways:
- The model uses Reinforcement learning tool.
- The Observation Space and Observation Space are both set to use Bonsai.
- The model sets the observation space parameters before requesting a decision.
- The model uses the action space parameters in its logic.
- The Reward Function must return an array where the second element (the "done" flag) is always zero. This flag may be used by Bonsai in the future.
- The Inkling file aligns with the model.
- The Inkling file has a type that matches the observation space. The fields of that type have the exact same names and types as the parameters in the observation space.
- The Inkling file has a type that matches the action space. The fields of that type have the exact same names and types as the parameters in the action space.
For example, the ChangeoverTimes example includes the parameters LastItemType, Time, and Throughput in the Observation space. It includes the parameter ItemType in the Action space. The Inkling file for that example includes two types: the ObservableState type, which matches the observation space, and the SimAction type, which matches the action space:
# State received from the simulator after each iteration
type ObservableState {
    LastItemType: number,
    Time: number,
    Throughput: number,
}

# Action provided as output by policy and sent as input to the simulator
type SimAction {
    ItemType: number<1 .. 5 step 1>
}
The names "ObservableState" and "SimAction" are arbitrary. The observation and action types can have any valid Bonsai name. However, the names of each field in each type must match the parameter names.
Managed and Unmanaged Simulators
Most of this walthrough deals with creating a simulator that encapsulates a FlexSim model. There are two kinds of simulators in Bonsai: unmanaged and managed. An unmanaged simulator is the easiest to create and use. The Bonsai brain always runs in the cloud, but an unmanaged simulator runs on your local computer. Consider the following diagram:
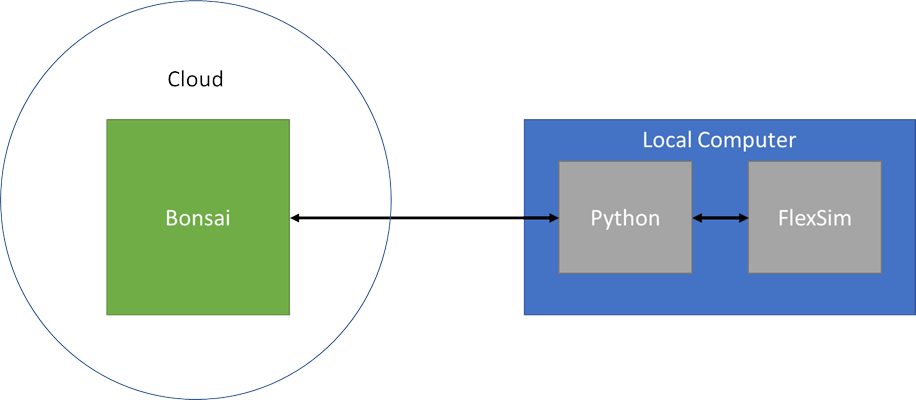
You'll notice that Python manages communication between the FlexSim model and the Bonsai brain. This is true for managed simulators as well.
A managed simulator is more complicated to create. To make a managed simulator, you'll need to create a Docker container that runs your FlexSim model. During training, Bonsai will make multiple copies of that container, so that it can train using many models simultaneously. This can make it much faster to train the brain. The following diagram illustrates this case:
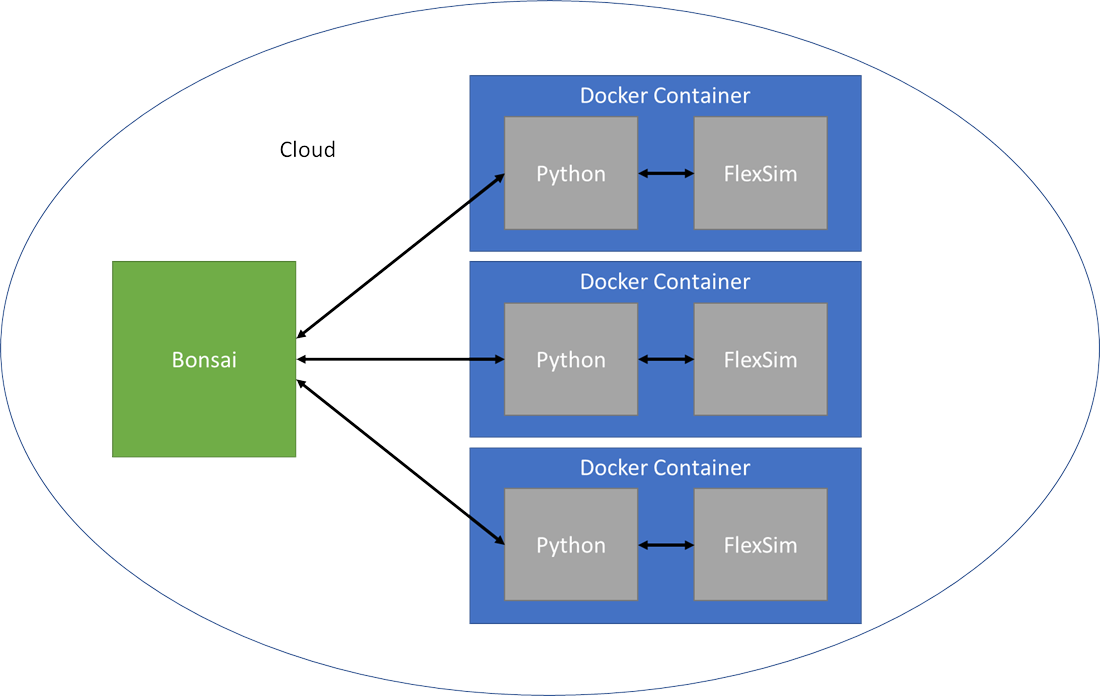
Bonsai will dynamically choose how many instances of the container to run, depending on the algorithm it chooses for learning.
Acquiring Services, Files, and Software
This section describes how to acquire all the files and software you need, in addition to FlexSim, in order to use Bonsai. Even if you have completed this section in the past, use it as a checklist to ensure you're able to proceed.
- Install Visual Studio Code. VS Code makes it easy to edit and run Python scripts. There are other methods to manage and run Python scripts, but this walkthrough uses Visual Studio Code. You can download the latest version from this page: Visual Studio Code. Be sure to download the version for Windows.
- Create a Bonsai workspace. Follow the instructions for creating a Bonsai workspace on this page: Microsoft account setup for Bonsai.
- Get important values from your Workspace Details. Once you've created
a Bonsai workspace, you can view
your workspace details.
From that interface, you'll be able to see the following values:
- Workspace Name
- Workspace ID
- Subscription
- Workspace ACR Path
- Access Key - this value must be generated. When you generate the key, be sure to copy it into a text editor; you'll only be able to see the key once. However, if you lose it, you'll be able to generate another one.
- Install Python 3. You can download the latest version from this page: Python Releases for Windows.
- Install the Bonsai Libraries for Python. Follow the instructions on this page to install the necessary libraries: microsoft-bonsai-api.
- Download or clone the FlexSimAI repository. You can download a zip file for the latest version of FlexSim at this link: FlexSimAI-main.zip You can also visit the repository page to clone the repository: FlexSimAI. Be sure that you clone or download the files from the branch corresponding to your version of FlexSim.
- Install Docker Desktop. You can download the latest version from this page: Docker Desktop. Be sure to select the version for Windows. Even if you don't create a managed simulator, you'll need Docker to use the trained brain.
The following steps are only required if you plan to create a managed simulator:
- Download the .msi installer for FlexSim The latest version can be found on FlexSim's website: FlexSim Downloads. Be sure the version you download matches the version used to create the model.
- Install the Azure CLI. You can download the latest version from this page: Install Azure CLI on Windows
- Gain access to a Public License Server.
A public license server holds a set of runtime licenses that
a FlexSim can access from within a container on the cloud. Contact your local
distributor to obtain the licenses and host them on a public license
server. To complete this walkthrough, you'll need two pieces of information:
- The public IP address of the license server.
- A secret key that allows access to those licenses.
Creating a Brain
To create a brain in Bonsai, follow these steps:
- Open the Bonsai Interface in your browser, and go to your workspace.
- On the left, find the Create Brain button:
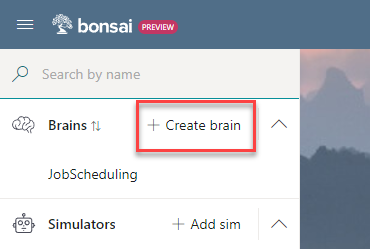
- Click that button, and choose Empty Brain:

- Once the brain as been created, go to the Teach tab for that brain. Enter your Inkling code in the code editor. If you are using one of the samples, you can open the .ink file in a text editor to copy the code and paste it into the editor.
Creating a Unmanaged Simulator
To create an Unmanaged Simulator, follow these steps:
- If you are using Visual Studio Code, make sure it is closed.
- In Windows, open the Environment Variables window.
- In the User Variables section, click the New button.
- Set the Variable name to SIM_WORKSPACE.
- Set the Variable value to your Workspace ID.
- Click OK to add the new variable.
- Click the New button again.
- Set the Variable name to SIM_ACCESS_KEY.
- Set the Variable value to a valid access key.
- Click OK to add the new variable.
- Click OK to close the Environment Variables window.
- Start Visual Studio Code
- In the main menu, select File, then choose Open Folder...
- Navigate to the directory containing the FlexSimAI repository. Select the repository directory, and click the Open button. If VS Code asks if you trust this directory, choose yes.
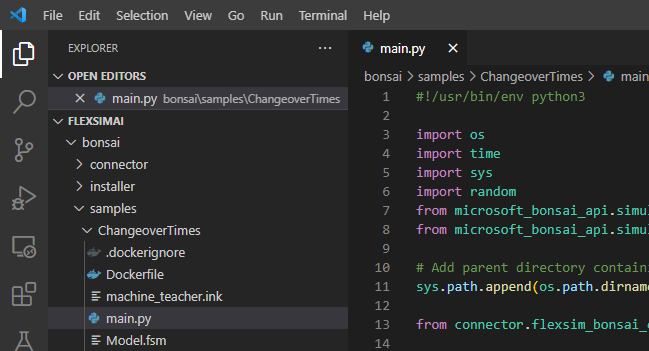
- In the Explorer in Visual Studio code, navigate to one of
the Bonsai samples, and open the file called main.py. For example,
if you are working with the ChangeoverTimes example, you would open
bonsai\samples\ChangeoverTimes\main.py:
- Modify main.py to reference the correct path to the version of FlexSim
you are using, as well as the correct path to the model you are using.
It may be helpful to comment out the original paths (using a # symbol at the beginning
of the line) if you plan to create a managed simulator later:
- In the main menu, select Run, and then choose Run Without Debugging. If you haven't selected a Python interpreter, you'll need to do that the first time you run. For more information, see Work with Python Interpreters
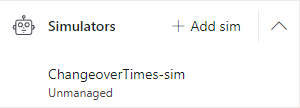
When the script runs, it launches FlexSim, registers as a simulator with Bonsai, and then waits for Bonsai to give it instructions. In the terminal running your script, you'll see an "Idle" message appear at regular intervales. You'll also see an unmanaged simulator appear in your list of simulators in the Bonsai UI:
At this point, you should have a brain, as well as a simulator. With these two components, you are ready to train the brain. If you don't plan to create a managed simulator, then you are ready for the next topic: Training With Bonsai. Even if plan to create a managed simulator, this is a good point to train long enough to verify that your model works with Bonsai.
Creating a Managed Simulator
Creating a managed simulator has many steps, so this section is broken into three phases:
- Configuring the Container Context
- Creating a Container for Local Use
- Creating a Container for Remote Use
The core concept of this section is to build a Docker container that runs your model as a simulator for Bonsai. A detailed description of Docker containers is outside the scope of this walkthrough. More information can be found on the Docker website.
Once you have created a container, you'll be able to upload it to the Azure cloud and then use it to create a managed simulator.
Step 1: Configuring the Container Context
To configure the container context, follow these steps:
- Copy the .msi installer for FlexSim into the
/bonsai/installerdirectory, inside the FlexSimAI directory. - Edit
installer/flexsim_server.licso that the IP address on the first line points to your public license server. - In the sample directory, edit the file called
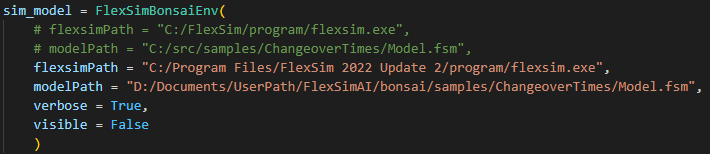
main.py. For example, if you are walking through the ChangeoverTimes example, you'd editbonsai/samples/ChangeoverTimes/main.py:- Verify that
flexsimPathis set to"C:/FlexSim/program/flexsim.exe" - Verify that
modelPathis set to the model in the sample directory. For the ChangeoverTimes sample, it would be set to"C:/src/samples/ChangeoverTimes/Model.fsm"If you are using this walkthrough for your own project, it would be set to"C:/src/samples/MyProject/MyModel.fsm" - Verify that
visibleis set toFalse. - Verify that
verboseis set toTrue.
sim_model = FlexSimBonsaiEnv( flexsimPath = "C:/FlexSim/program/flexsim.exe", modelPath = "C:/src/samples/ChangeoverTimes/Model.fsm", verbose = True, visible = False ) - Verify that
- If you are working with your own project, verify that the
registration_infovariable is initialized with a meaningful name:registration_info = SimulatorInterface( name="SampleName-sim", ... - In the sample directory, edit the file called
dockerfile. For example, if you are walking through the ChangeoverTimes example, you'd editbonsai/samples/ChangeoverTimes/dockerfile:- Set the LM_PROJECT environment variable. The value of this variable
is the secret key that allows access to your public license server.
ENV LM_PROJECT="SECRET_VALUE" - Set the SIM_WORKSPACE environment variable. The value of this variable
is your workspace ID, which you can access from
your workspace details.
If the line begins with a '#' symbol, delete that symbol.
ENV SIM_WORKSPACE="aaaaaaaa-1111-bbbb-2222-ccccddddeeee" - Set the SIM_ACCESS_KEY environment variable. The value of this variable
is your simulator's access key, which you can create from
your workspace details.
If the line begins with a '#' symbol, delete that symbol.
ENV SIM_ACCESS_KEY="A1AZBBBB11112...ZZZyyyyXXXX00001z2y" - Verify that the installer name in the
RUNcommand matches the name in theinstallerdirectory. If your installer is namedFlexSim_22.2.0.msi, then the command should read as follows:
Note that both file paths in theRUN msiexec /i installer\FlexSim_22.2.0.msi INSTALLDIR=C:\FlexSim /passive /norestartmsiexeccommand must use back slashes (\). All other slashes in the file are forward slashes (/).
- Set the LM_PROJECT environment variable. The value of this variable
is the secret key that allows access to your public license server.
- If you are following this walkthrough for your own project, make the following edits to the
dockerfile. If you are using one of the provided samples, you can skip this step:- Verify that the
COPYcommand that copies the sample directory is correct.
The first path is relative to theCOPY ./samples/SampleDirectory ./samples/SampleDirectorybonsaidirectory on your computer. The second path is relative to the root directory in the container. - Verify that the path to
main.pyreferences the correct sample directory:CMD ["python", "-u", "samples/SampleDirectory/main.py"]
- Verify that the
Step 2: Creating a Container for Local Use
At this point, you are ready to create a container. However, before trying to use your container as a managed simulator, we recommend that you run the container locally. Completing this step is the easiest way to verify that the container can access the license server, and that the container can act as a bonsai simulator.
To create a container, follow these steps:
- Ensure that Docker Desktop is running. If it is, you'll be able to see the docker icon in your system tray. If you can't find that icon, start the Docker Desktop application.
- Ensure that Docker Desktop is in Windows mode. To check, Open the
Docker Desktop menu by right-clicking the docker icon in your system tray.
If the menu contains the option to Switch to Windows containers..., choose that option, and confirm that you want to restart Docker. Restarting can take several moments. If the menu contains an option to switch to Linux containers, then you are already in Windows mode, and you don't need to do anything. - Open a command prompt window. If you are using VS Code, you can open a new Terminal.
- Use the
cdcommand to change the working directory to the sample directory. For example:cd /d "C:\Documents\FlexSimAI\bonsai\samples\ChangeoverTimes" - Use the folling
dockercommand to build the container. Replacesample-namewith a name similar to the sample model you are working with:
Note that docker may need to download several gigabytes of data to complete this step. It will cache what it can for future calls todocker build -t sample-name-container:latest -f Dockerfile ../..docker build.
At this point, we recommend that you run the docker container, and observe the console output. By doing so, you can verify that the container was built correctly, and that FlexSim can acquire a license from a public license server from within the container. To run the container, follow these steps:
- In Docker Desktop, you can now see the list of available images. Hover over the image
with the name
sample-name-container, and click the Run button: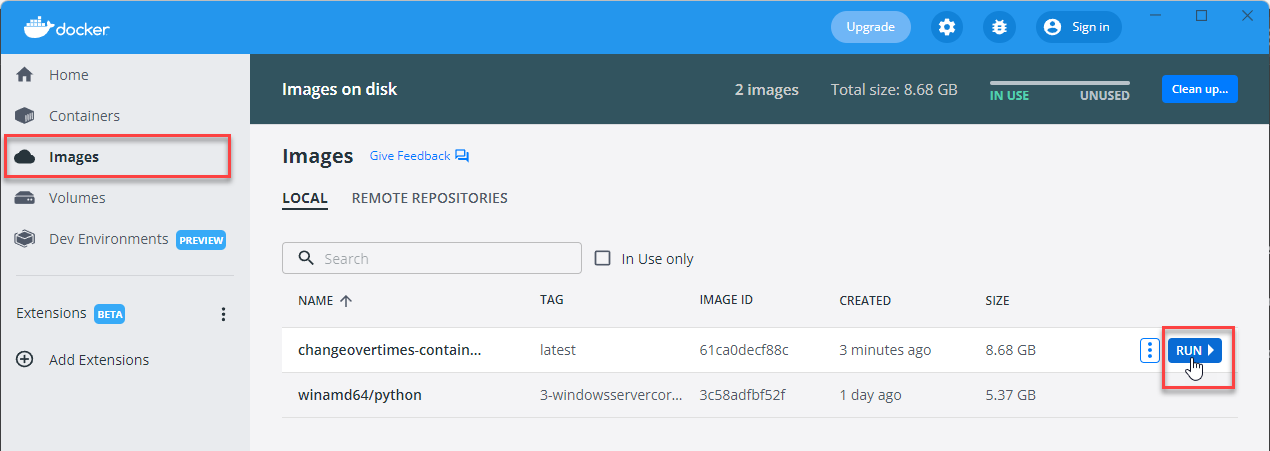
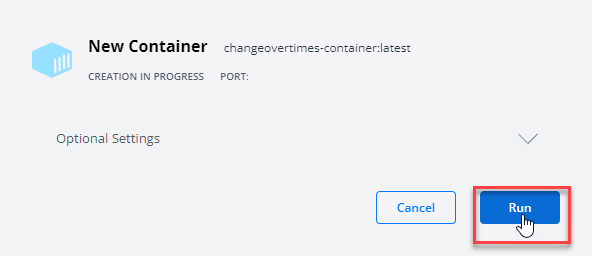
- In the popup that appears, click the Run button:
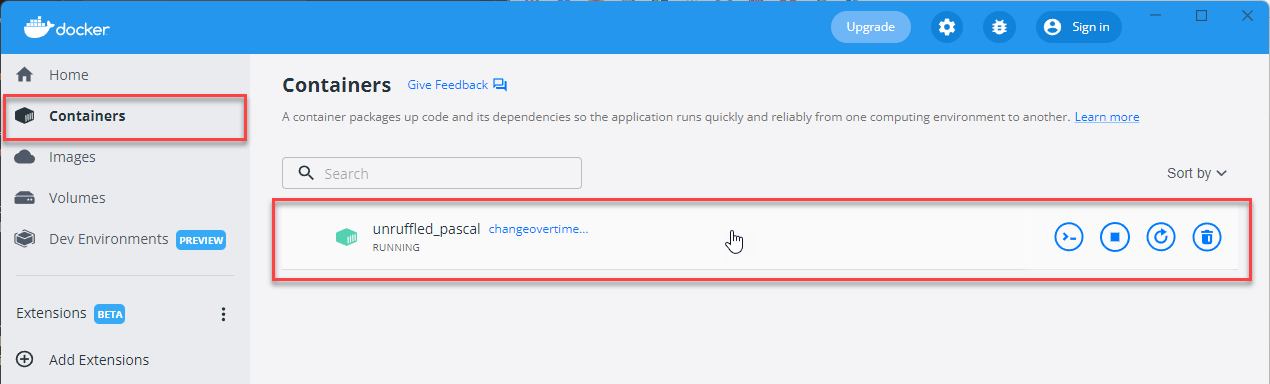
- The screen will automatically shift to a view of containers.
After a few moments, a new container should appear in the list of Containers/Apps.
The name of the container will be random.
Click on the image to view the console output for that image:
 Within a few moments, you should see the console report
FlexSim Environment Ready. An unmanaged simulator should appear in the Bonsai web interface.
With the docker container running, you can train the brain as a test. If training begins, and completes several episodes without an issue, you can be confident that you are ready to create a cloud container.
Step 3: Creating a Container for Remote Use
A container for remote use is very similar to the container
created in the last step. You'll make slight modifications
to dockerfile and
main.py, build a new container,
push it to Azure, then make a simulator that references the container
on the cloud. Follow these steps:
- Edit
dockerfileby commenting out the lines that set SIM_ACCESS_KEY and SIM_WORKSPACE. You can comment out a line by adding a # symbol as the first character of the line:# ENV SIM_ACCESS_KEY="abcd...12354" # ENV SIM_WORKSPACE="aaaabbbb-2020-cc44-eeff-1a2b3c4d5e6f" - Verify that in
main.py, bothvisibleandverboseare set toFalse:sim_model = FlexSimBonsaiEnv( flexsimPath = "C:/FlexSim/program/flexsim.exe", modelPath = "C:/src/samples/ChangeoverTimes/Model.fsm", verbose = False, visible = False ) - Open a command prompt window, or if you are using VS Code, you can open an integrated terminal.
- Use the
cdcommand to change the working directory to the sample directory. For example:cd /d "C:\Documents\FlexSimAI\bonsai\samples\ChangeoverTimes" - Run the following command, but replace
<sample_name>with a name that matches your project:docker build -t <sample_name>:latest -f Dockerfile ../.. - Run the following command, but replace both instances of
<sample_name>with the same value as the previous step. In addition, replace<workspace_acr_path>with your Workspace ACR Path:docker tag <sample_name>:latest <workspace_acr_path>/<sample_name>:latest - Run the following command, but replace
<subscription>with your Subscription, and replace<workspace_name>with your Worspace Name:az acr login --subscription <subscription> --name <workspace_name> - Run the following command, but replace
<workspace_acr_path>with your Workspace ACR Path, and replace<sample_name>with the same value as in the previous steps.docker push <workspace_acr_path>/<sample_name>:latest - In the Bonsai interface, click the + New Simulator button, and choose Other .
- Set the Azure Container Registry image path to the following, replacing
<workspace_acr_path>and<sample_name>with the appropriate values:<workspace_acr_path>/<sample_name>:latest - Set the Simulator package display name to something similar to your sample name.
- Set the Environment Configuration as follows:
- OS: Windows
- Max instance count: 25 - you can change this value later if needed.
- Cores: 1 - FlexSim can only take advantage of a single core.
- Memory: 1 GB - If your model uses more than 1 GB to run, you should increase this limit.
- Click the Create Simulator button to complete the simulator.
At this point, when you train, you'll be able to select a managed simulator for Bonsai to use. Bonsai will be able to create multiple instances of your container, and use them to train simultaneously. To learn more about training, see the next topic: Training with Bonsai.